The free Certificate addon of Quiz and Survey Master gives you the option of creating a certificate for users who pass your quizzes or tests; you can customize the title of your certificate, and its message, add a background, add a logo and even choose a different font by specifying the font family.
INSTALLATION/SETUP
Once you have purchased the addon, you will have access to download the addon. To install, simply upload the addon as a normal WordPress plugin. To do so, go to the Plugins page and click Add New. Then, click Upload. From there, upload the zip file that you downloaded when downloading the addon.
Once the addon has been uploaded, you should now have the plugin QSM – Certificate listed in your list of plugins. Activate that plugin. Once activated, the plugin will create a new tab in the Quizzes/Surveys list labeled Certificate.
SETTINGS/CONFIGURE
Before you can use the Certificate addon, we must first enter the license key.
Adding Your License Key

Enter your license key from your account into the “Addon License Key” field on the “Certificate” tab of the “Addon Settings”.
Once you have entered your license key, be sure to click “Save Changes” to save the page.
After adding the License Key, you can now use the “Certificate” tab when editing your quizzes or surveys.
There are going to be times when you would like the user to be given a certificate after taking a quiz. To start setting up your certificate, first edit your quiz. Now, navigate to the Certificate tab.
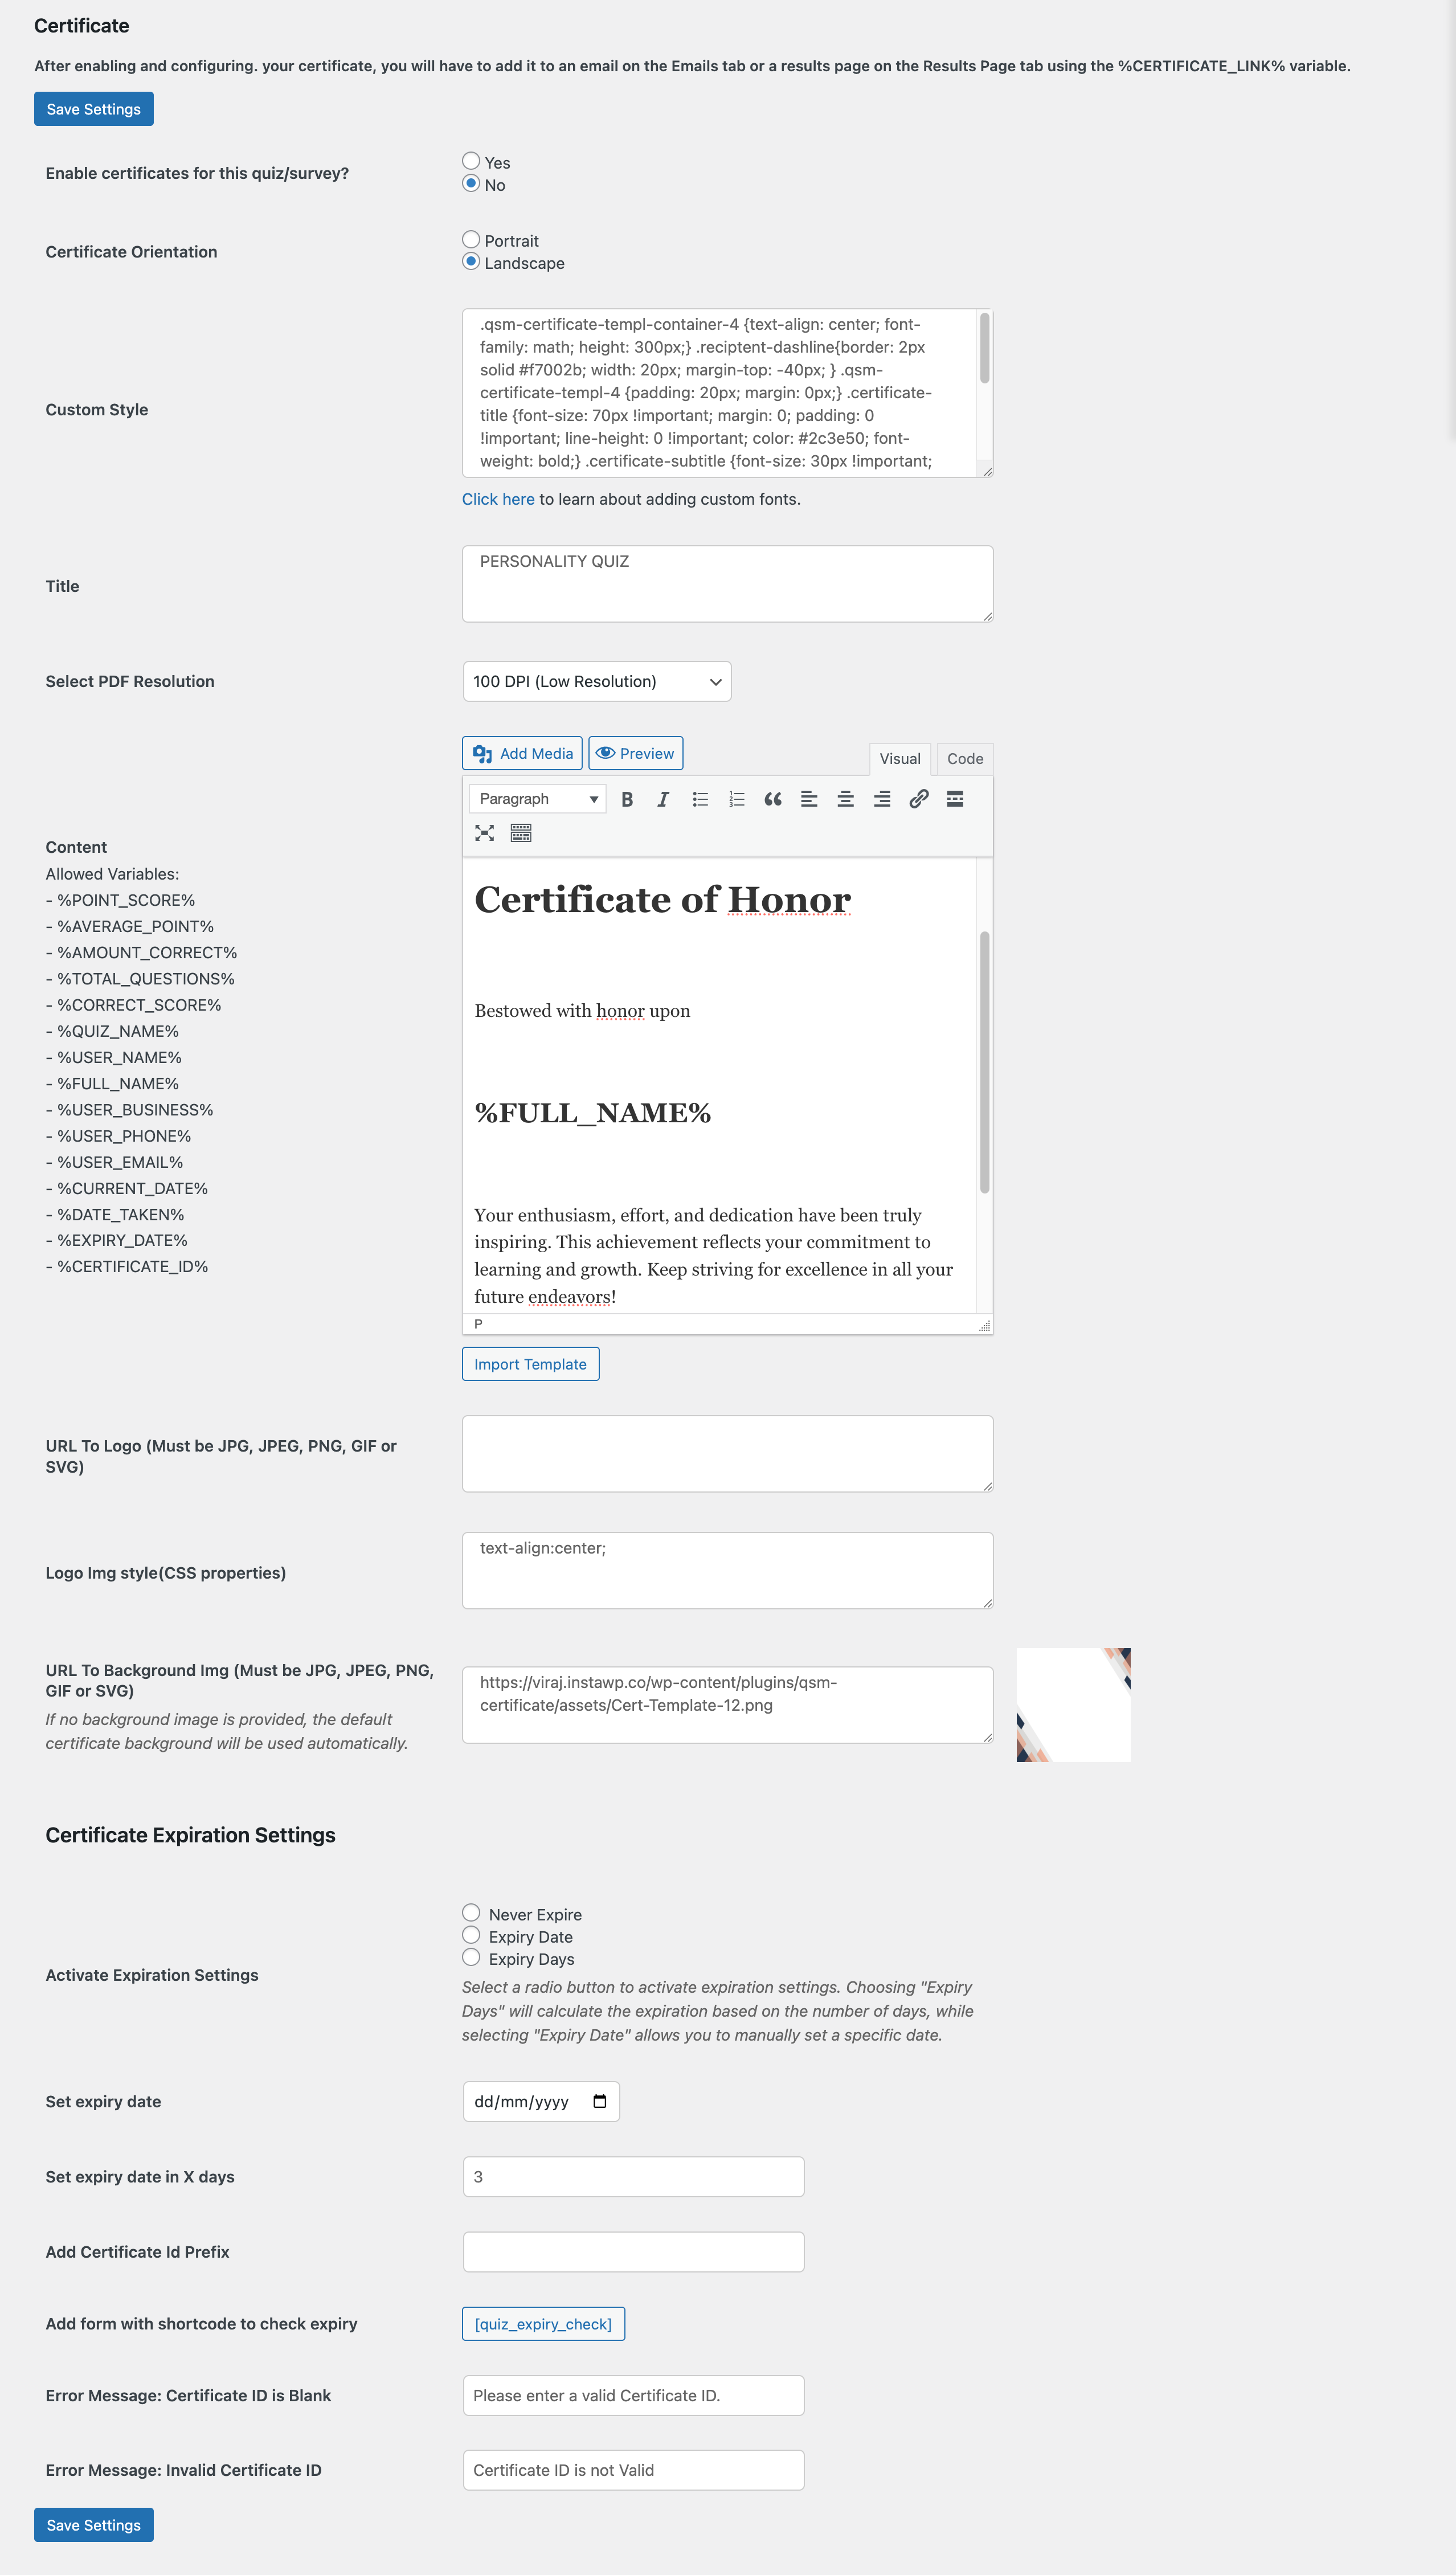
1. Enable Certificate
To turn on the certificate feature, set “Enable Certificates For This Quiz?” to Yes.
2. Orientation
It lets you set how you would like to display the certificate to your users. You can go with Portrait (Vertical) or Landscape (Horizontal).
3. Custom Style
QSM Certificate comes with a default “dejavusans” English font, you can go with the default font or add a different font using Google Fonts. To add a new font, follow these steps:
If you want to set a language other than English, you need to download the .ttf files from Google Fonts & upload them to your WordPress site’s “Media Library.”
- Go to Google Fonts
- Select the Font you want to use and click on Get Fonts > Download all

- In your WordPress site, go to the Media Library > Add a New Media File
- From your device, upload the font’s .ttf file

- Once uploaded, click on the file and copy the URL mentioned
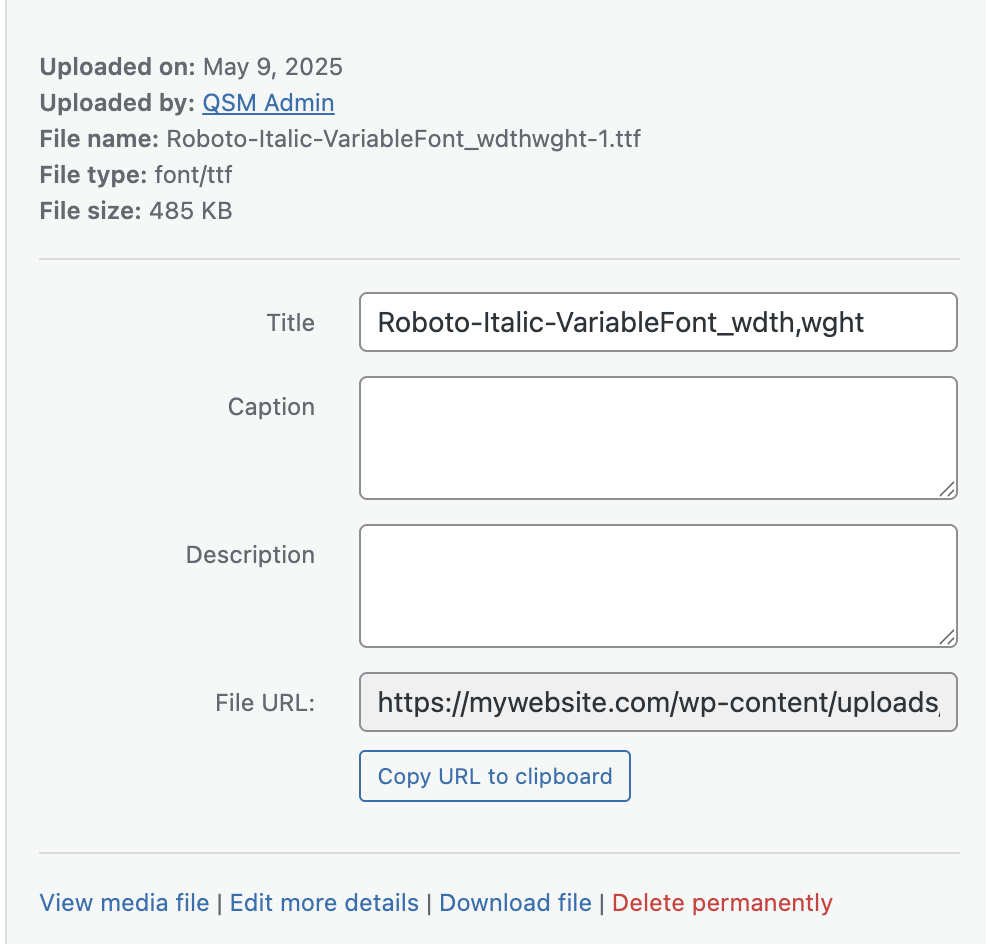
- Paste the link into the Custom Style field of the Addon, then save the settings.

Note – In case your .ttf file doesn’t work, you can add the following code temporarily to functions.php of their child theme. For that, simply go to the Tools > Theme File Editor > Theme Functions, and paste the code.
// Allow .ttf uploads for admin users
add_filter('upload_mimes', function($mimes) {
    if (current_user_can('manage_options')) {
        $mimes['ttf'] = 'font/ttf';
    }
    return $mimes;
});
add_filter('wp_check_filetype_and_ext', 'fix_ttf_mime_check', 10, 4);
function fix_ttf_mime_check($data, $file, $filename, $mimes) {
    $ext = pathinfo($filename, PATHINFO_EXTENSION);
    if ('ttf' === strtolower($ext)) {
        $data['ext'] = 'ttf';
        $data['type'] = 'font/ttf';
    }
    return $data;
}
You can add other CSS properties like padding, color, etc., along with the font CSS in the Custom Style Field of the Certificate Addon.
padding: 20px;
color: red;
If you are importing fonts with multiple styles and font weights, then it’s better to go with a single font weight that you prefer the most. For example, we are using Google’s Robotic font, which comes with multiple styles and font weights. However, we’ve chosen Alkatra Italic as our preferred style.
4. Title
Next, fill in the “Certificate Title” text box. This will be the first line on the certificate.
4. PDF Resolution
You can select from the different PDF resolutions available in the dropdown from 100 DPI (low resolution) to 720 DPI (ultra-high resolution).
6. Content
This will be the main body text, which will be displayed on the certificate.
You can either manually add content by adding a message, including media by clicking on the “Add Media” button and selecting from the WP gallery or playlist. Plus, make use of all the variables included under the Allowed Variables section on the left.
If needed, refer to our Template Variable system guide.
If you are copying the text from other sources and pasting it in the Content field, make sure you paste it without any text formatting by Ctrl+Shift V (on Windows) and Option+Shift+Command+V (on Mac).
Some fonts do not support bold and italic styles. If you’re using bold or italic formatting with a custom Google Font, ensure the font natively supports those styles. Otherwise, the certificate output will display the text in plain formatting.
📌 Note: Enter the text in the same Language as you’re using the font family.
Import Template
Alternatively, you can also select a pre-built certificate template where you get a few templates created with proper design and content body.

Click on the Import Template button, you’ll see a pop-up box with a few certificate templates. You can either preview each one of them or simply click to import them.
Once you import a template, the “custom style” field & “background image” option will depict the data related to the template. You can customize the text or fonts according to your requirements.
Preview Certificate
After fully creating the content for your certificate, you can preview it before finalizing & saving it.
Click on the Preview button & you’ll get the preview of the certificate you have created. If you find anything amiss, you can customize the content again and save it.

6. Logo URL
To add the logo, fill in the “URL To Logo” section with the URL to your logo. The logo must be in JPG, JPEG, PNG, or GIF format.
7. Logo CSS
If you want to align the logo to a specific location or side on the certificate? You can do so with CSS in the Logo Img style field. Just add the CSS properties and style your logo as per your requirements.
8. Background Image
To add a border or background to your certificate, simply add the URL to your background image in the “URL To Background Img” section. The background must be in JPG, JPEG, PNG, or GIF format.
9. Certificate Expiration Settings
1. Activation Expiration Settings
Configure how long a certificate remains valid by choosing between “Never Expire,” “Expiry Date,” or “Expiry Days.
- Never Expire: Choose this option if you want the certificate to remain valid indefinitely for the participant.
- Expiry Date: This allows you to set a specific date after which the certificate will no longer be valid or available for use and download.
- Expiry Days: With this option, you can define a specific number of days the certificate remains valid. The expiration is calculated based on the selected number of days from the date the certificate was issued (the current date).
If you select any of the radio buttons, then the corresponding option will be displayed to you. For example, if you select Never Expire, then you will not see the expiry date and expiry days fields below.
In case you opt for the Expiry Date, then only the “set expiry date” field will be available for you to configure below the ‘activate expiration settings’.
Similarly, if you select Expiry Days, then only the “set expiry date in X days” option will be visible.
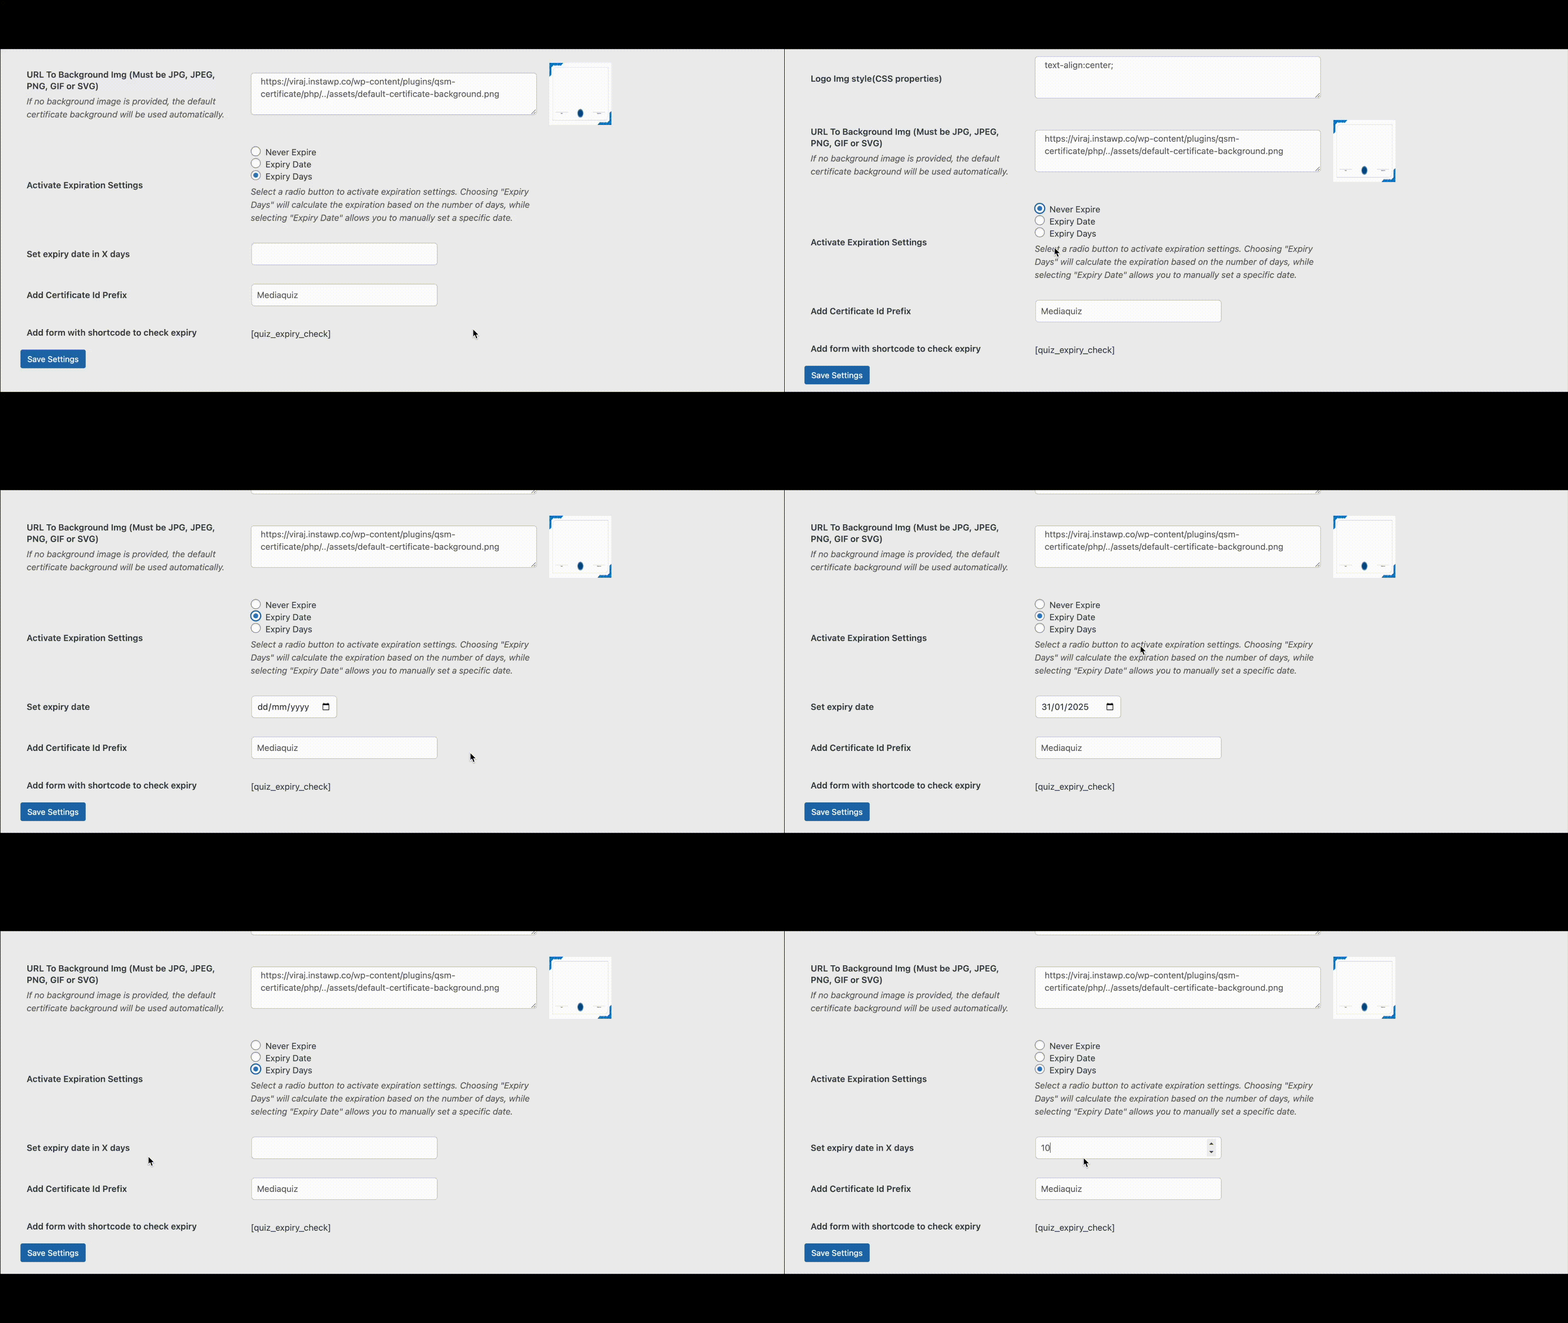
Note – Make sure to include the template variables like %CURRENT_DATE% and %EXPIRY_DATE% in the content body to display the date your certificate will expire.
2. Add Certificate ID Prefix
You can add a custom starting text to the certificate IDs to match your organization’s style or make them easier to identify. Using the certificate ID you can check whether your certificate is valid or not.
Note: Add %CERTIFICATE_ID% to the certificate content body to display the Certificate ID. This ID can be used to verify the certificate’s expiration status.
3. Add form with a shortcode to check expiry
The shortcode quiz_expiry_check can be added to pages, posts, result pages, or emails. It lets users check if their certificate is still valid by entering the certificate ID, which can be found on the certificate. This ID can be used anytime to verify the certificate’s validity.
4. Custom Certificate Validity Message
You can customize the message participants see to check for the certificate validation.
Error Message: Certificate ID is Blank – In this text field, you can input a custom message that participants will see for entering the certificate ID
Error Message: Invalid Certificate ID – In this text field, you can enter a custom message that participants will see to show that their certificate ID is not valid.

Don’t forget to click the “Save Settings” Button when you are finished!
Adding Certificate Variable to the Results/Emails Page
Once you have your certificate set up, simply add the %CERTIFICATE_LINK% variable to any results page or email. This will then show a link for the user to download/print the certificate.
If needed, you can also create a duplicate certificate after the user has taken a quiz by viewing the user’s results on the Results page. From there, simply go to the Quiz Tools tab and click Create Certificate.
Sample Certificate in Default English:
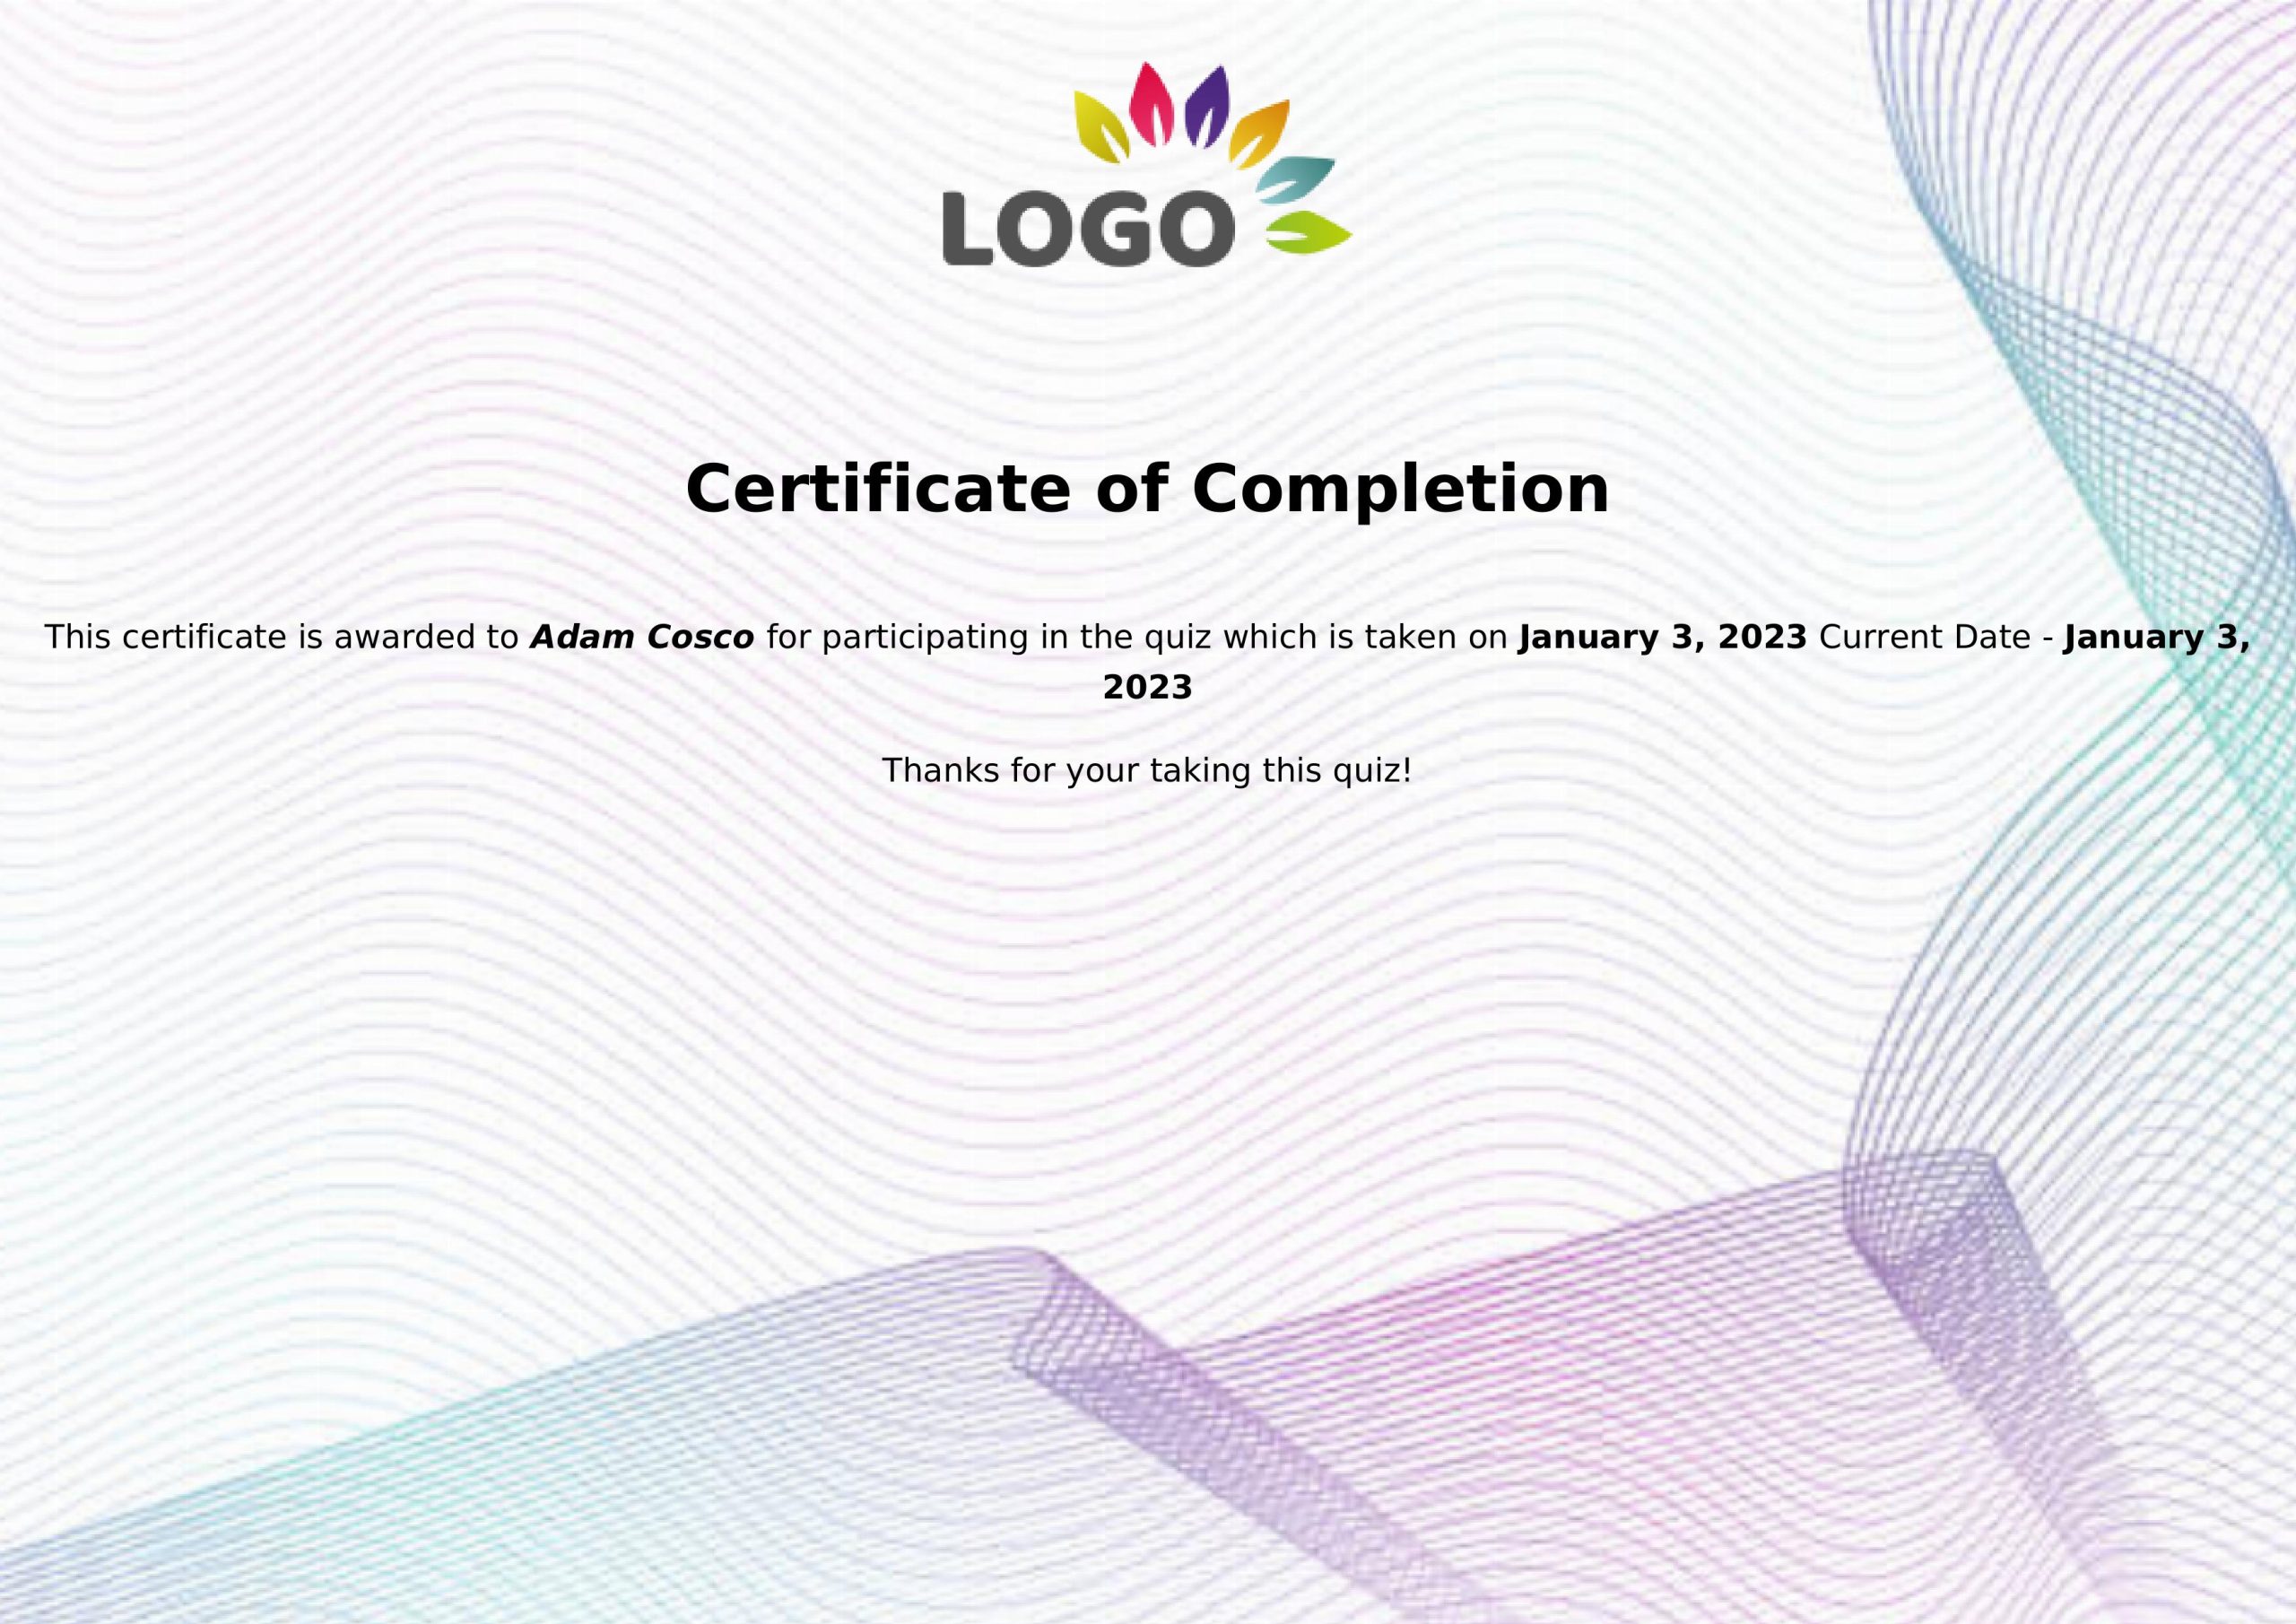
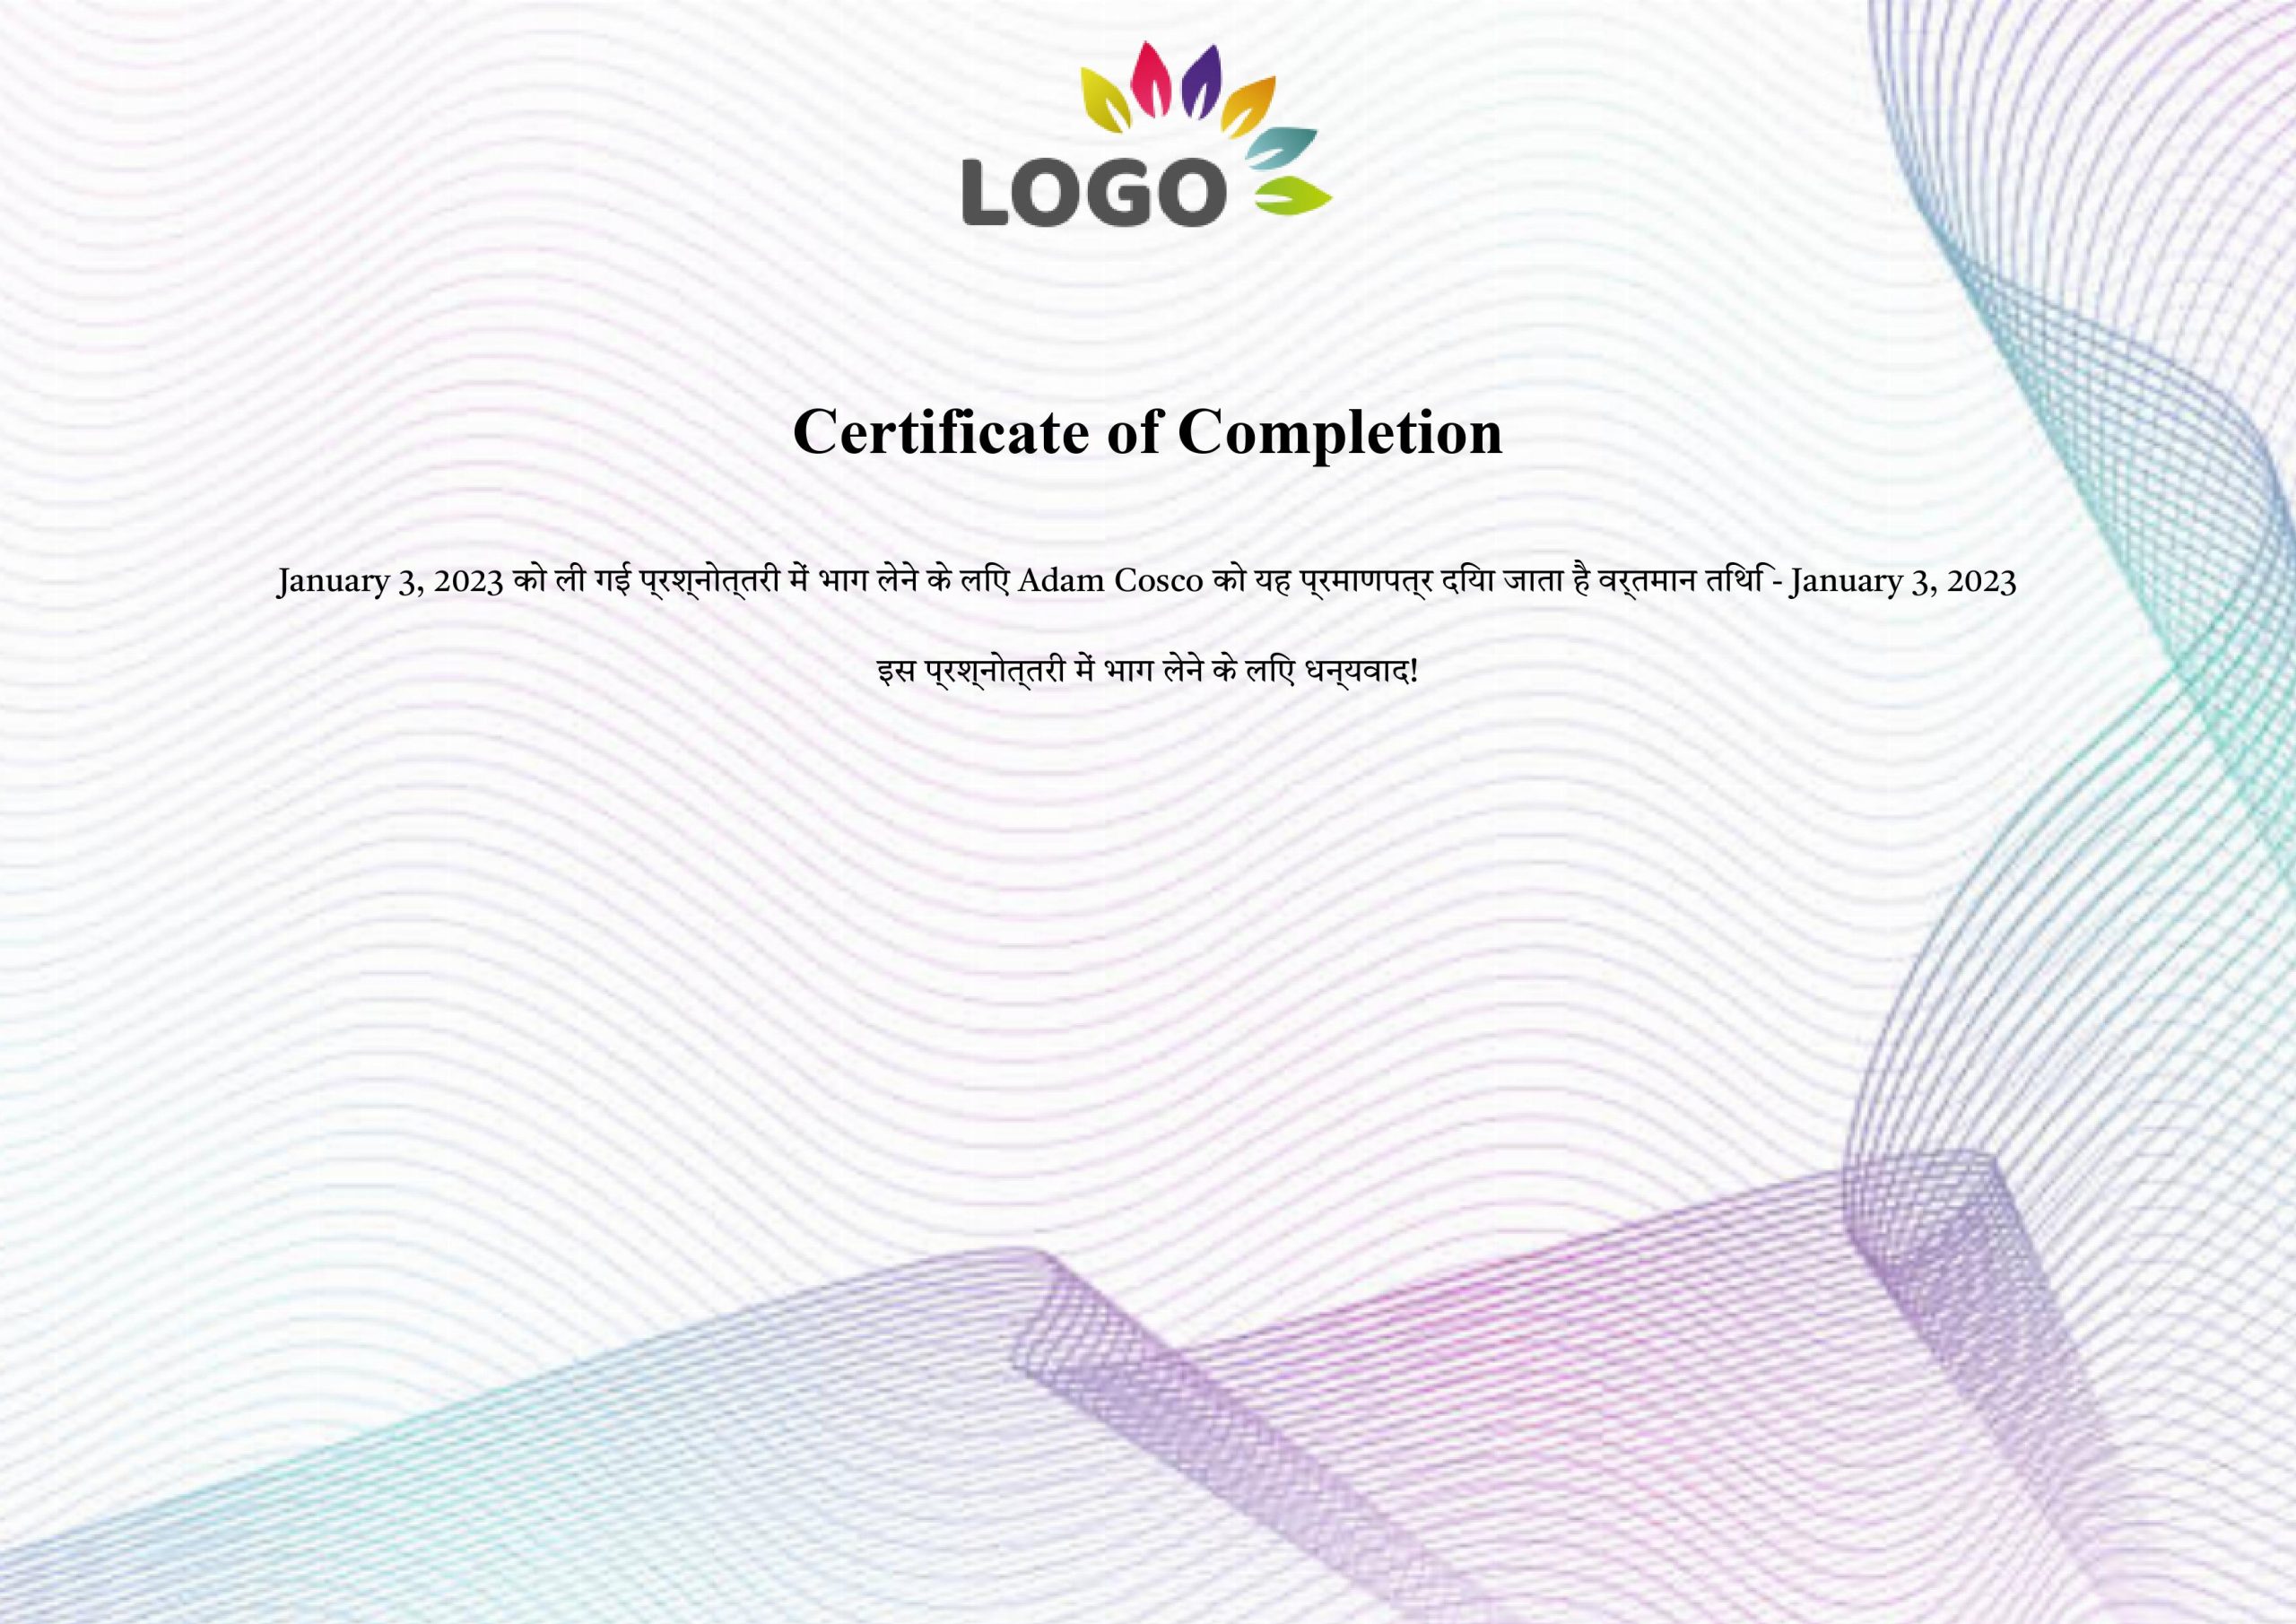
Sample Certificate in Hindi Font:
If you have any trouble implementing the Certificate Addon or have more questions about the process, please fill out a support ticket by going to the WordPress dashboard and selecting ‘help’ in the QSM plugin and our support guru will be able to help you.


