The Quiz and Survey Master Google Analytics Tracking Addon allows you to track your quiz and survey submissions in Google Analytics.
The Plugin now works with both Universal Analytics and GA4 accounts.
INSTALLATION/SETUP
Once you have purchased the addon, you will have access to download the addon. To install, upload the addon as a normal WordPress plugin. To do so, go to the Plugins page and click Add New. Then, click Upload.
From there, upload the zip file that you downloaded when downloading the addon. Once the addon has uploaded, you should now have the plugin QSM – Google Analytics Tracking listed in your list of plugins. Activate that plugin. Once activated, the addon will add a new tab in the Addon Settings labeled “Google Analytics”.
Before you can use the Google Analytics addon, we must first enter the license key.
Adding Your License Key
Enter your license key from your account into the “Addon License Key” field on the “Google Analytics” tab of the “Addon Settings”.
SETTINGS/CONFIGURE
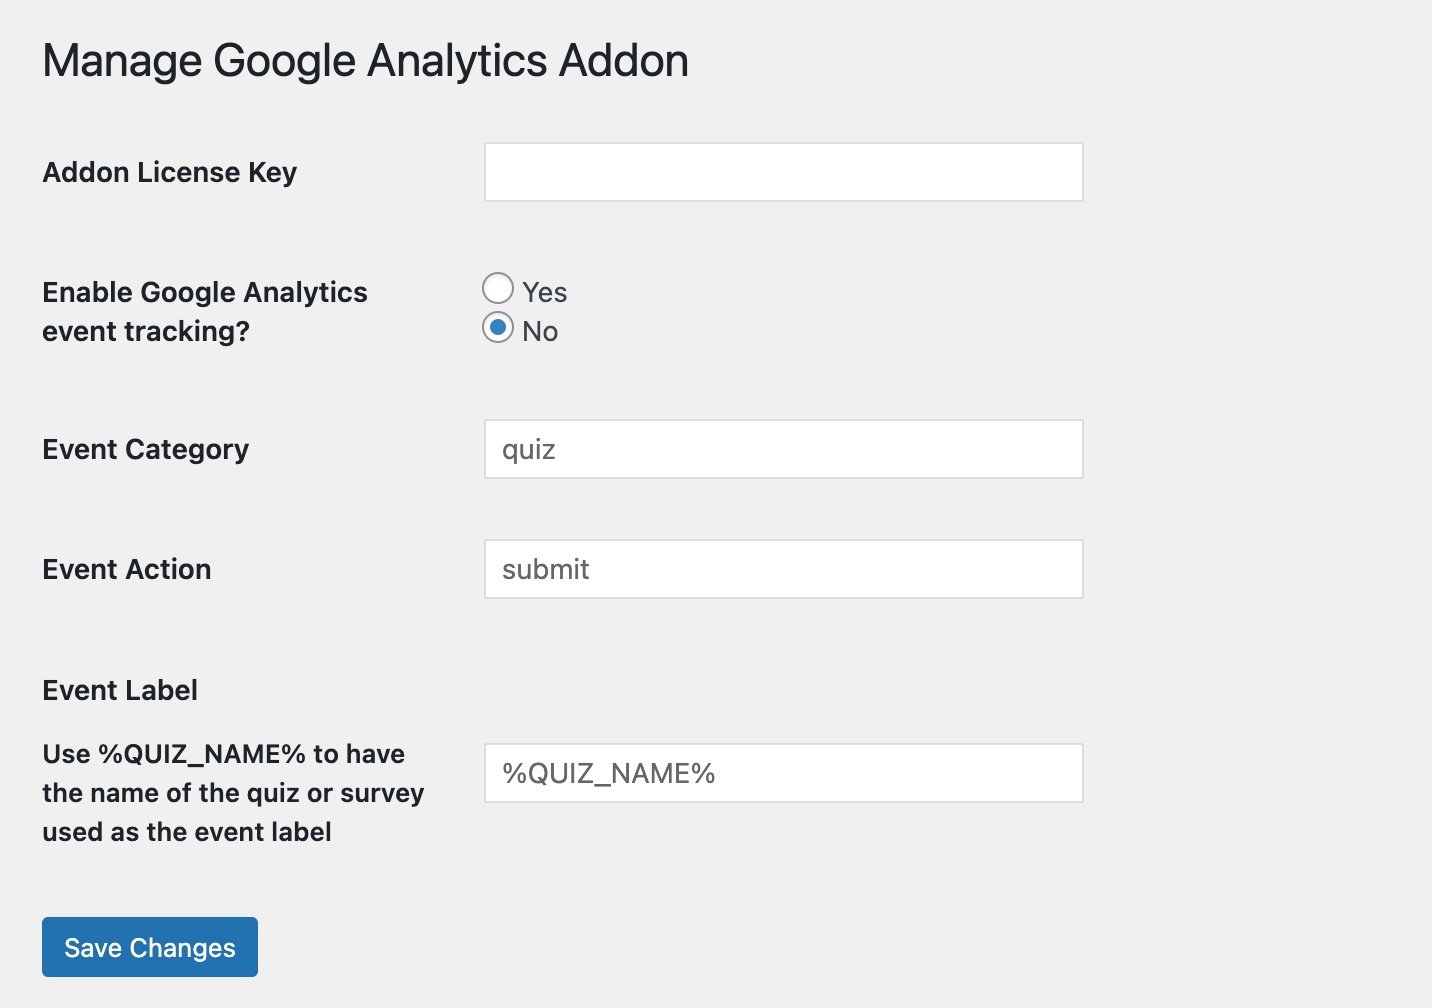
By default, when a user submits a quiz or survey, the addon will send a custom event to Google Analytics with the category as “quiz”, action as “submit”, and the label as the name of the quiz.
Your website must have an active Google Analytics Universal tracking code installed. For the plugin to actually work. If you’ve never installed Google Analytics Tracking on your website, the process to install GA4 Tracking code in your website can be found below.
Once, you’ve successfully installed the Tracking Code you can now get back to setting-up the QSM Google Analytics Tracking plugin.
If you want to enable event tracking for your quizzes and surveys, set the “Enable Google Analytics event tracking?” to “Yes”.
If you want to edit the category, action, or label of the event that is sent, you can customize the last three fields to do so. Make sure you use %QUIZ_NAME% to have the name of the quiz or survey used as the event label.
Lastly, be sure to save your changes. You are all good to go!
Process to install GA4 tracking code on your website (Ignore if already installed)
Here’s a reference video tutorial explaining GA4 tracking code installation process, else below is a step-by-step process that you can follow.
Step 1: Goto https://marketingplatform.google.com/about/analytics/ and sign-in to Analytics.

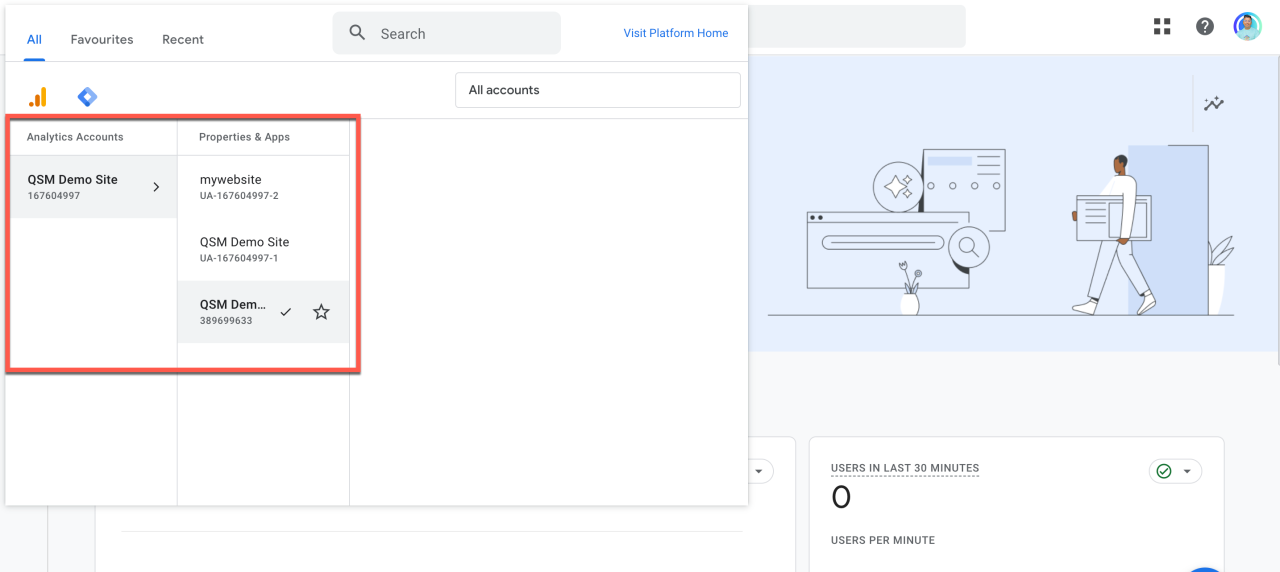
Step 2: Click on All Accounts and select your preferred Analytics Account > Property
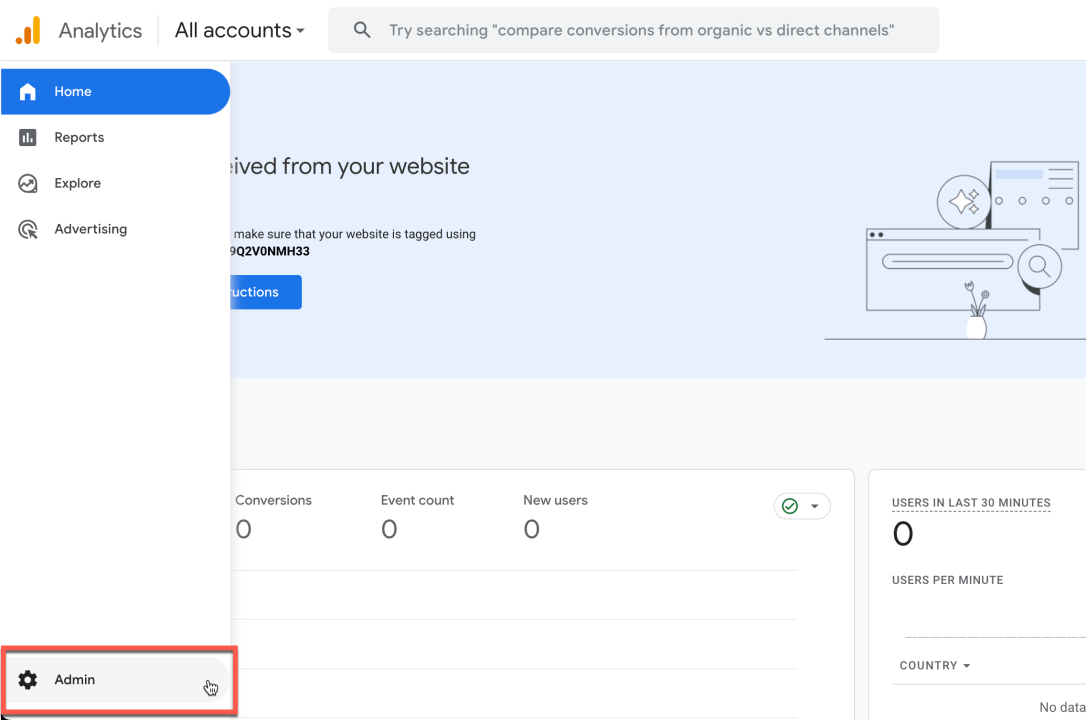
Step 3: From your Property, goto the Admin section found at the bottom-left of the page
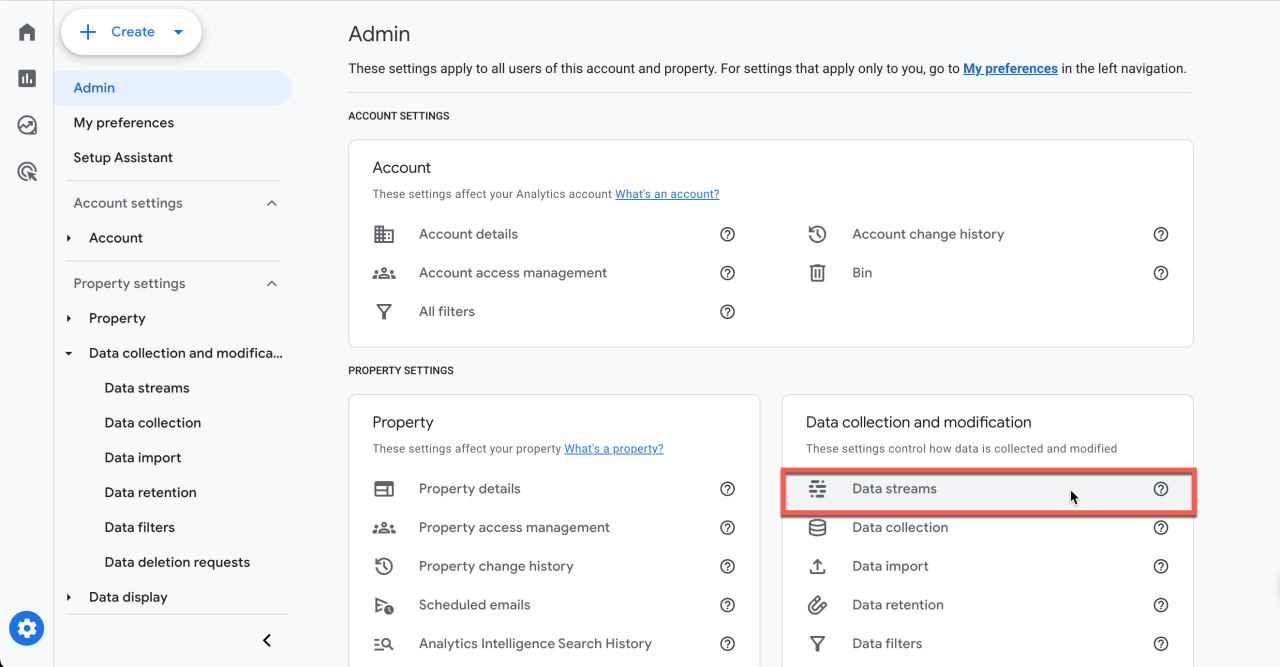
Step 4: Click on Data Streams and you will find your website listed as a web-stream
Step 5: Click on the arrow on the right-side of the stream, and scroll down to the bottom of the page until you find “View Tag Instructions“

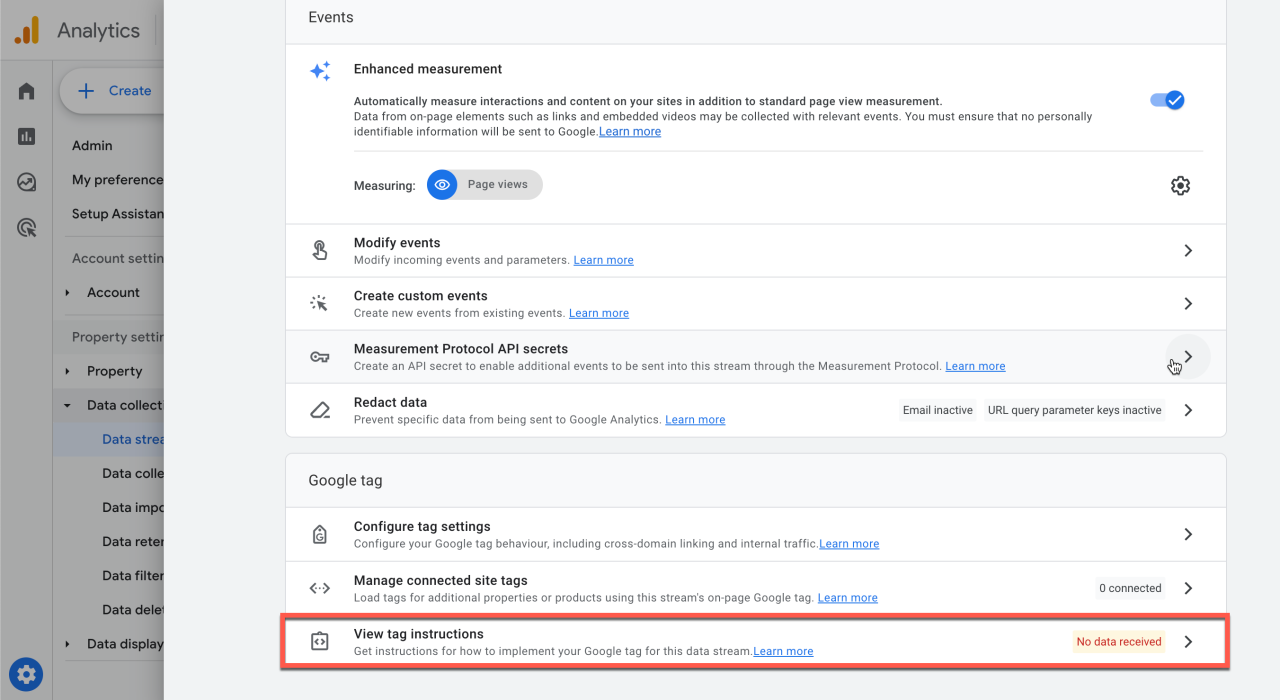
Step 6: Now, you can either install GA Tracking code on your website using the “Site Kit Plugin” or install the code manually.
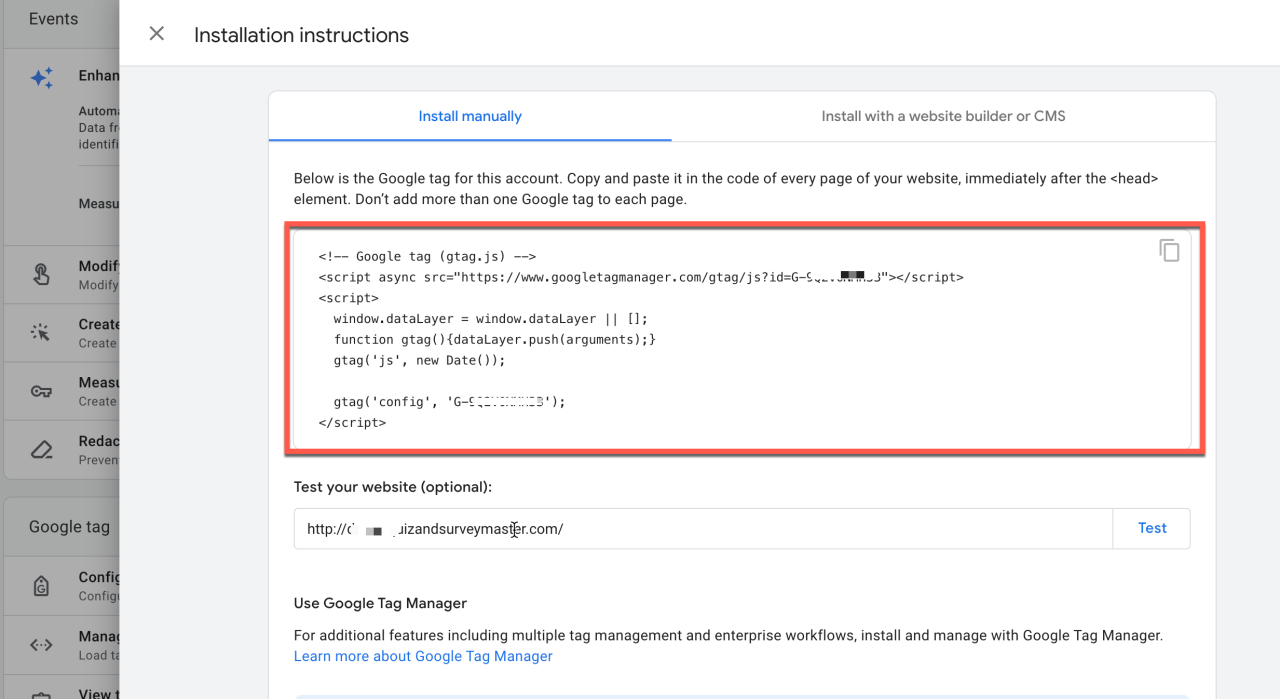
Step 7: To install manually, goto the section that says “install manually” and copy the Google Tag JS code and paste it in the header section of your website.
If you have any trouble implementing the Google Analytics Addon or have more questions about the process, please fill out a support ticket by going to the WordPress dashboard and selecting ‘help’ in the QSM plugin and our support guru will be able to help you.


