The Advanced Leaderboard addon for Quiz and Survey Master offers various shortcodes to create leaderboards for individual quizzes and surveys, as well as for all quizzes and surveys combined. It also allows you to customize the leaderboard table as needed.
The new update brings minor changes in the layout of the options. The radio buttons make the configuration look easy and are now more appealing and simple to use.
With this update, you can now track the time taken in milliseconds for timer-based quizzes and also display the quiz/test date. The new “TIME TAKEN IN Millisecond” button is added in the Leaderboard Template of the Advanced Leaderboard Addon.
INSTALLATION/SETUP
Once you have purchased the add-on, you will have access to download it. To install, upload the addon from the “Plugin” option in WordPress, click Add New, and then, click Upload.
Upload the zip file that you downloaded after purchasing the add-on. Once the addon has been uploaded, you will have the QSM Advanced Leaderboard listed in your list of plugins. Activate the plugin.
Adding Your License Key
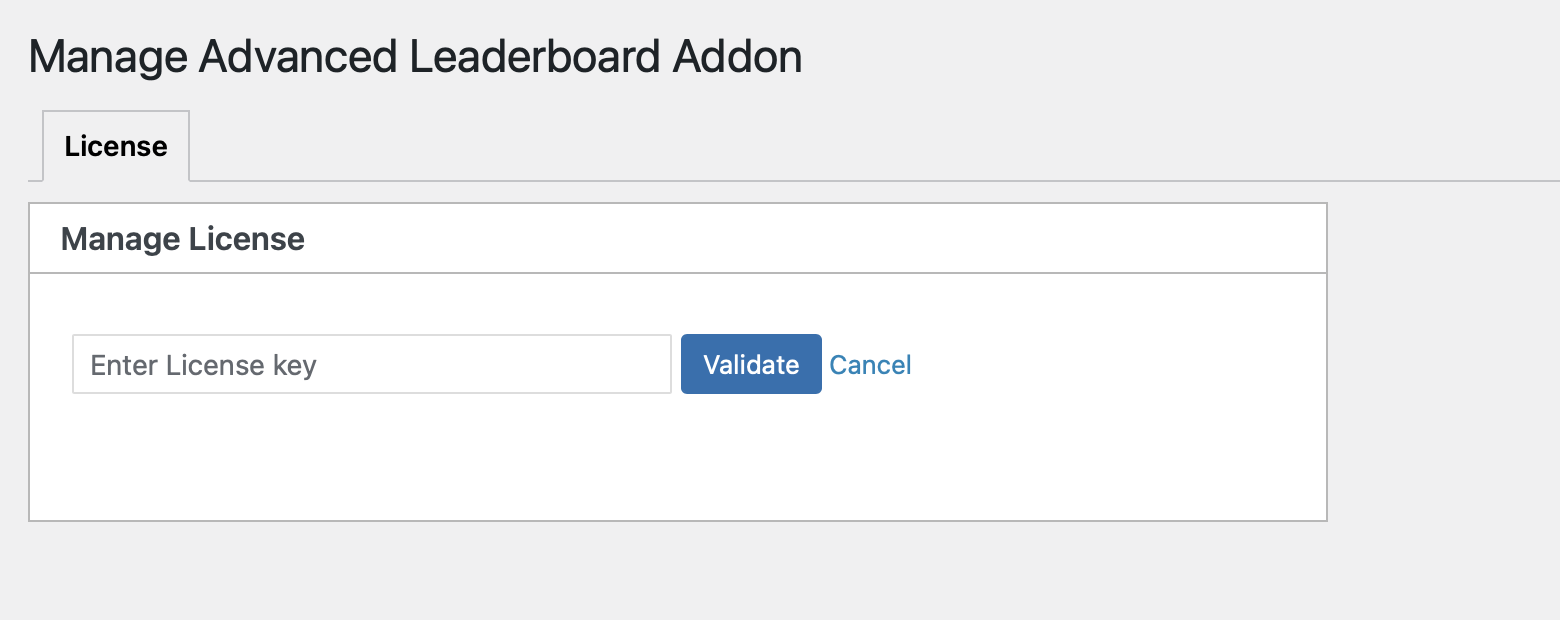
To enter your license key in the “Manage License Key” field of Advanced Leaderboard settings, copy the license from your account, then go to the “Addon Settings” from QSM.
Under the Installed Add-ons you’ll find the Advanced Leaderboard settings, click on it and enter the license key. Once you have entered your license key, be sure to click “Save Changes” to save the page.
Once the license key is entered, you can now use the “Advanced Leaderboard” tab when editing your quizzes or surveys.
Manage Global Leaderboard Settings
Now, navigate to the Advanced Leaderboard global settings. In the WordPress sidebar, hover over ‘QSM’ to reveal the ‘Advanced Leaderboard’ menu. Click on the ‘Advanced Leaderboard’ option to navigate to the global settings page of the Advanced Leaderboard add-on.
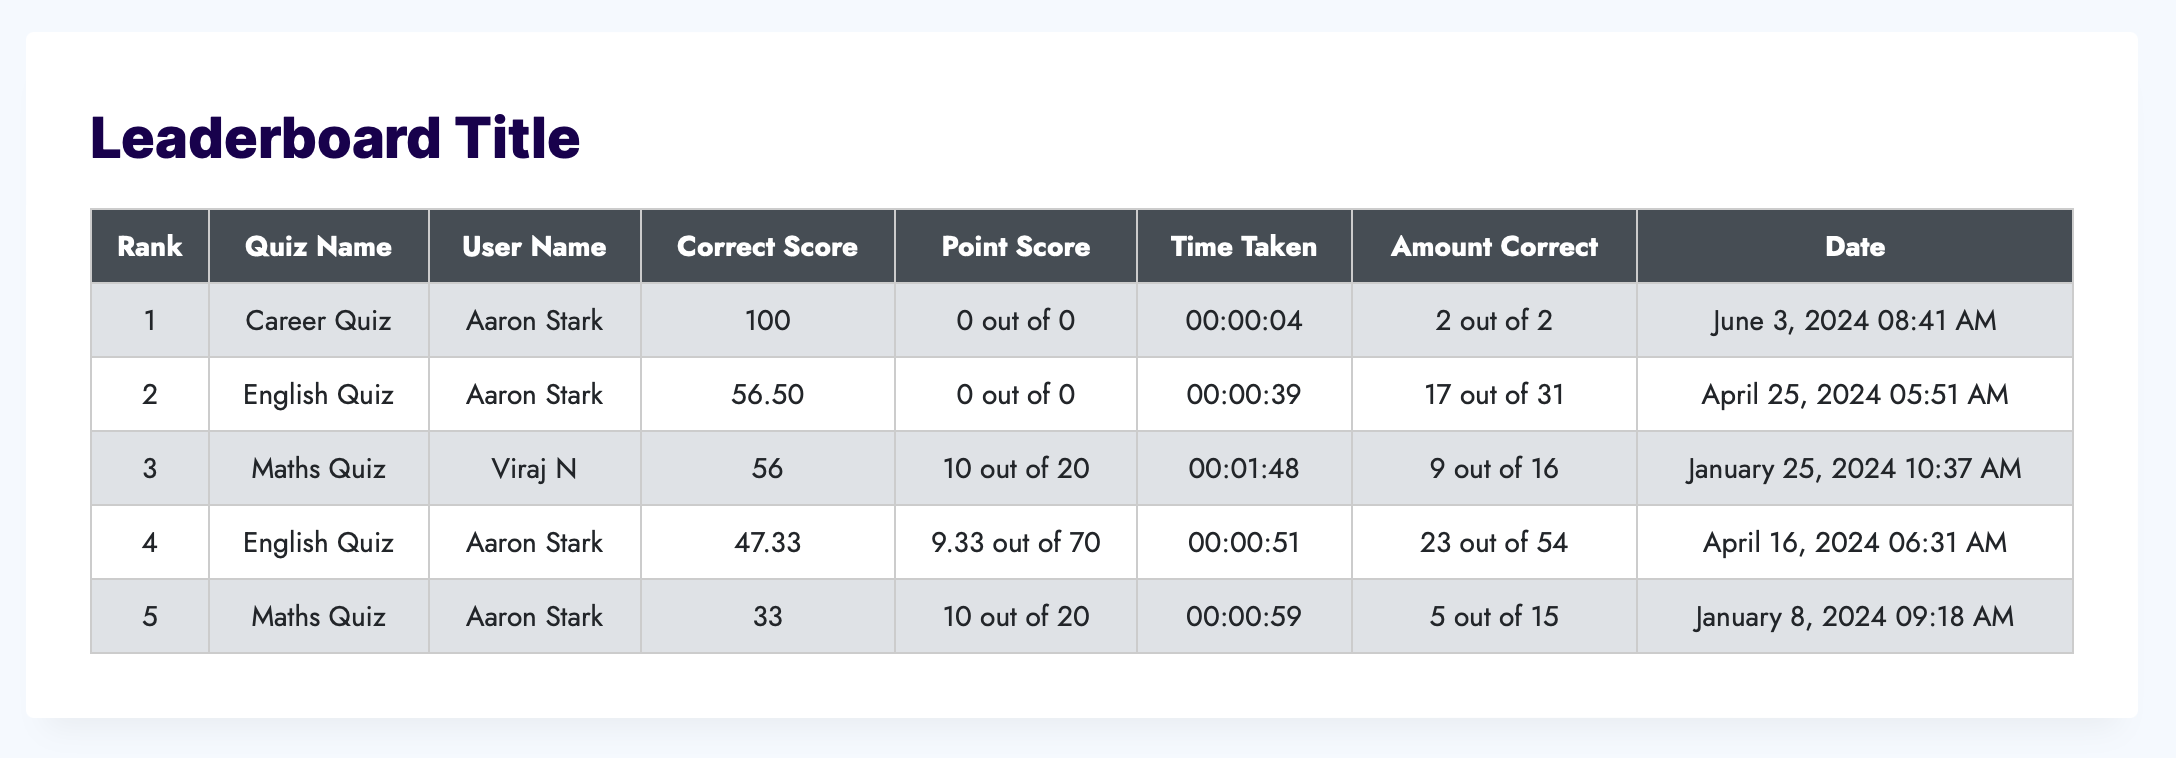
In the Global Leaderboard settings, you can configure the settings to display the leaderboard for all quizzes. To use the shortcodes, copy and paste them into any post or page.
Manage Table and Titles
In this section, you can configure the variables to display in the leaderboard. You can show or hide columns, personalize their titles, access additional options for some columns, and rearrange the order with drag-and-drop.
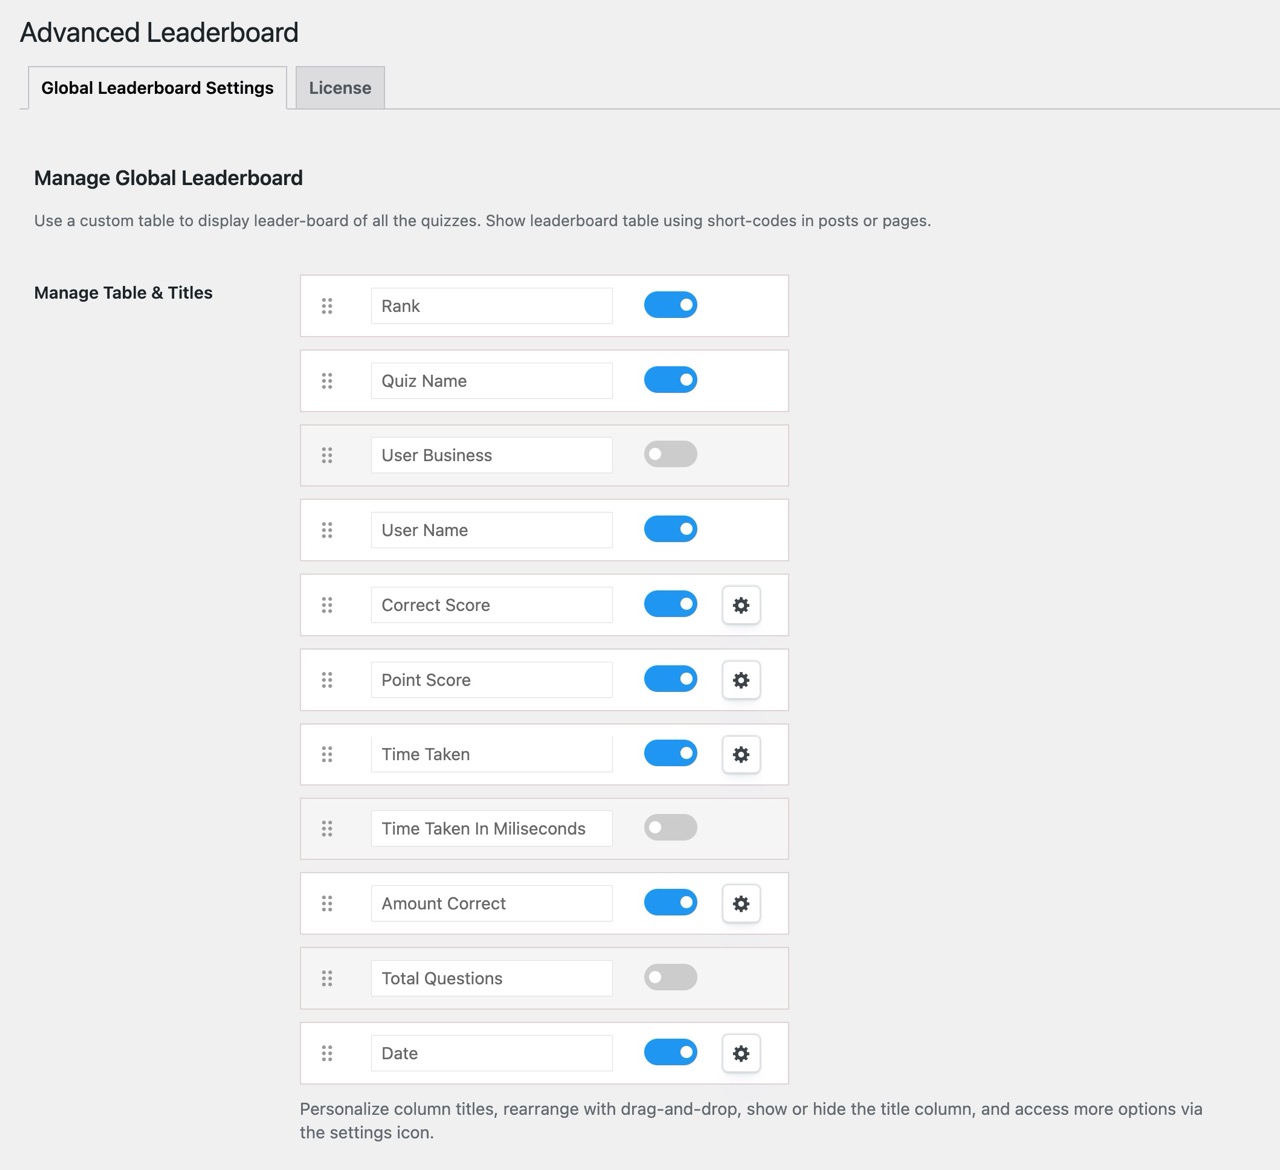
- Rank – If you enable this field by clicking on the toggle button, the leaderboard table will display a column showing the ranks.
- Quiz Name – If you enable this field, the table will display a column showing the quiz names of quizzes that users have taken.
- User Business – If you enable this setting, a column showing the user’s designation or organization will be added. To collect this information, you’ll have to set up the contact form and enable the ‘business’ label field while creating the quiz or survey.
- User Name – If you enable this field, a column will be added displaying the user names of the top ranks on the leaderboard.
- Correct Score – If you enable this field, the leaderboard will include a column displaying the score percentage achieved by each user. You can adjust the number of decimal points displayed in the score by clicking the settings icon.
- Point Score – If you enable this setting, the table will add a column displaying the total points each user achieved in a quiz. In the settings option, you can set custom text for point score labels using variables.
- Time Taken – If you enable this field, a column displaying the time taken by users to complete a quiz will be added to the leaderboard. Additionally, in the setting option, you can choose from three available formats to display the quiz duration.
- Time taken in milliseconds – If you enable this field, the table will display the time taken by users in millisecond format.
- Amount Correct – If you enable this option, a column will be added to display the number of correct answers given by each user in a quiz. In the settings option, you can customize the correct answer text using variables.
- Total Questions – If you enable this setting, then the tabular leaderboard will display a column indicating the total number of questions in a quiz.
- Date – If you enable this option, the table will include a column showing the date and time of quiz submissions by users. You can customize the date and time format or add your custom format through the settings.
Manage Shortcodes
In this section, you can create your custom short code by customizing the shortcodes’ settings and displaying the leaderboard and graph of all quizzes. You’ll see the preview of the shortcode settings that you configure in the display text field.
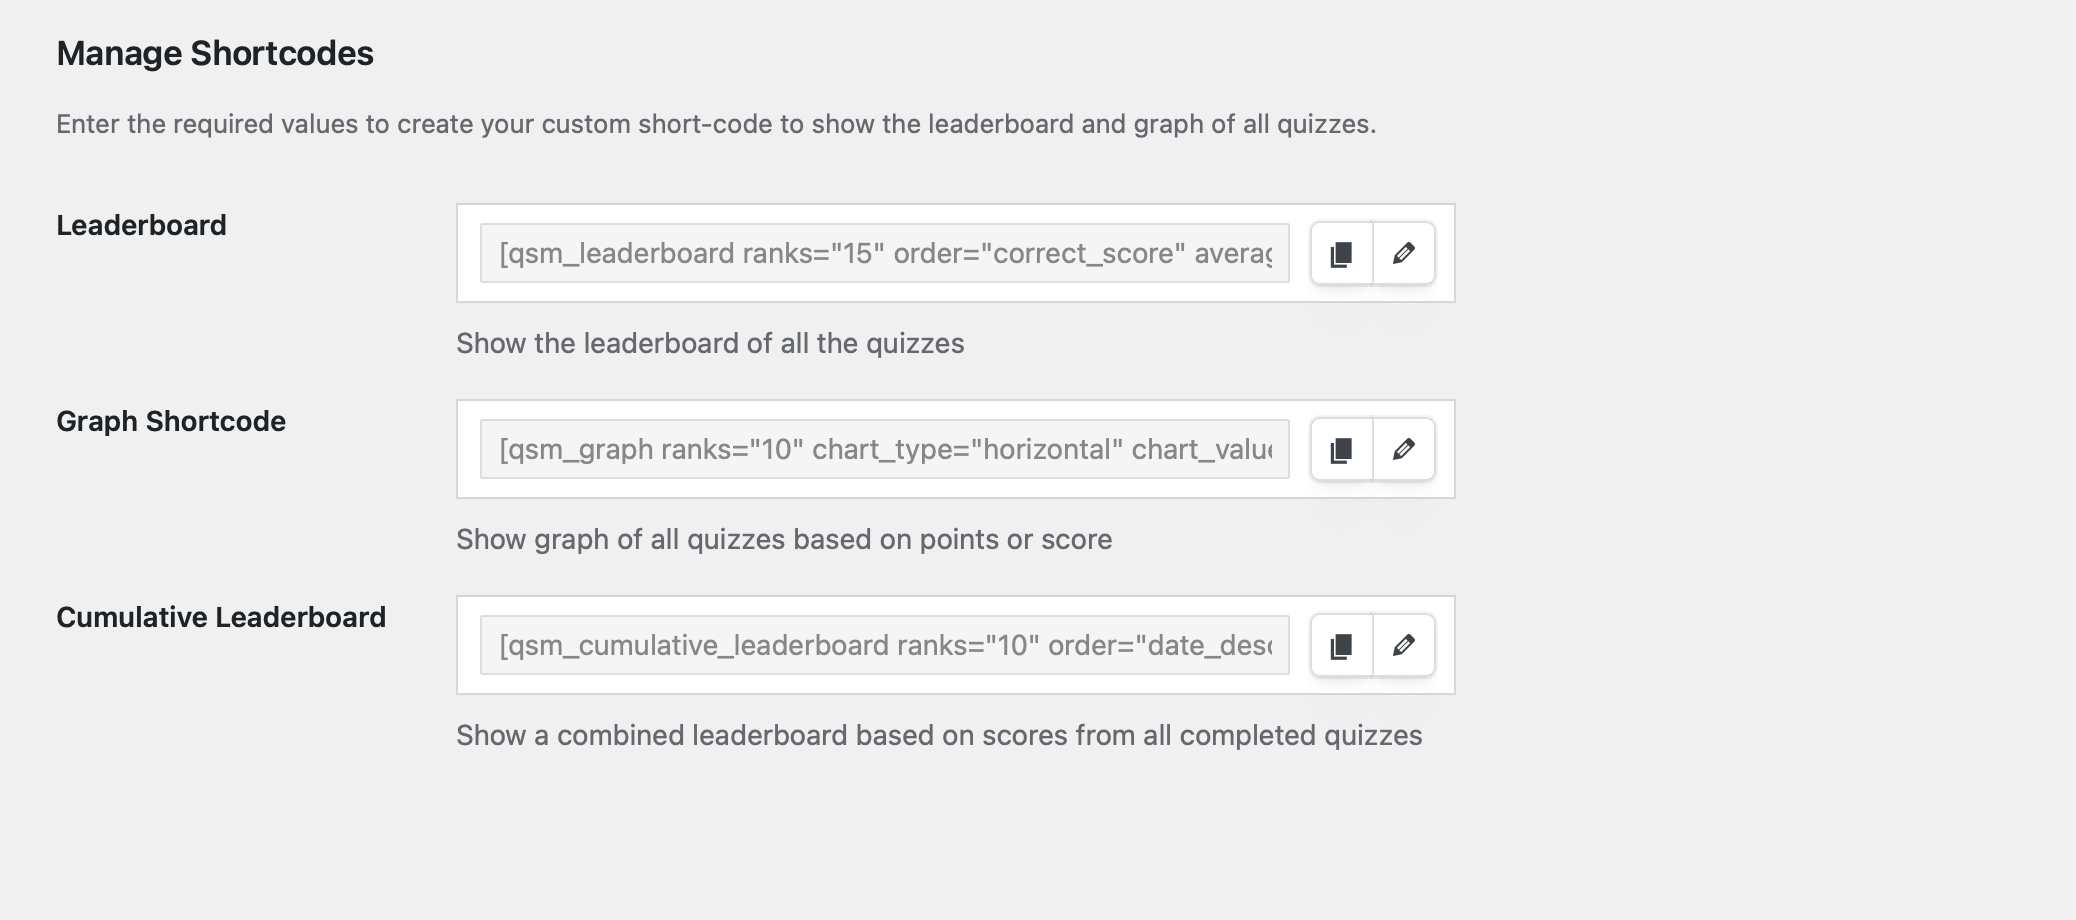
1. Leaderboard shortcode – This shortcode is used to display the leaderboard table for all the quizzes. You can copy the shortcode by clicking on the “Copy Shortcode” button and add it to your post/page. In the input box, you’ll be able to preview the shortcode settings that you’ve applied.
If you click on the settings icon beside the field you’ll get advanced settings to set the leaderboard shortcode. It includes;
- Select Quiz – In this dropdown field, you can select multiple quizzes for which you want to display the leaderboard table.
- Show Ranks up to – In this input field you can set the rank limit to include in the table.
- Leaderboard Order – In this dropdown menu you can choose the order in which leaderboard data will be arranged. You can sort the results by the submission date, point scores, or total percent score.
Note – If you are choosing any of the order parameters, it is important to enable that column from the leaderboard table section.
- Average Result – A checkbox option that allows you to show the average score data based on the multiple quiz attempts done by the users.
- Sorting Order – In this option, you can select the order to display the leaderboard data in ascending or descending order.
- Leaderboard Filter – In this setting, you get two options to show the result on the leaderboard.
- Show leaderboard by number of days – In this input field, you can set the number of days based on which it will display the leaderboard, it will show the results from the last “n” days up to today. For example, if you enter “7,” the leaderboard will show the results from the last 7 days, counting back from today.
- Show date-range-based leaderboard – If you select a date range for the leaderboard, two input fields will be there to choose the start and end dates. The leaderboard will then display results based on the dates you selected.
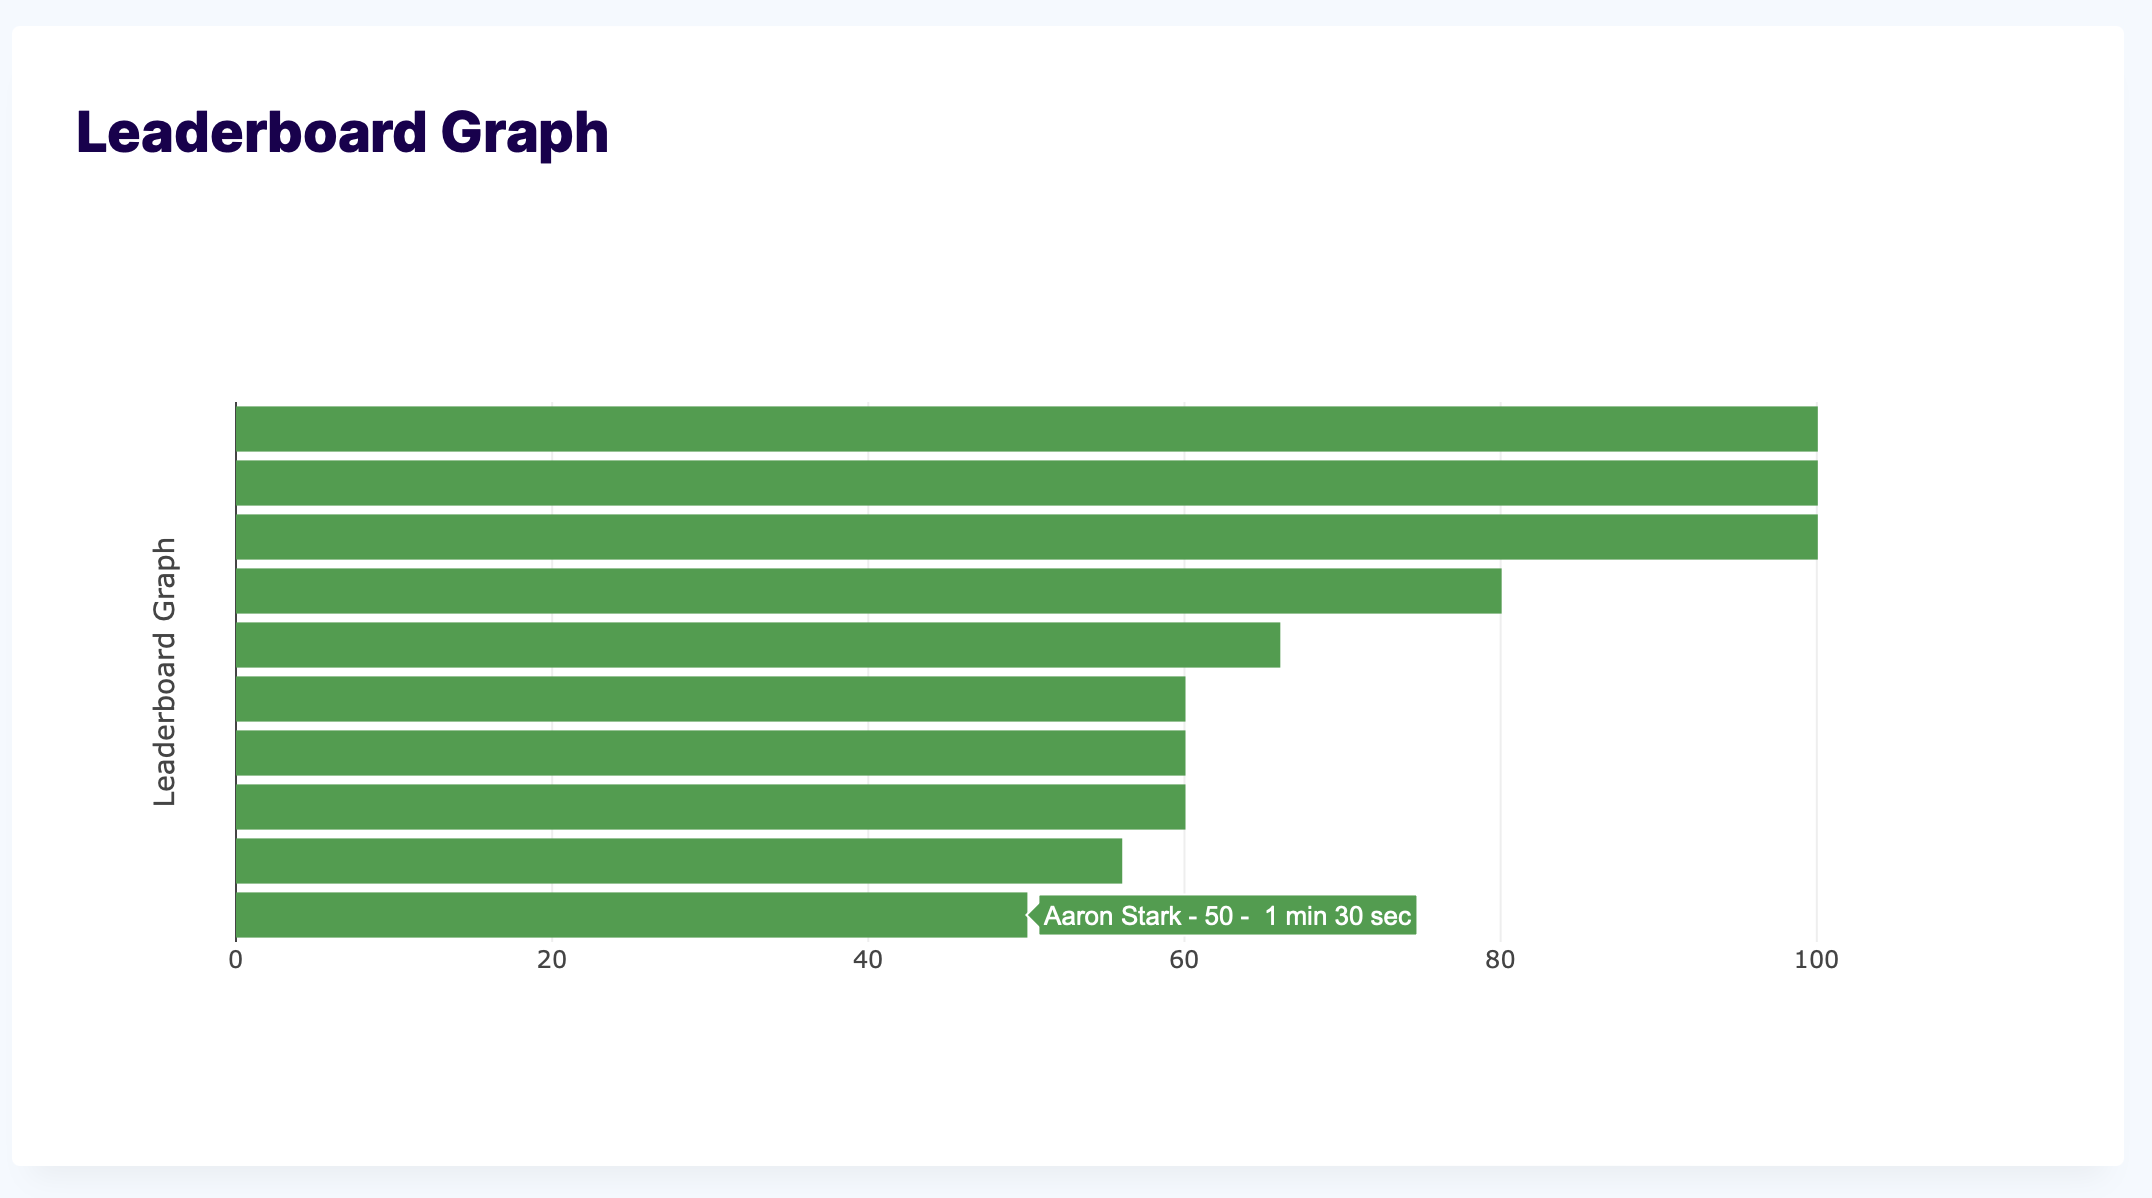
2. Graph Shortcode – This shortcode displays data from all quizzes in a graph format. Like the leaderboard shortcode, you can preview the shortcode that you’ve customized from the graph settings and copy the shortcode using the button provided.
The graph settings include the following options:
- Show ranks up to – Similar to the leaderboard shortcode, in this input field, you can set the rank limit, up to which you want to display the graph.
- Bar Chart – In this dropdown menu, you can select the orientation of the bar chart for your graph. There are two available options – Horizontal Chart and Vertical Chart.
- Show Chart based on – In this dropdown menu, you can choose to display the graph of all quizzes either based on the score percentage or points.
- Graph Color – You can change the color of your graph by selecting a color from the color picker.
- Graph Font Color – You can customize the color of the text in the graph using the color picker in this option.
- Graph Label – In this text box, you can insert the variables to display labels in the graph using the available variable buttons.
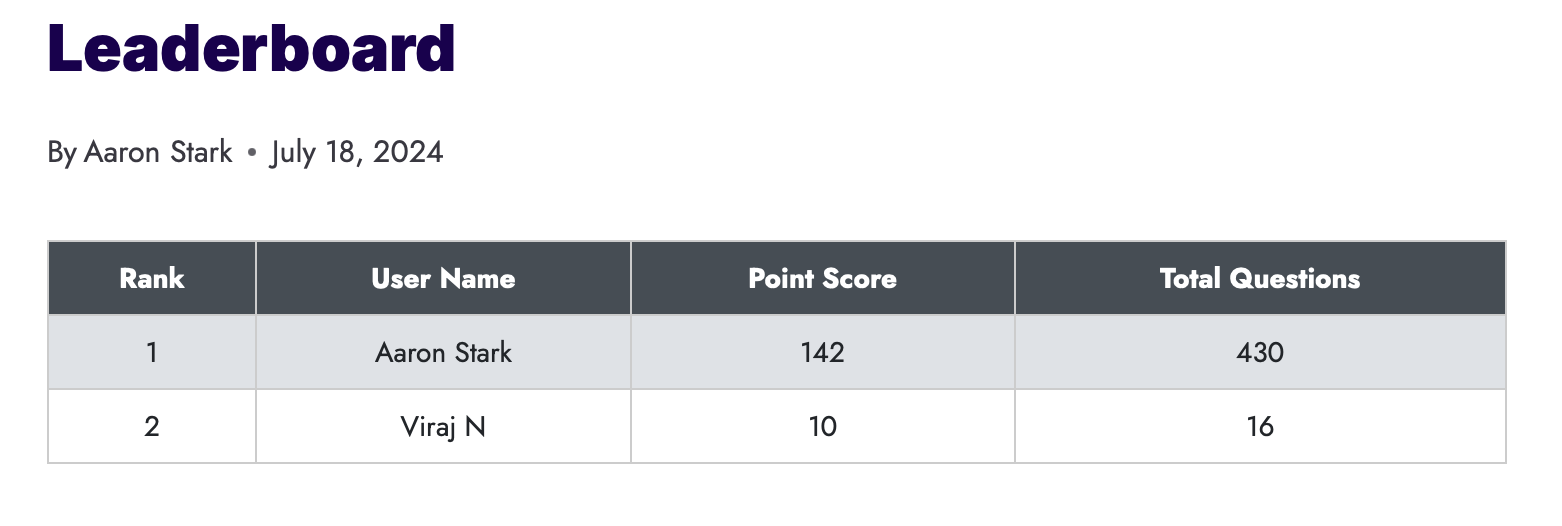
3. Cumulative Leaderboard – This shortcode is used to display the leaderboard of total cumulative points of individual users from all their quizzes and rank them accordingly. The leaderboard includes four columns: rank, name, points, and total questions.
For example, If User 1 got,
10 points – Quiz 1
10 points – Quiz 2
Similarly, User 2 got,
Quiz 1: 10 points
Quiz 2: 20 points
Then, based on their cumulative points, the leaderboard will display user rank as,
Rank 1: User 2 – 30 points
Rank 2: User 1 – 20 points
You can further customize the cumulative leaderboard with the advanced settings options, it includes;
- Show Ranks up to – Similar to other shortcode option, in this input field you can set the rank limit to include in the table.
- Leaderboard Order – Similar to the leaderboard shortcode, in this dropdown field you can choose the order in which leaderboard data will be arranged. You can sort the results by the submission date, point scores, or total percent score.
- Sorting Order – In this option, you can select the order to display the leaderboard data in ascending or descending order.
Setup Leaderboard for Individual Quiz
To add a leaderboard for individual quizzes, you need to configure it for each quiz separately by navigating the Advanced Leaderboard add-on from the Add-ons tab. Here’s how:
- Open the quiz for which you want to set the leaderboard from the Quizzes and Surveys tab.
- From the Add-ons tab, go to the Advanced Leaderboard option
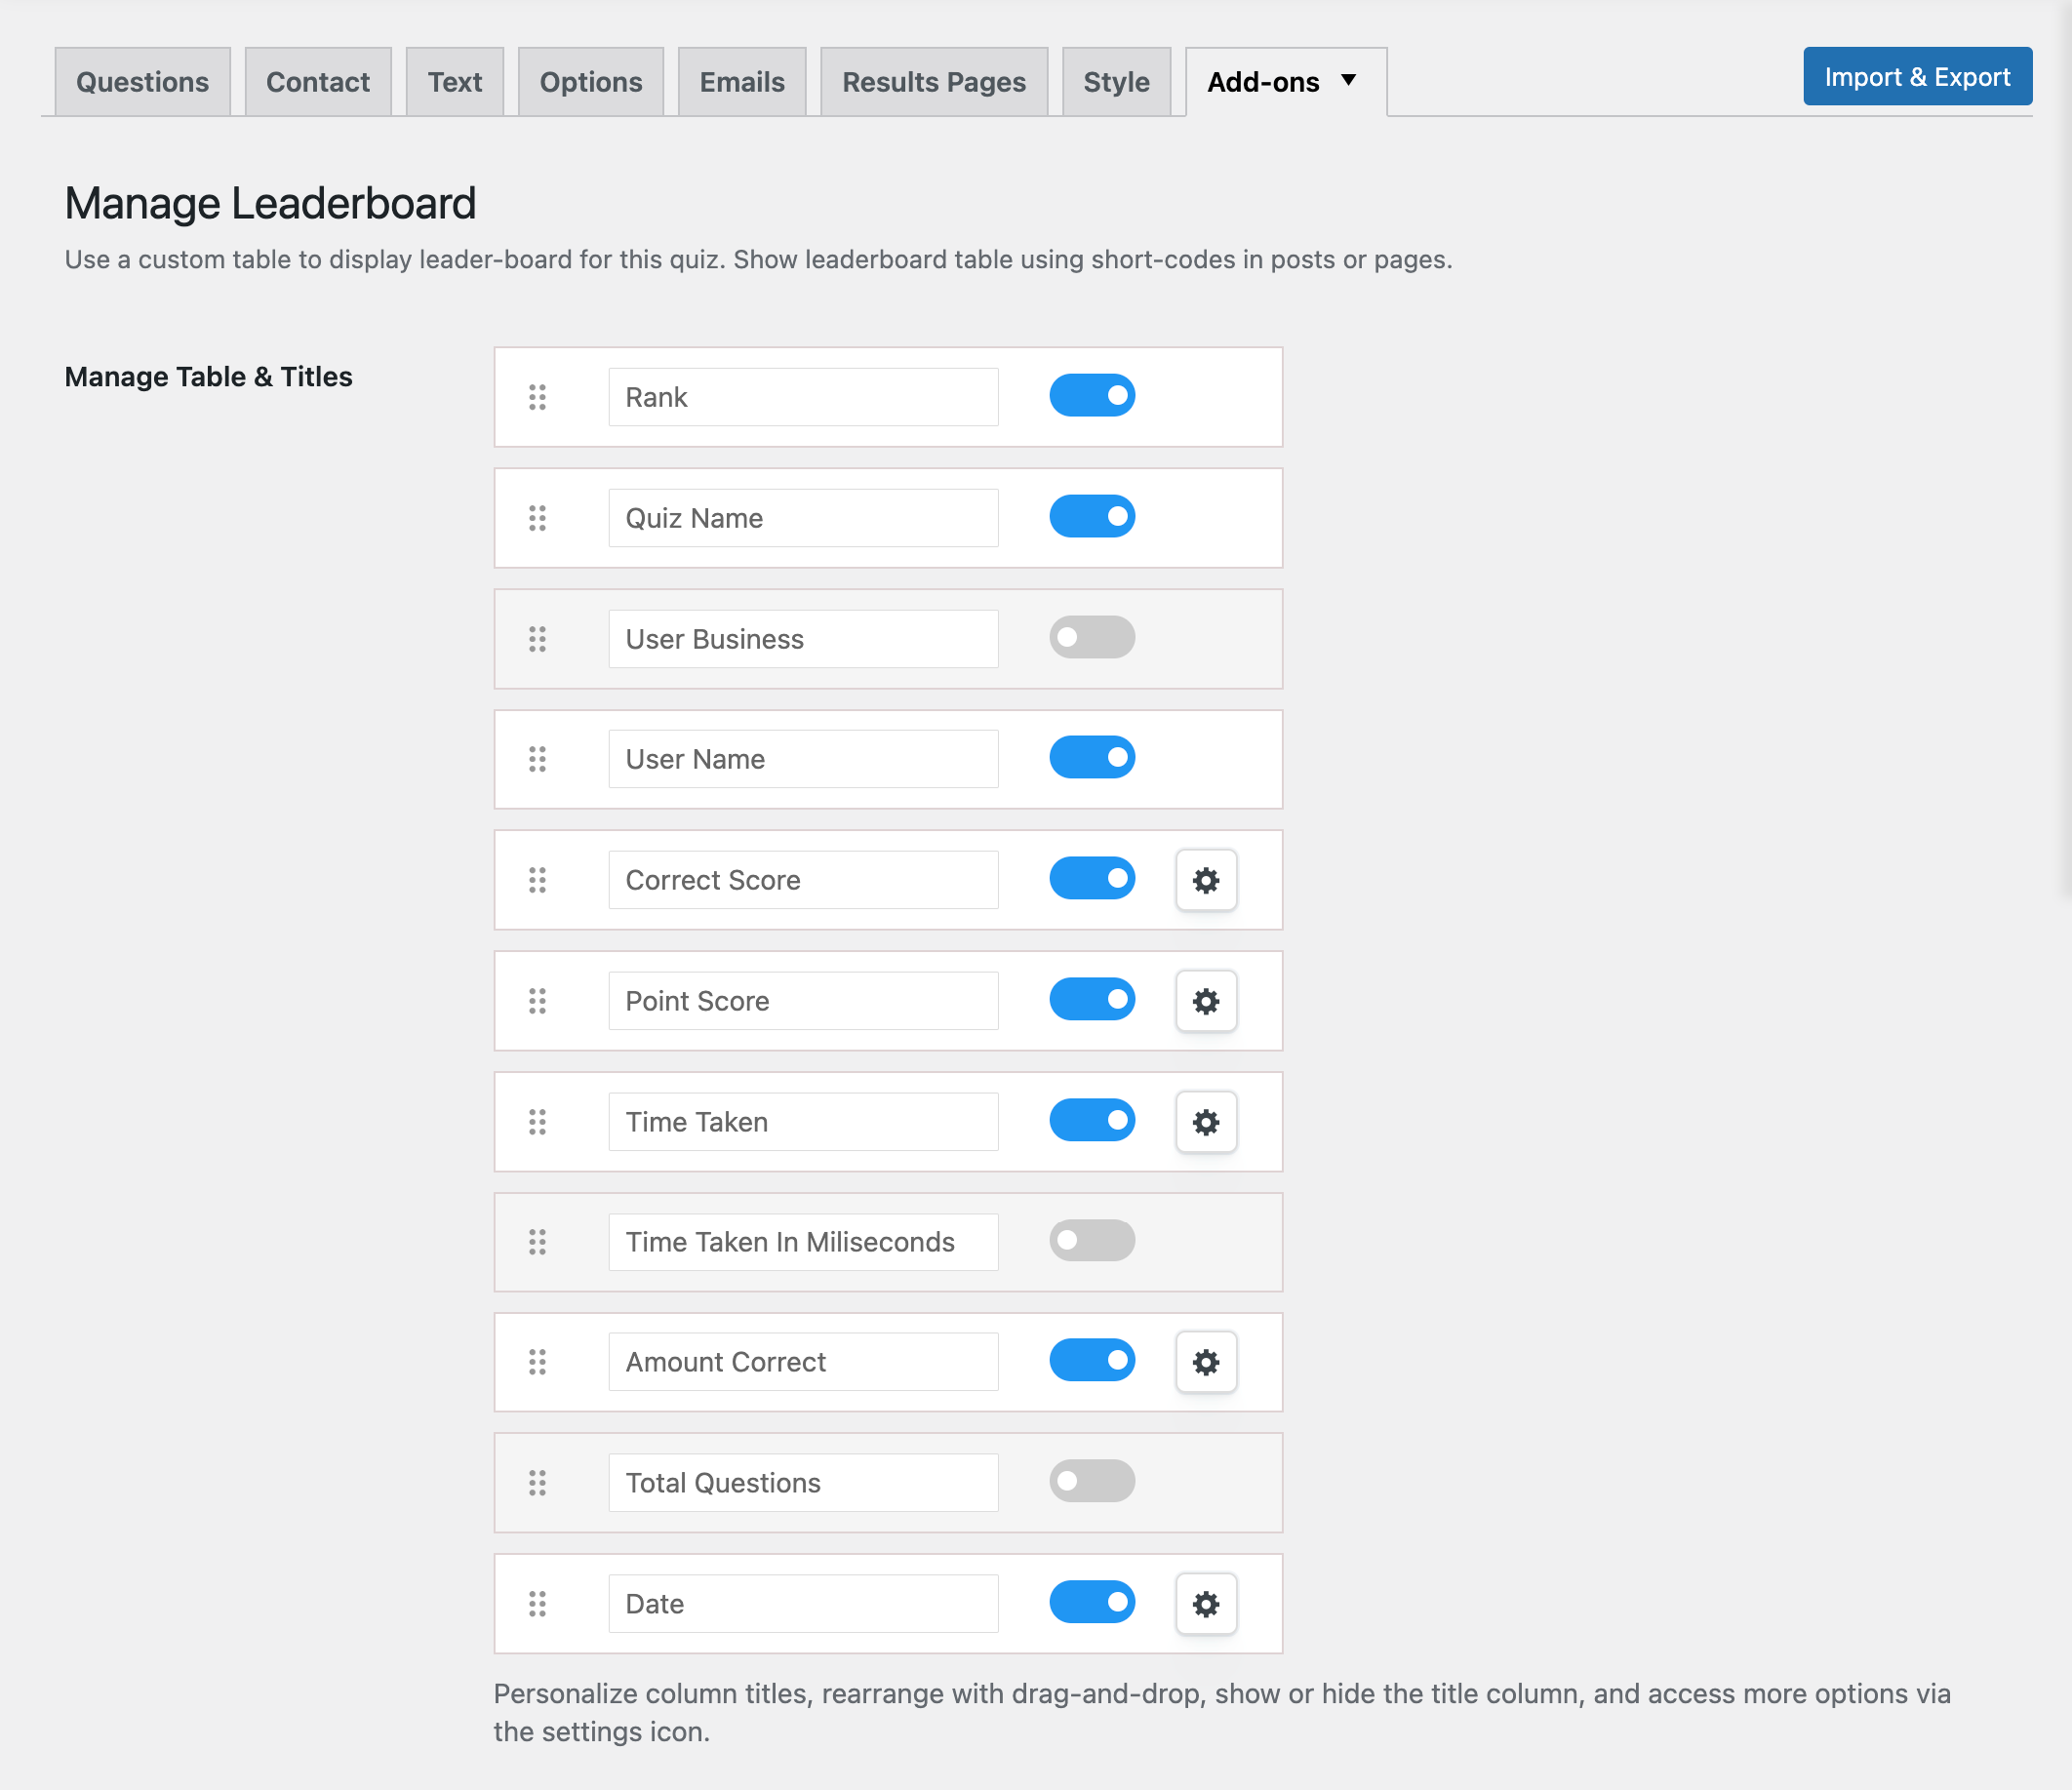
From here, you can manage the leaderboard settings for a specific quiz. The “Manage Table & Titles” option functions similarly to the one in the Global Settings for all quizzes, allowing you to enable or disable fields according to your preference.
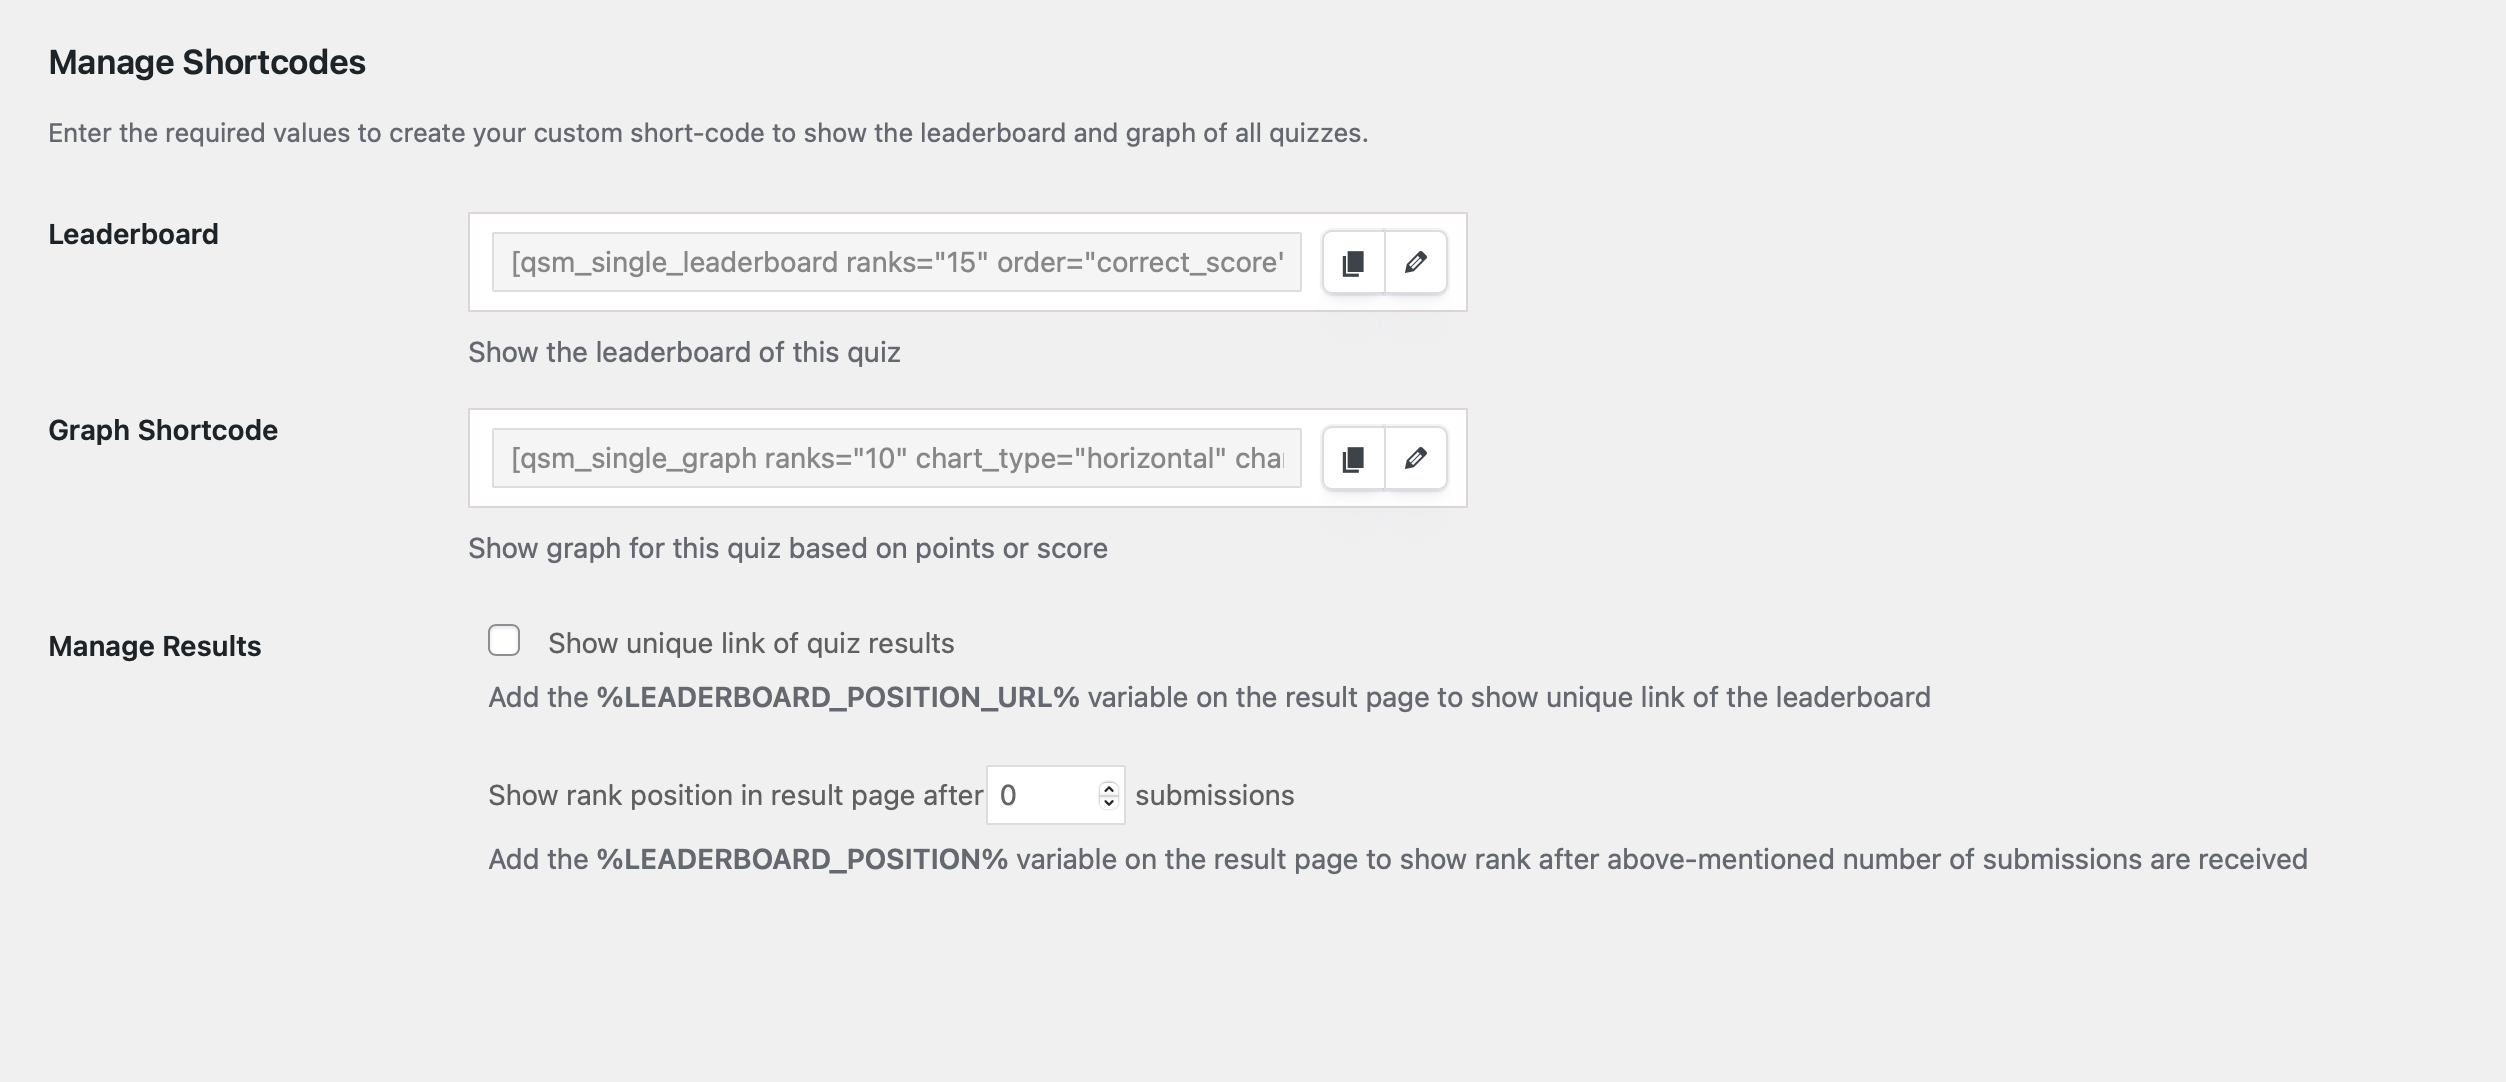
Under “Manage Shortcodes,” you’ll find two shortcode options – Leaderboard and Graph, similar to those in the Global Settings. However, in the advanced settings for the “Leaderboard shortcode,” the “Select Quiz” option will not be available, as these settings are specific to an individual quiz.
Manage Results
Show Unique link of Quiz Result – When you enable the ‘show unique link of quiz results’ option, a special link for viewing quiz results is created. To display this link on the quiz result, you need to add the %LEADERBOARD_POSITION_URL% variable on the result page.
To use the variable in your quiz result page, you need to create a leaderboard page or post with the slug set as “leaderboard.” Here’s how:
- Go to ‘Pages’ or ‘Posts’ and create a new page or post and title it ‘Leaderboard.’
- Add any shortcode for the leaderboard you want, and copy-paste it from the Advanced Leaderboard settings page.
- After that, in the permalink set the slug as ‘/leaderboard/’ after your domain. For Example, http://example.com/leaderboard/
- Finally, publish the page or post.
The %LEADERBOARD_POSITION_URL% variable will automatically detect the created leaderboard page or post and will be displayed as a link on the result page for users to access the leaderboard data.
Note: To properly utilize the variable in the quiz result page, the slug in your link should consist of the word “leaderboard,” such as yourdomain.com/leaderboard/. Anything else like – yourdomain.com/top-leaderboard will not work.
Show rank position in result page – You can display the rank position on the result page based on the number of submissions entered in the input field. To show the rank on the result page, you need to add the %LEADERBOARD_POSITION% variable to the result page template.
WIDGET SETTINGS/CONFIGURE
The Advanced Leaderboard addon also comes with two customizable widgets. These widgets can be found in the WordPress dashboard under Appearance and then under Widgets. Once the Widgets page is selected, you will see two Advanced Leaderboard widgets.
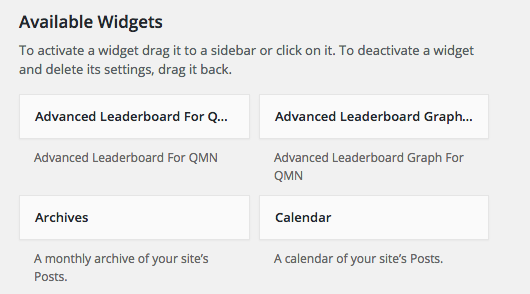
Select where you want these widgets to appear by clicking on them and dragging them to the labeled location on the right side of the Widgets page. Once put in the desired location, you will see a list of options you will need to fill out.
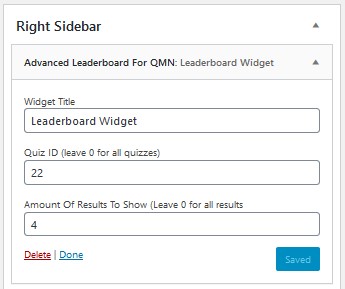
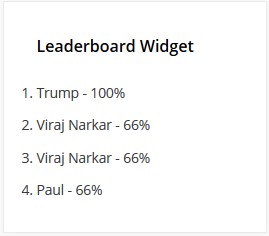
The Widget Title is the title that will be displayed on the widget. The Quiz ID needs to be filled out if you want only one particular quiz’s leaderboard to show. You can find the Quiz ID number on the Quizzes/Surveys main page. Also, select the number of results you would like shown on the leaderboard. Once these options are filled out and you save the widget, the widget should appear on the page.
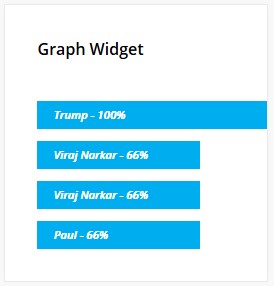
The other widget option includes a graph image, the setup is the same as the widget above.
If you have any trouble implementing the advanced leaderboard shortcodes or have more questions about the process, please fill out a support ticket by going to the WordPress dashboard and selecting ‘help’ in the QSM plugin and our support guru will be able to help you.


