The Drip Integration addon allows Quiz and Survey Master to integrate with the Drip service.
INSTALLATION/SETUP
Once you have purchased the addon, you will have access to download the addon. To install, simply upload the addon as a normal WordPress plugin. To do so, go to the Plugins page and click Add New. Then, click Upload. From there, upload the zip file that you downloaded when downloading the addon. Once the addon has uploaded, you should now have the plugin QSM – Drip Integration listed in your list of plugins. Activate that plugin. Once activated, the plugin will add a new tab called Drip Integration into your Addon Settings page found in the Quizzes/Surveys menu.

SETTINGS/CONFIGURE
Once you are in the Addon Settings for Drip Integration, you will see a form like the one pictured above. First, enter your license key found where you downloaded the addon from. Next, you need to retrieve the API Token to your account in Drip. To do so, log into Drip. Click the “Settings” menu and choose “User Settings”. You will be brought to a page with some information for your account including your API Token.

Copy the token from that field and paste it into your Addon Settings. Next, you need to retrieve the “Account ID” for your account in Drip. To get this, simply log into Drip and access any page such as the Dashboard.

The account ID is the number after the getdrip.com. In the image above, the account ID would be 9291188. Copy this and paste it into the Addon Settings. Now click “Save Changes”. The addon is now ready to be used on your quizzes and surveys!
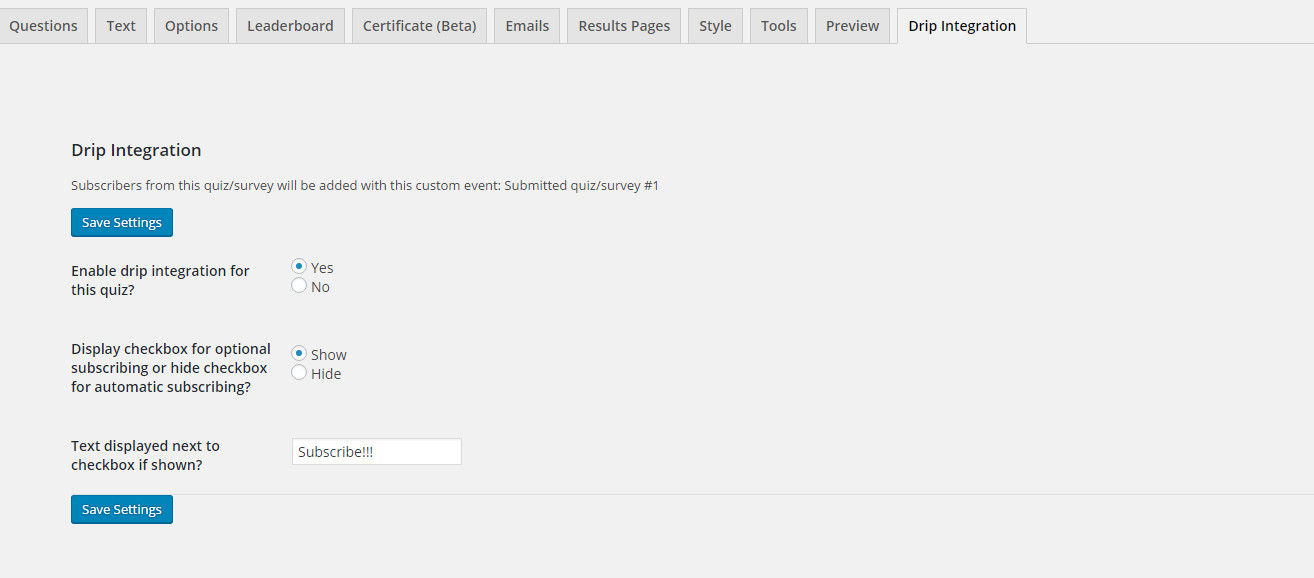
To use this addon with a quiz or survey, edit your quiz or survey and go to the new “Drip Integration” tab.

To enable the Drip integration on a quiz, set the “Enable drip integration for this quiz?” to “Yes”. By showing the checkbox, users will have to click the checkbox in order to be subscribed. If you hide the checkbox, all users will be subscribed to your Drip account. To edit the text shown next to the checkbox for users to subscribe, edit the “Text displayed next to checkbox if shown?” option. Be sure to click “Save Settings” after you make any changes.
Now, when a user submits your quiz or survey, they will be added to your Drip account with a custom event. The custom event is different for each quiz and survey and can be found on the “Drip Integration” tab. For example, in the image above, the custom event is said to be “Submitted quiz/survey #1”. This is shown on the subscriber’s profile like this:

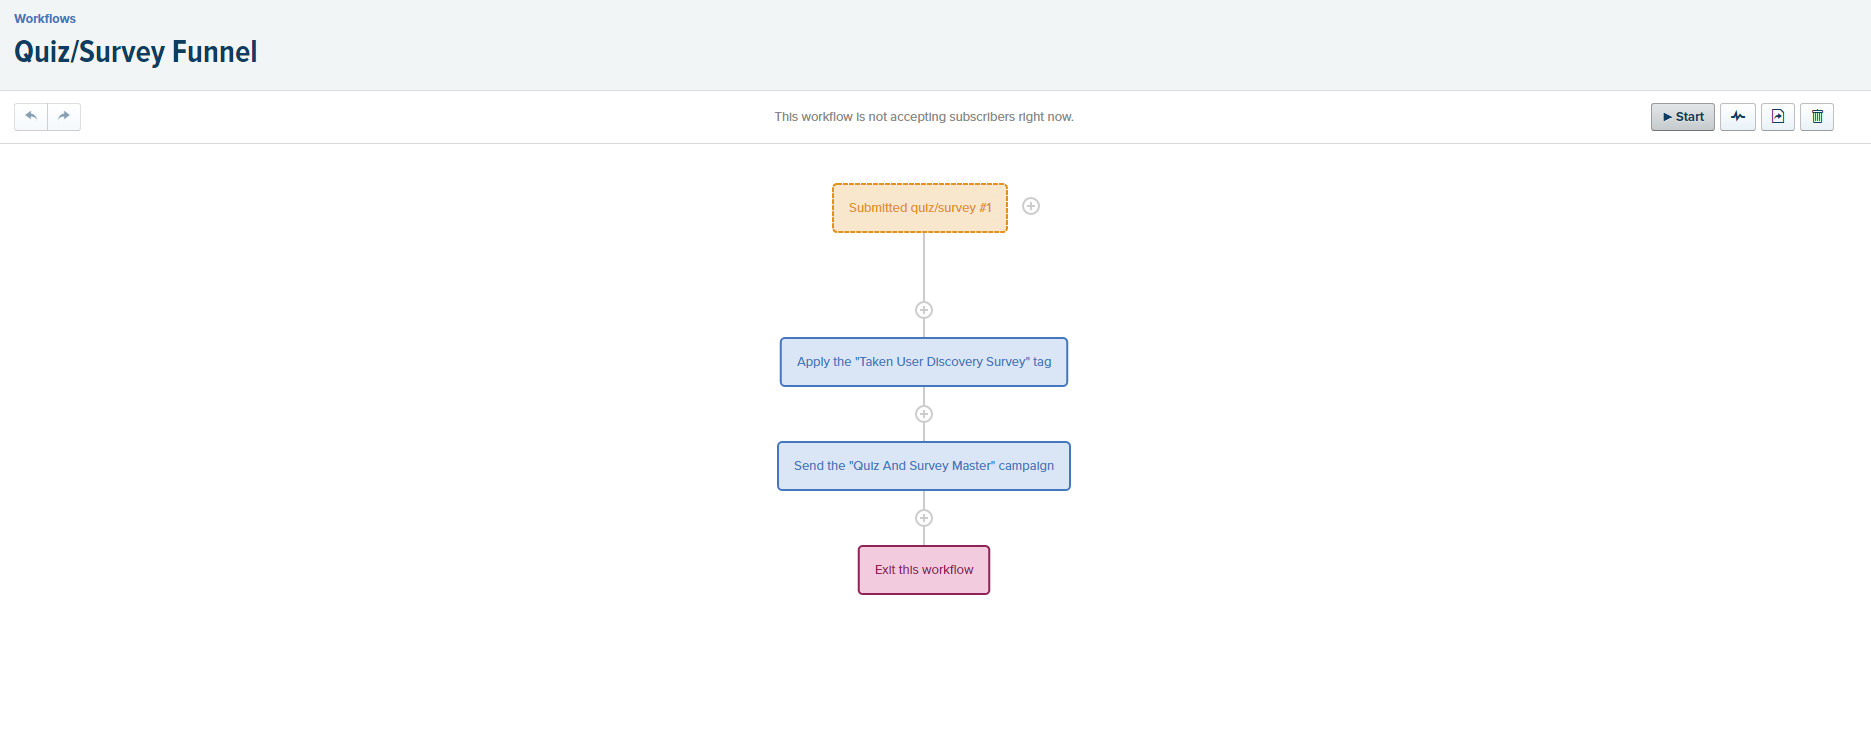
If you click “Toggle Properties”, you can even see the user’s total points or score earned on the quiz. The final step is to set up some automation for subscribers. Using Drip’s workflows, we can add custom tags and assign a campaign to subscribers. An example workflow for using this addon would be like this:


