The Campaign Monitor Integration allows Quiz and Survey Master to integrate with the Campaign Monitor service.
Installation/Setup
Once you have purchased the addon, you will have access to download the addon. To install, upload the addon as a normal WordPress plugin. To do so, go to the Plugins page and click Add New. Then, click Upload.
From there, upload the zip file that you downloaded when downloading the addon. Once the addon has uploaded, you should now have the plugin QSM – Campaign Monitor Integration listed in your list of plugins. Activate that plugin. Once activated, the addon will add a new tab in the Addon Settings labeled “Campaign Monitor Integration”.
Settings/Configure

Before you can use the Campaign Monitor addon, we must first enter in the license key and the Campaign Monitor API key.
Adding Your License Key
Enter your license key from your account into the “Addon License Key” field on the “Campaign Monitor Integration” tab of the “Addon Settings”.
Adding YOUR API KEY
To get started, log into Campaign Monitor. In the top right corner, you will see your name (or the name on the account). Click on your name. In the menu that appears, select “Account Settings”.
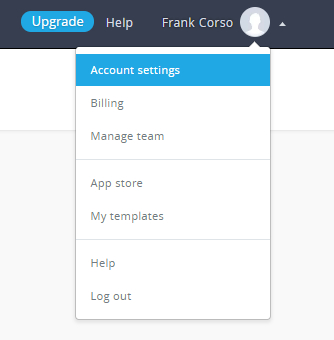
Once the page loads, you should see a page similar to the image below.
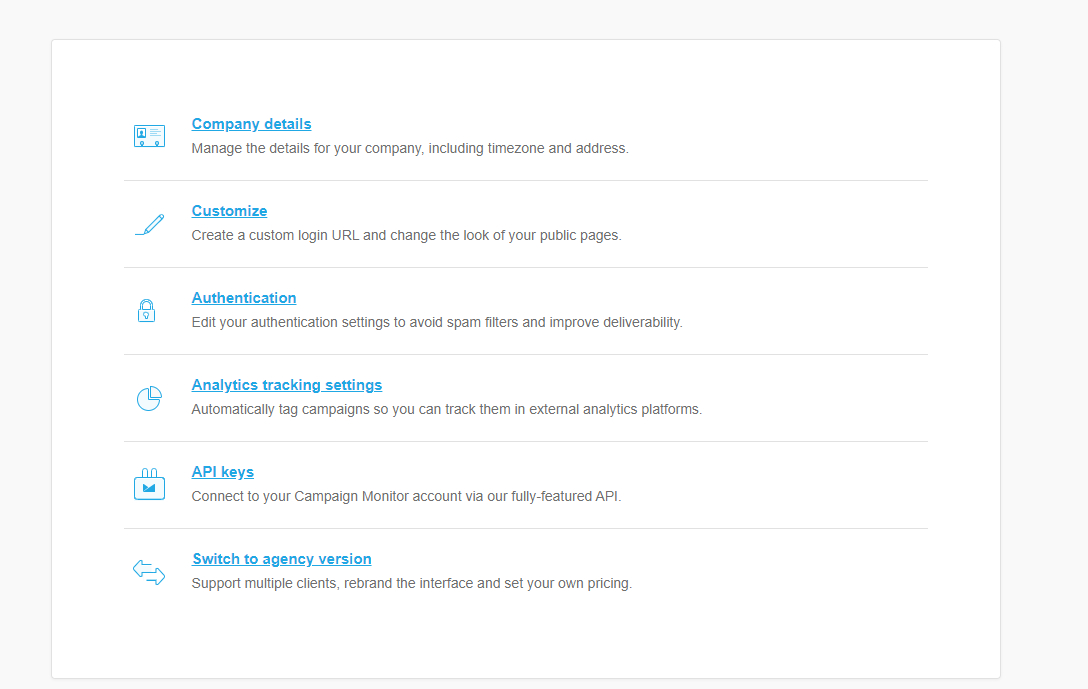
Click on the “API keys” link. It will take you to a page like in the image below.

You may have to click “Show API Key” to get the API key to appear. Copy the API key and paste it into the “Your Campaign Monitor API Key” field back in the “Addon Settings” page.
Once you have entered your license key and API key, be sure to click “Save Changes” to save the page.
SETTING UP THE QUIZ INTEGRATION
Once your API key has been added in, you can use the new “Campaign Monitor” tab when editing your quiz or survey.
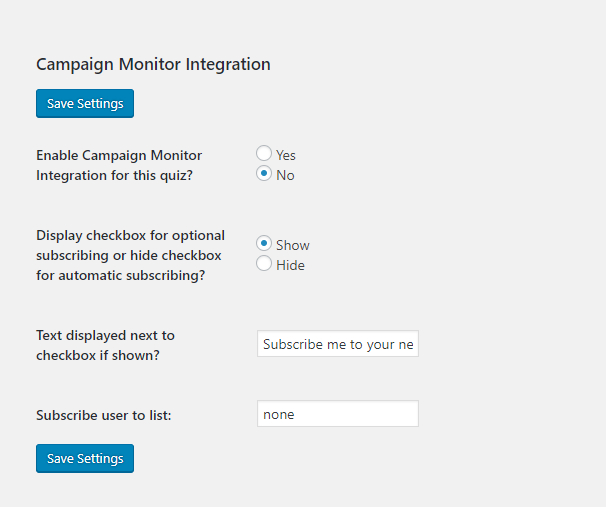
First, if you want this quiz or survey to be integrated with Campaign Monitor, then set the “Enable Campaign Monitor Integration for this quiz” to “Yes”.
Next, you can allow the user to choose to subscribe by checking a checkbox or you can have the user automatically subscribed. To allow the user to choose, set the “Display checkbox for optional subscribing or hide checkbox for automatic subscribing” option to “Show” and then fill in the “Text displayed next to checkbox if shown”. If you want the user to be automatically subscribed, simply set the previous option to “Hide”.
Lastly, you need to enter which Campaign Monitor list you would want to add the user to. To find the List ID, go back to your account in Campaign Monitor. Then, click “Lists & subscribers” at the top of the Campaign Monitor website. Then click on the list you would like to use. This should load a page similar to the image below.
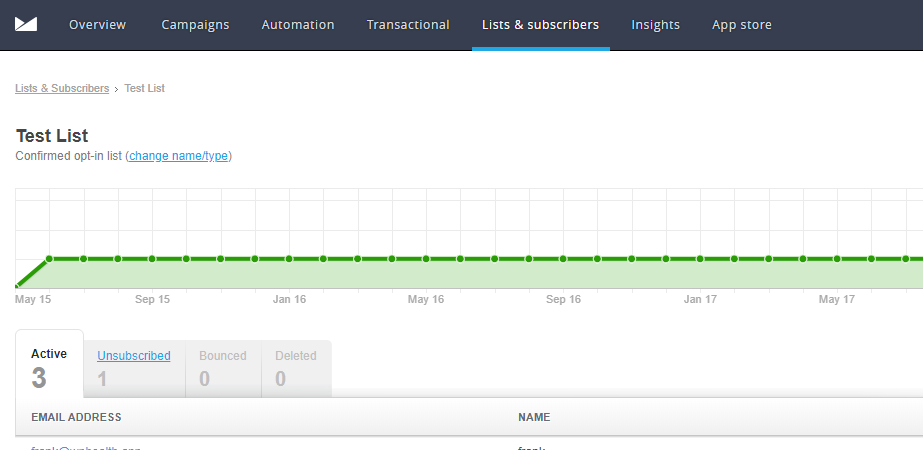
Underneath the list’s name, you will see a small link labeled as “change name/type”. Click on that link to bring up the edit page like in the image below.
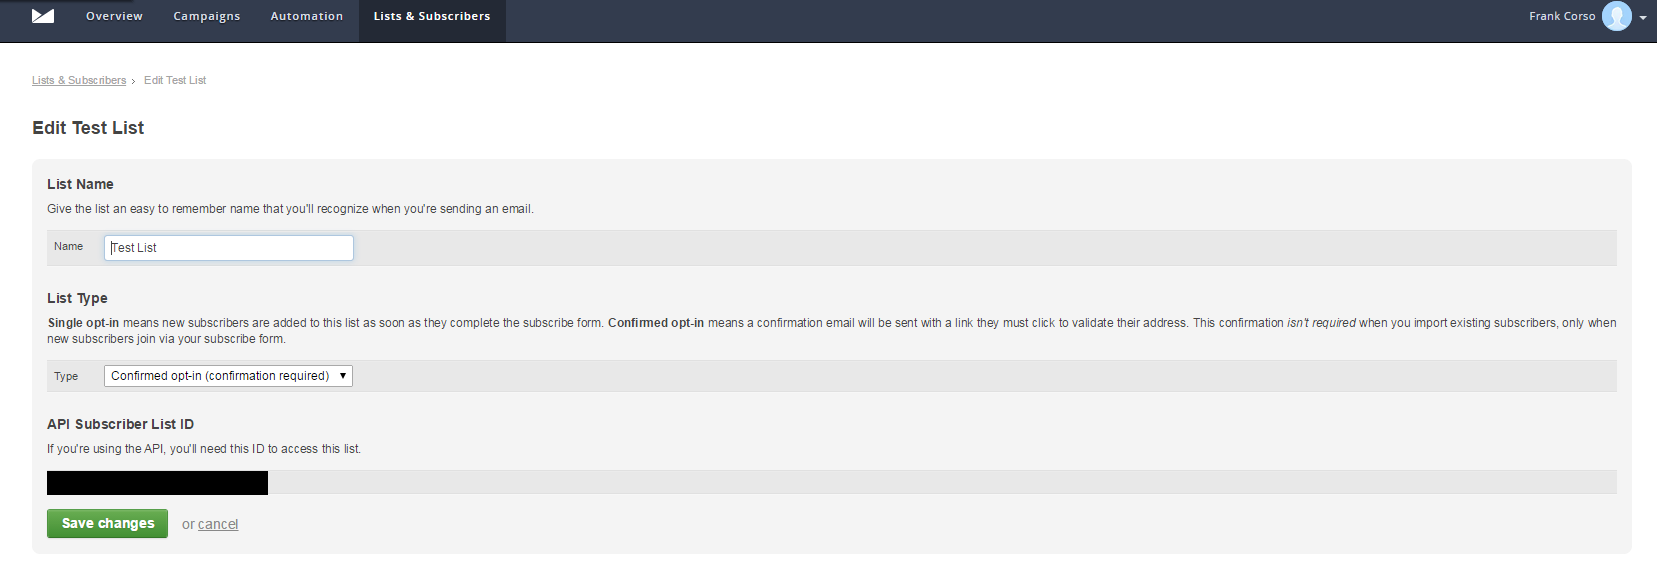
Copy the data from the “API Subscriber List ID” field and paste it into the “Subscribe user to list:” back in the “Campaign Monitor” tab of your quiz or survey.
Be sure to click “Save Settings” on the “Campaign Monitor” tab when you are finished to save your changes.


