The ConvertKit Integration addon allows you to subscribe quiz and survey takers to your forms, courses, and tags in ConvertKit.
Installation
Once you have purchased the addon, you will have access to download the addon. To install, simply upload the addon as a normal WordPress plugin. To do so, go to the Plugins page and click Add New. Then, click Upload. From there, upload the zip file that you downloaded when downloading the addon. Once the addon has uploaded, you should now have the plugin QSM Convertkit Integration listed in your list of plugins. Activate that plugin. Once activated, the plugin will add a new tab labeled ConvertKit Integration on your Addon Settings page.

Configure ConvertKit
After entering the license key, next you will need to enter your API Key from your ConvertKit account.
1. If you haven’t created one, sign up for a ConverKit account.
2. After logging in, click on your profile name and select the Settings menu.

3. Select Developer from the sidebar, and you’ll see the API section.
4. Copy your API key and paste it in the respective field in ConverKit settings in QSM
5. Then, click the Show button under the API Secret, copy the API Secret key, and paste it in the ConvertKit integration settings in QSM

Set up ConvertKit Integration
Once your ConvertKit account is linked, you can integrate the quiz or survey with it

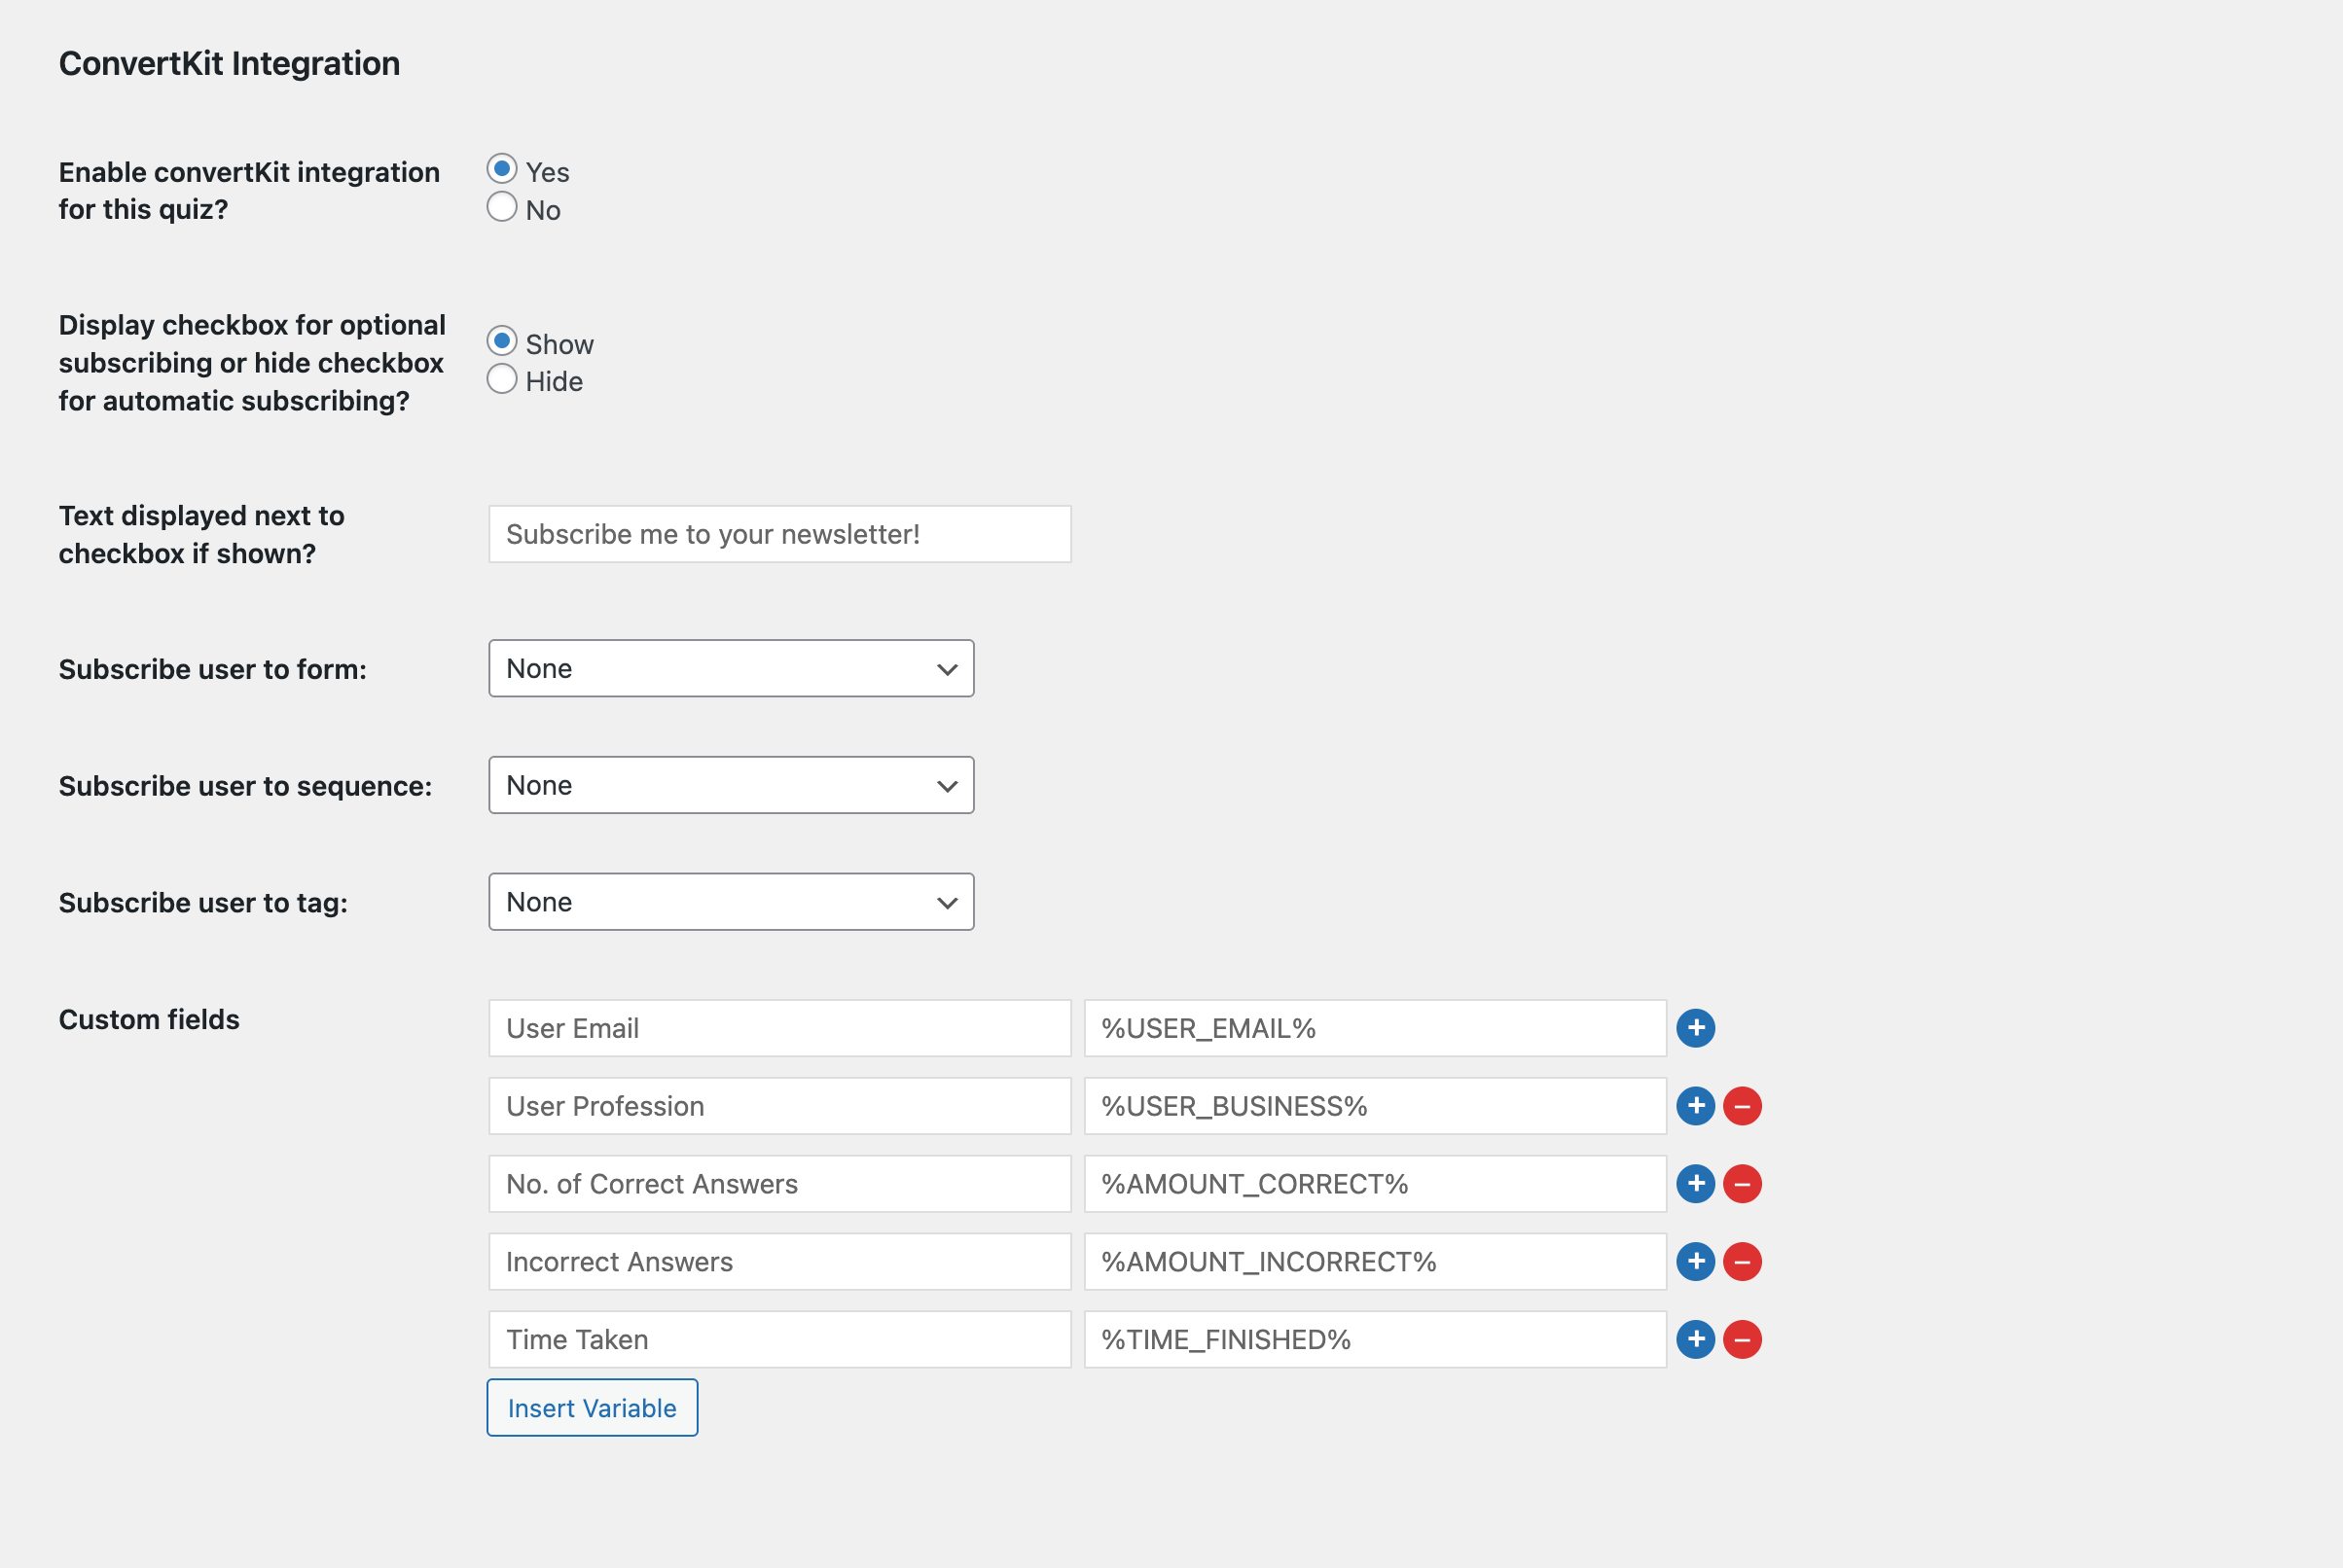
1. Edit your quiz or survey and go to Add-ons → ConverKit
2. Select Yes to enable the ConvertKit integration for the quiz
3. Choose your subscription display option
- Select Show if you want to display a checkbox for optional subscribing
- Select Hide if you want to automatically subscribe users without showing a checkbox.
4. If you have selected the Show option, then enter the text to display next to the checkbox for subscribing
5. Choose what the user will subscribe to; there are three options that you can configure:
- Subscribe the user to form
- Subscribe user to sequence
- Subscribe user to tag
6. You can also define custom fields to send additional custom data and associated values with those fields to ConverKit. Copy variables from the Insert Variables button to add values in the custom field.

Creating an Email Sequence
Subscribe users to a specific email lists based on their responses, create an email sequence in ConvertKit which will be executed automatically based on the set email conditions in the emails tab of QSM.
Step 1: Creating Email Sequence in ConvertKit

Note: To use this feature, you first need to create a sequence in the convertkit account. Setting up a Sequence in Convertkit is a premium feature and will only work completely for paid customers. However, you can try it out partially with a newly signup trial account and that will be available for just 14 days.
- Go to Send > Sequences in the top navigation.
- Click + New Sequence and choose a default template.
- Rename your Sequence by clicking the pencil icon.
- Compose your Sequence emails in the Content tab.
- Use the Emails tab to manage email sequence and send days. Refer this ConvertKit Documentation to know more.
Step 2: Select the Subscriber Sequence
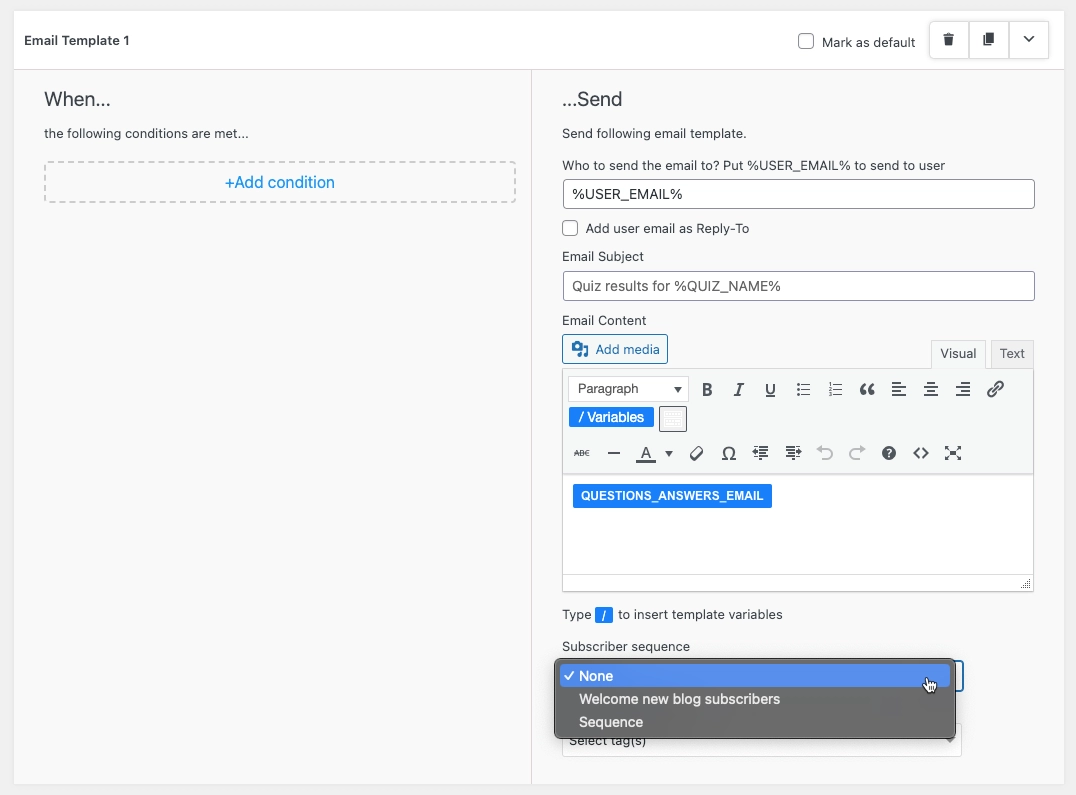
Once your email sequence is created in ConvertKit the same will be reflected in the QSM’s Email Tab – Subscriber Sequence dropdown.

Create email conditions that subscribe user to the assigned sequence by selecting the appropriate Subscriber Sequence in the emails.
After successfully completing the steps and setting up the emails sequence you can subscribe quiz takers to different email sequences based on their quiz results.


