The AI Integration add-on revolutionizes how you create quizzes & surveys by integrating AI directly into the QSM plugin. Instead of creating a quiz manually, the add-on allows you to generate high-quality questions & answers by simply describing what you need to the AI and saving you hours of creating a quiz.
In this documentation, we’ll walk you through the process of setting up QSM AI to create quizzes or surveys instantly.
Installation Setup
After purchasing the QSM AI add-on, you’ll receive a zip file. Download it onto your device. Then,
- Go to your WordPress site,
- Navigate to Plugins > Add New,
- Select the zip file, & Upload it to the site.
- Click Install No, and once installed, click Activate Plugin to enable QSM AI.
Once the add-on is activated, it can be found under Installed Add-ons in the QSM menu from the side panel.
To start using the add-on, enter the license key provided with your purchase.
- Go to the QSM > Extensions > AI Integration, click on Settings
- Copy the license key from your QSM account
- Paste the license key in the ‘Manage License’ tab within the settings

Note – If you already have the QSM Add-on Installer, things get even simpler. Just go to QSM > Extensions, find QSM AI, and click Install & Activate. No manual upload needed!
📌 For a full guide, check our detailed tutorial: How to Install Add-ons
AI Integration Settings
Once the add-on is activated with the license key, you can move to the AI Integration Settings.
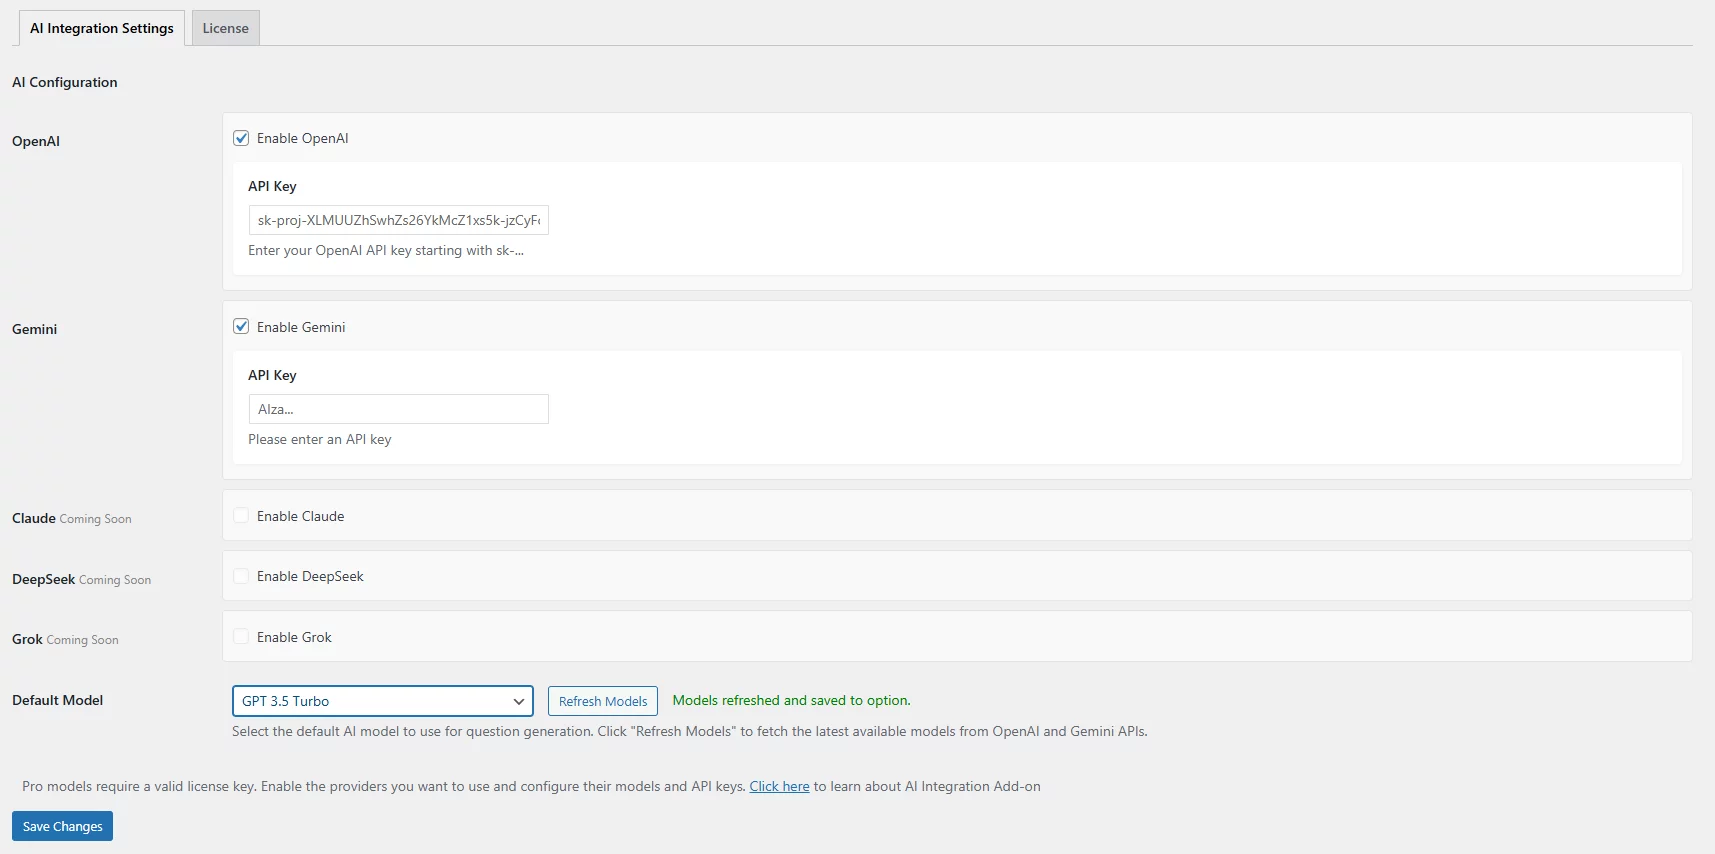
Before generating questions, you’ll need to connect your OpenAI account with the QSM. To connect the plugin with the AI, you’ll require an API Key.
Here’s how you can connect:
- Log in to your OpenAI account
- Go to the API Keys section and create a new secret key
- Copy the generated API Key
- Paste it into the API Key text box inside the AI Integration Settings panel in the QSM.
📌 Important Tip – To use the AI Integration addon, you must have an OpenAI account with sufficient available credits or active billing. Without this, the addon will not function.
Next, you can connect to Gemini AI with the QSM for your quiz.
All you’ve to do is:
Enable Gemini and enter the Gemini API Key (you can get the API key from Google AI Studio).
Once connected, select the Default AI Model to be used for generating questions and answers (e.g., GPT-3.5 or GPT-4, depending on your API access).
Furthermore, you can Refresh Models in the “Default Model” option, and it will fetch the latest model available under OpenAI & Gemini.

⚠️ *Note: If you’re using a paid model (like GPT-4), make sure your API key has the appropriate access level for those services.
🔜 Coming Soon: OpenAI is just the first step. We’re working on bringing support for more AI models like Claude, DeepSeek, & Grok in future updates—stay tuned for even more flexibility.
Creating Quizzes using AI Integration
When you’re ready to create your first AI-generated quiz, start a new quiz or survey as you normally would in QSM.
In the Questions tab, click the “Generate with AI” button in the top-right corner.

This opens a pop-up box where you can input a description of exactly what kind of quiz questions & answers you need.
(If you click on the AI Configuration button, it will lead you to the AI Integration Settings page, from where you can configure the AI model.)

Example Prompt:
Create English quiz questions for students between the 5th and 10th grades. Mix grammar, vocabulary, and reading comprehension. Keep the language age-appropriate and include a short reading passage for 2 of the questions.
The key to great results is providing clear, detailed instructions in your prompt.
Further, to fine-tune the results even more, you can enable “Additional Options,” which allows you to:

- AI Model: Choose from your connected OpenAI models..
- Question Type: Multiple-choice, true/false, fill-in-the-blank, etc.
- Difficulty: Select the difficulty level for your quiz – easy, medium, or hard.
- Number of Questions: Set how many questions you need.
- Correct Answer Points – Select the points to be given for to correct answer
- Page – Choose the page number to add the generated questions.
📌 Note – Add a New Page first and then prompt the AI to generate questions for that page.
Once you have configured it all, click on the Generate Questions button. It will typically take a few seconds & you’ll get your questions & answers.
Regenerate Individual Questions & Answers
After generating your questions, you might want to make adjustments to individual questions or answer choices to better suit your needs.
You can regenerate individual questions by clicking on the Edit option for a specific question and then hitting the “Regenerate” button.

The AI produces a new version of the question with the same topic and difficulty level.
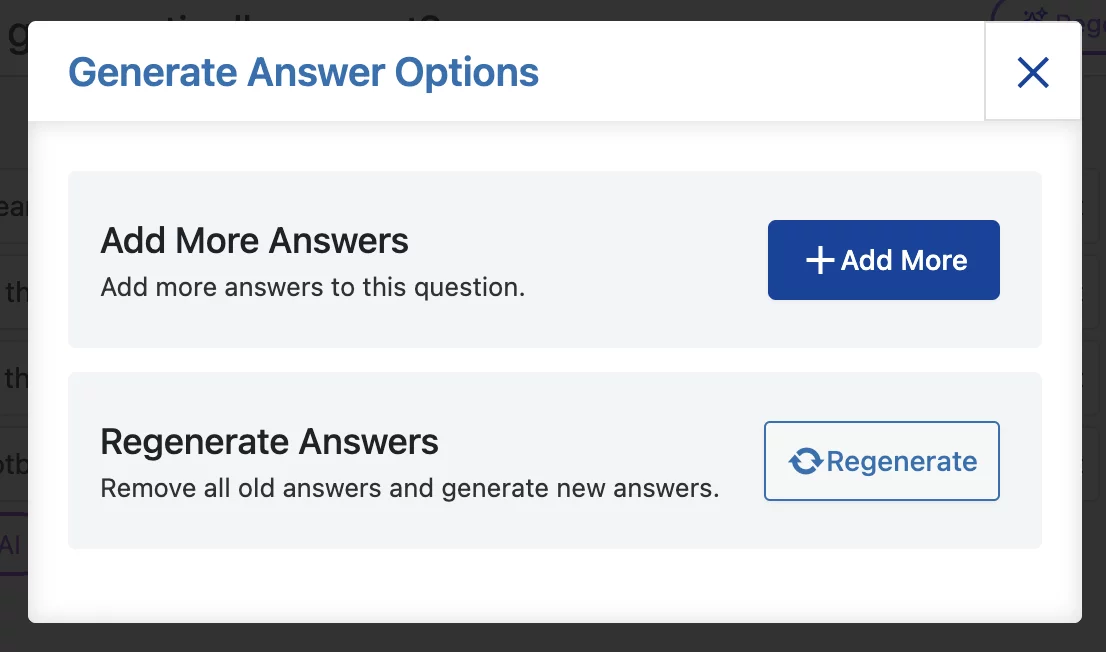
For answers, the Answers with AI option provides two useful functions.
- You can completely “Regenerate” all answer choices for a question
- Use the Add More Answers option to supplement existing choices with additional options while keeping the other answers as it is.

Once you’re satisfied with your AI-generated questions & answers, simply proceed through the regular quiz or survey publishing.


