Do you want to create a Survey in WordPress? Surveys are the best way to gather feedback and to know your Product/Service much better from the user’s perspective.
You can create efficient reports in the form of Pie charts, Bar graphs, and Box plots. You can also collect email addresses using the quizzes and send them to a variety of services like MailChimp, AWeber, ConvertKit, and many more.
The collected data will help you make better decisions and plan for future business ideas or implement certain improvements that will tweak your business and help you generate more income. You can do much more than just that!
Also check, The Best WordPress Survey Plugins of 2023
Why Create a Survey in WordPress?

Why should we create a Survey in WordPress? Why not any other Survey/Online Form Tool?
The answer is that with WordPress data will be stored in a known Server/Database whereas using any other online tool you don’t know where exactly the data will be stored may be on third-party servers and you may have limited customization options.
Some of these tools/forms also allow just a limited number of responses to be collected from users and charge hefty amounts or sometimes bill you the monthly amount for the service.
Whereas, in WordPress, you can make use of Plugins to make Surveys and store the data in your website’s database and have full control over it.
Adding Surveys to WordPress
To create a Survey in WordPress we are going to make use of Quiz and Survey Master. It is the Best Quiz, Exam, and Survey Plugin for WordPress!
Don’t believe us? Quiz and Survey Master has the highest number of Positive Reviews on WordPress.org also says the Statistics.

Quiz and Survey Master is easy to use and there is no cap on creating surveys or on user responses; you can create an unlimited number of Quizzes, Surveys, Polls, and Exams using the Free Plugin. It is highly customizable and flexible.
Step 1: Download and Install the Plugin
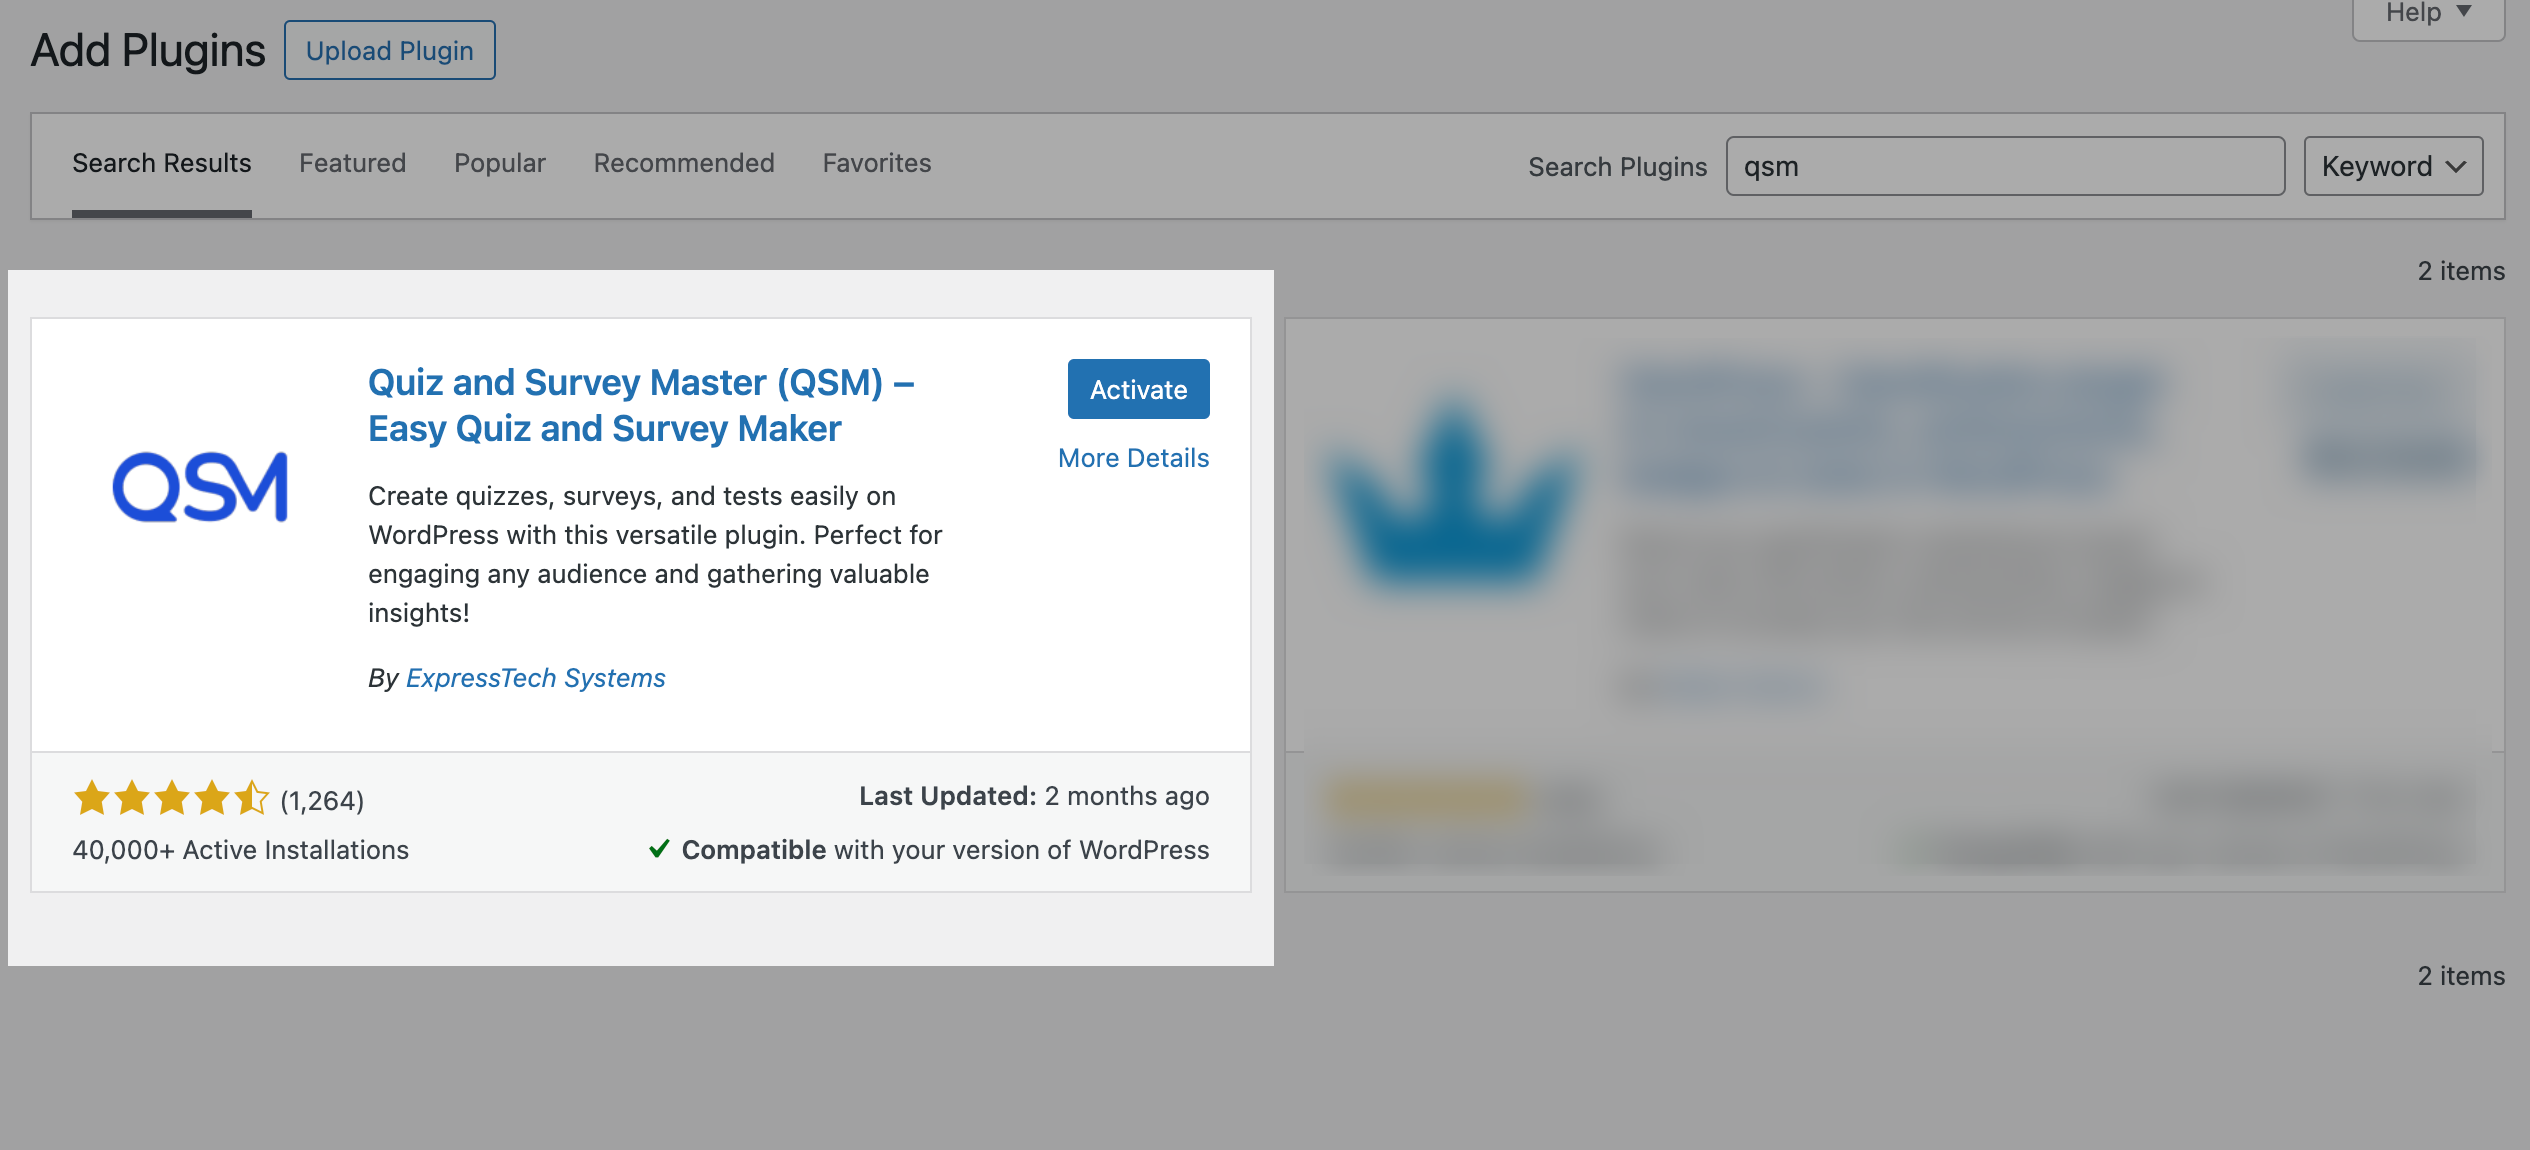
The first step to Creating a Survey in WordPress is to Download the Plugin to your WordPress website and install and Activate it.
Step 2: Create a New Survey
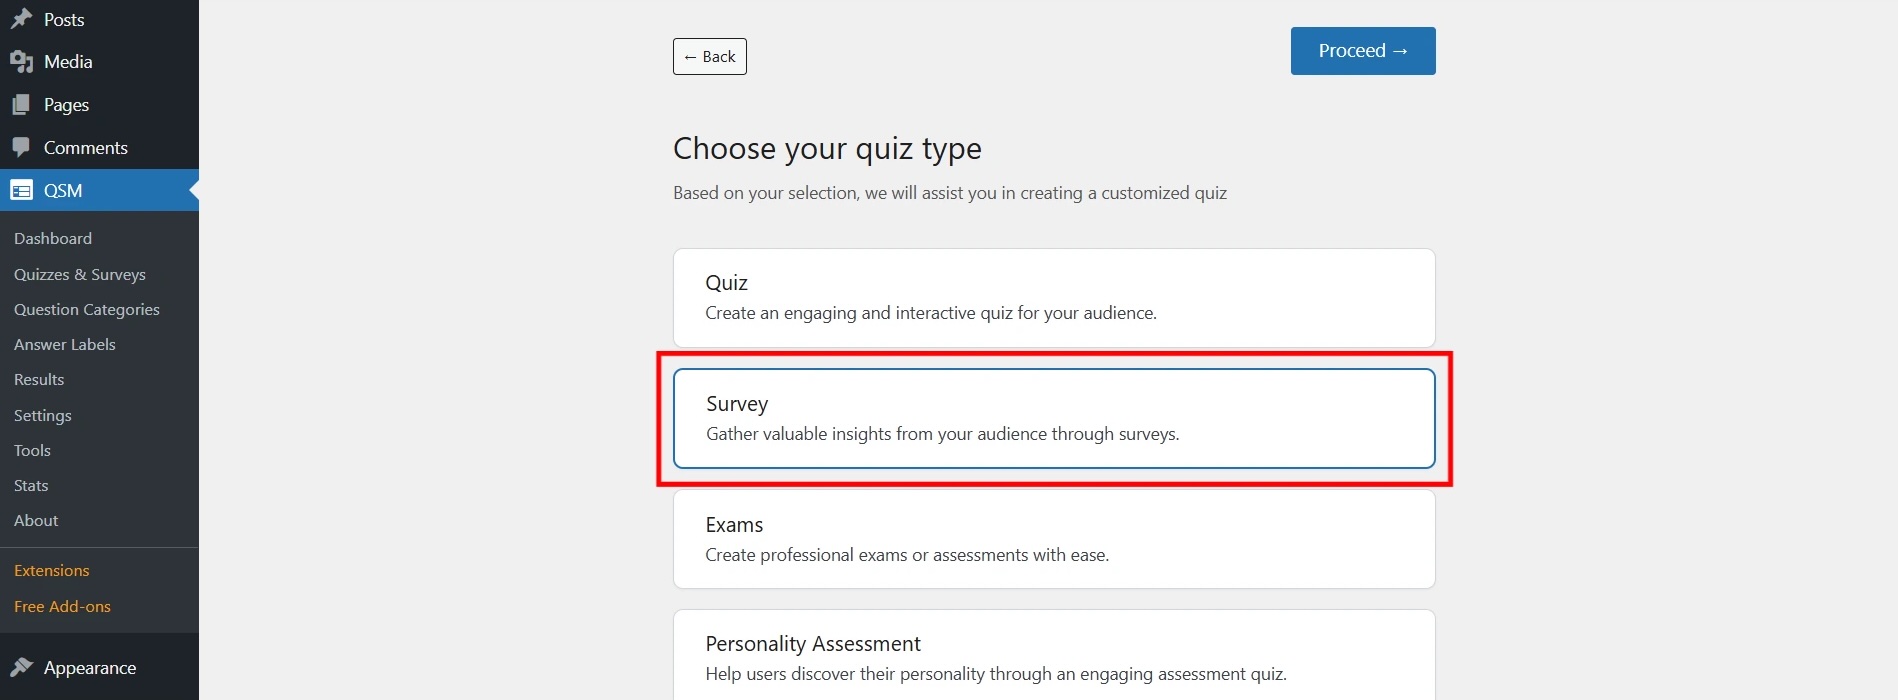
After installing the plugin, you will notice a new Quiz and Survey Master Menu on the sidebar of your WordPress admin panel.
Click on it, and Press the Create New Quiz/Survey Button on the QSM Dashboard.
A new window appears with Multiple Quiz/Survey Templates, select Survey, and give it a name in the above blank field. Press the Create Quiz Button once done.
Step 3: Enter the Questions
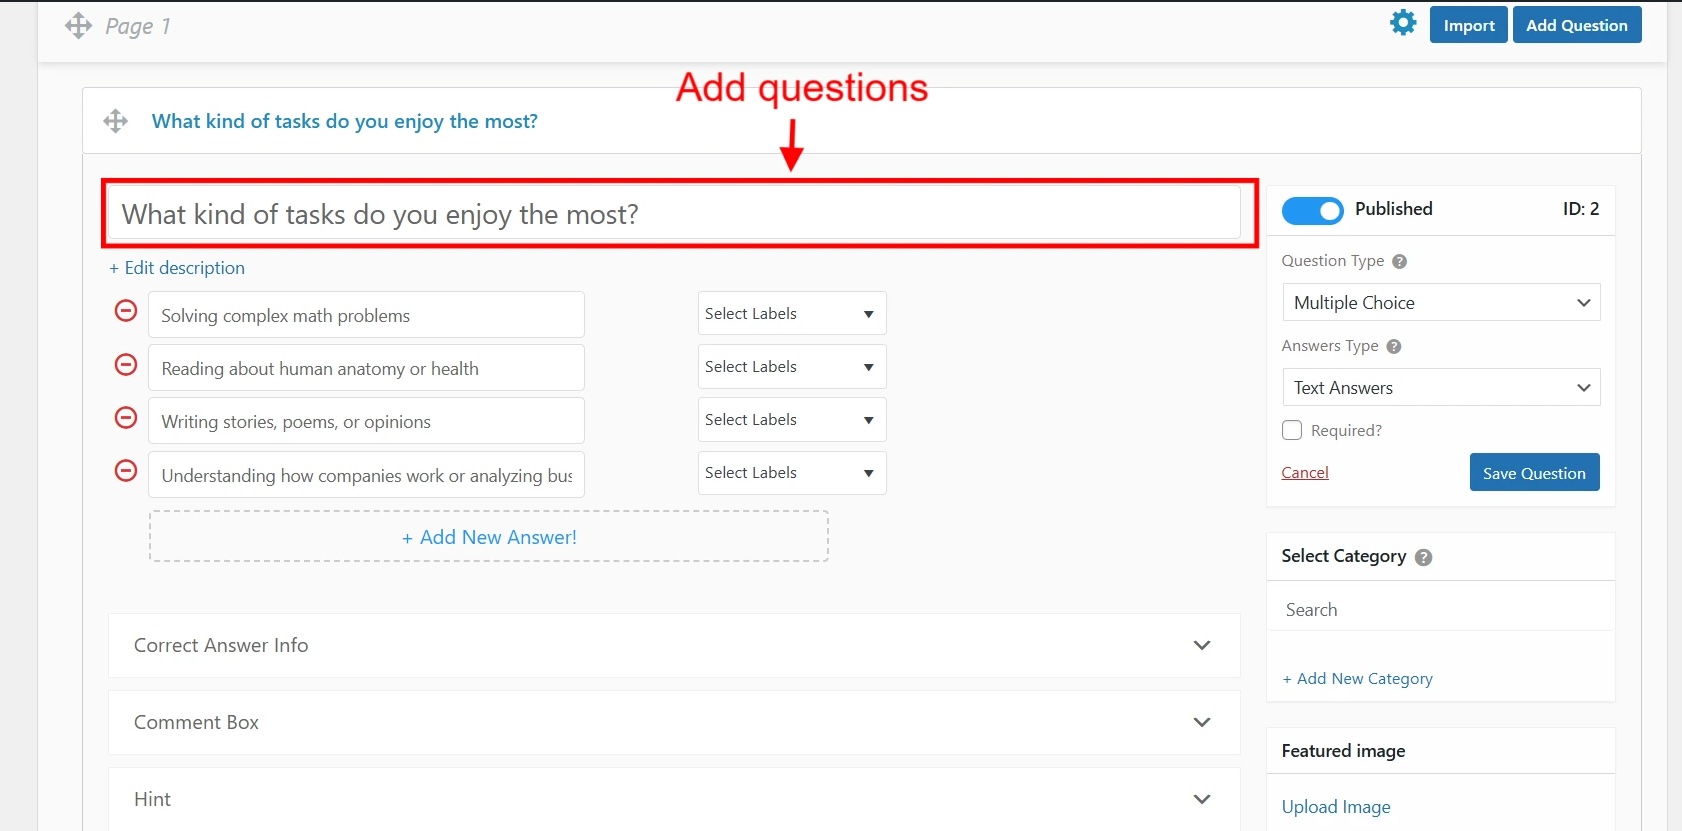
After hitting the Create Quiz button, you will be taken to the Questions Tab. Here you can add the Questions of the Survey and their answers.
We have 15 Question Types to choose from, like Multiple Choice, File Upload, Date, Horizontal Multiple Choice, Down, Small Open Answer, Multiple Response, large Open Answer, Text/HTML Section, Number, Accept, Captcha, Horizontal Multiple Response, Fill in the Blank and Polar(Slider).
For this Survey, we have used the Multiple Choice Question Type. If you want to the user to answer the Question you can tick the Required. Checkbox.
Add the Question Title and Enter the Question in the field also you can add multiple answers by pressing the Add New Answer button. You can add the Question to a particular category as seen in the above image.
Just like this, you can create unlimited questions of various Question Types, with multiple pages.
The rest of the fields are not mandatory, you can play with them if you want. After making your changes Hit the Save Question Button.
Step 4: Collecting User Details
In the Contact Tab, You can collect details of the user taking the Survey and store them in the Database.
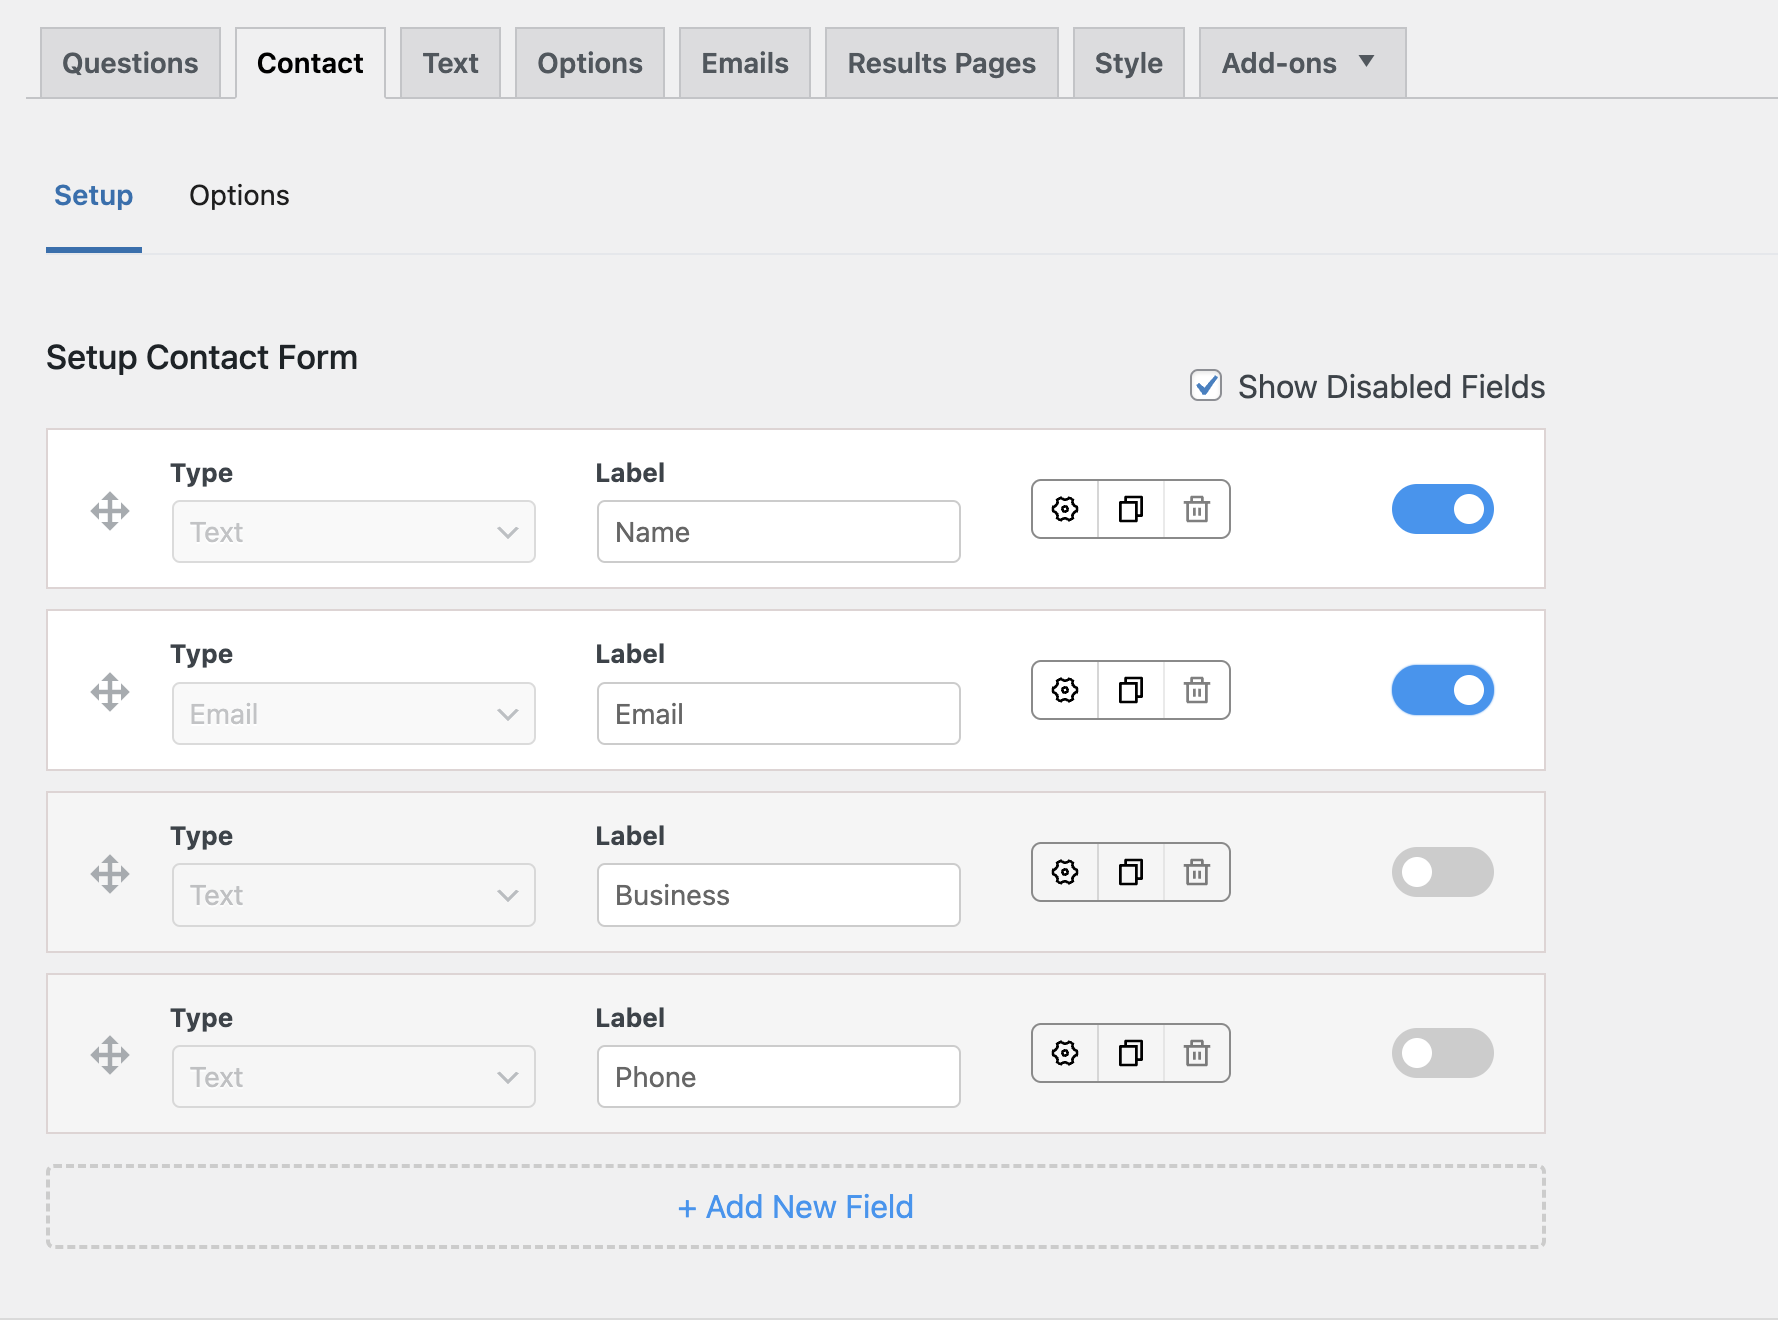
You can collect details like Name, Email Address, Phone Number, Business, etc., and can also display a checkbox for the Terms and Conditions.
Click, the Save Contact Fields Button once done.
Step 5: Display a Message to the User
In the Text Tab, you can display a message to the user in various instances, notably a welcome message before the Survey Starts. You can also display an image or any other media if you want.
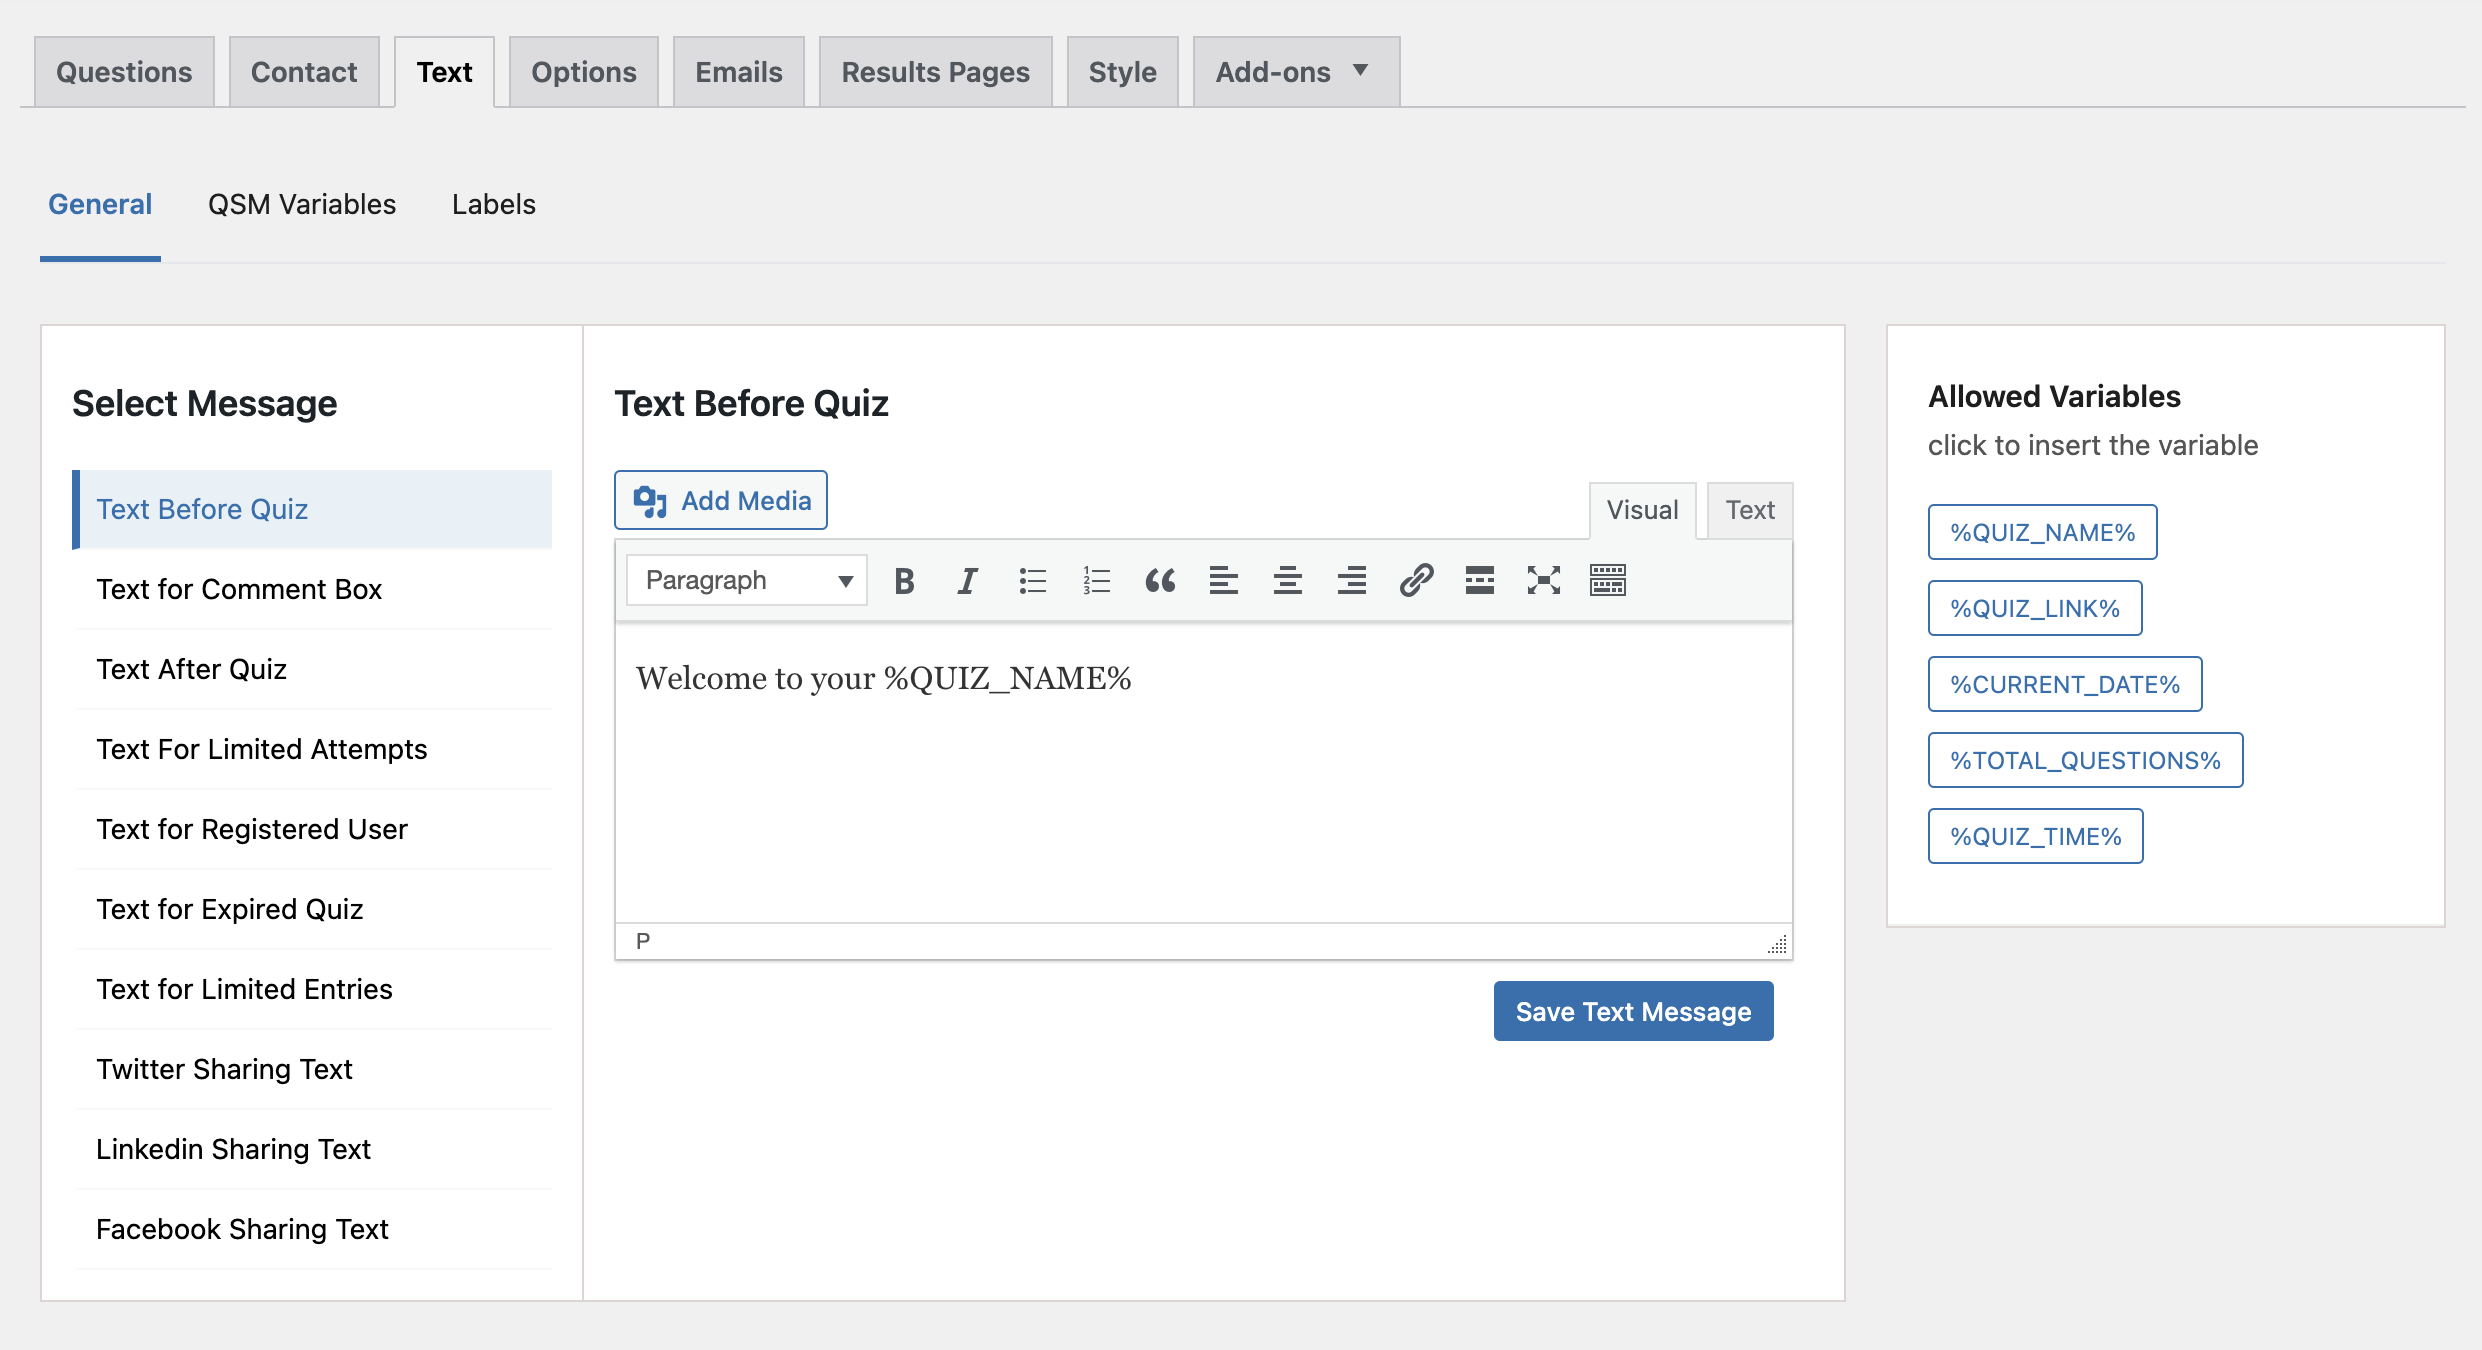
And also Customize Labels for Submit Button, Previous Button, etc. Hit the Save Text Message Button once done.
Step 6: Configure the Working
In the Options Tab, you can configure the overall working of the Quiz.
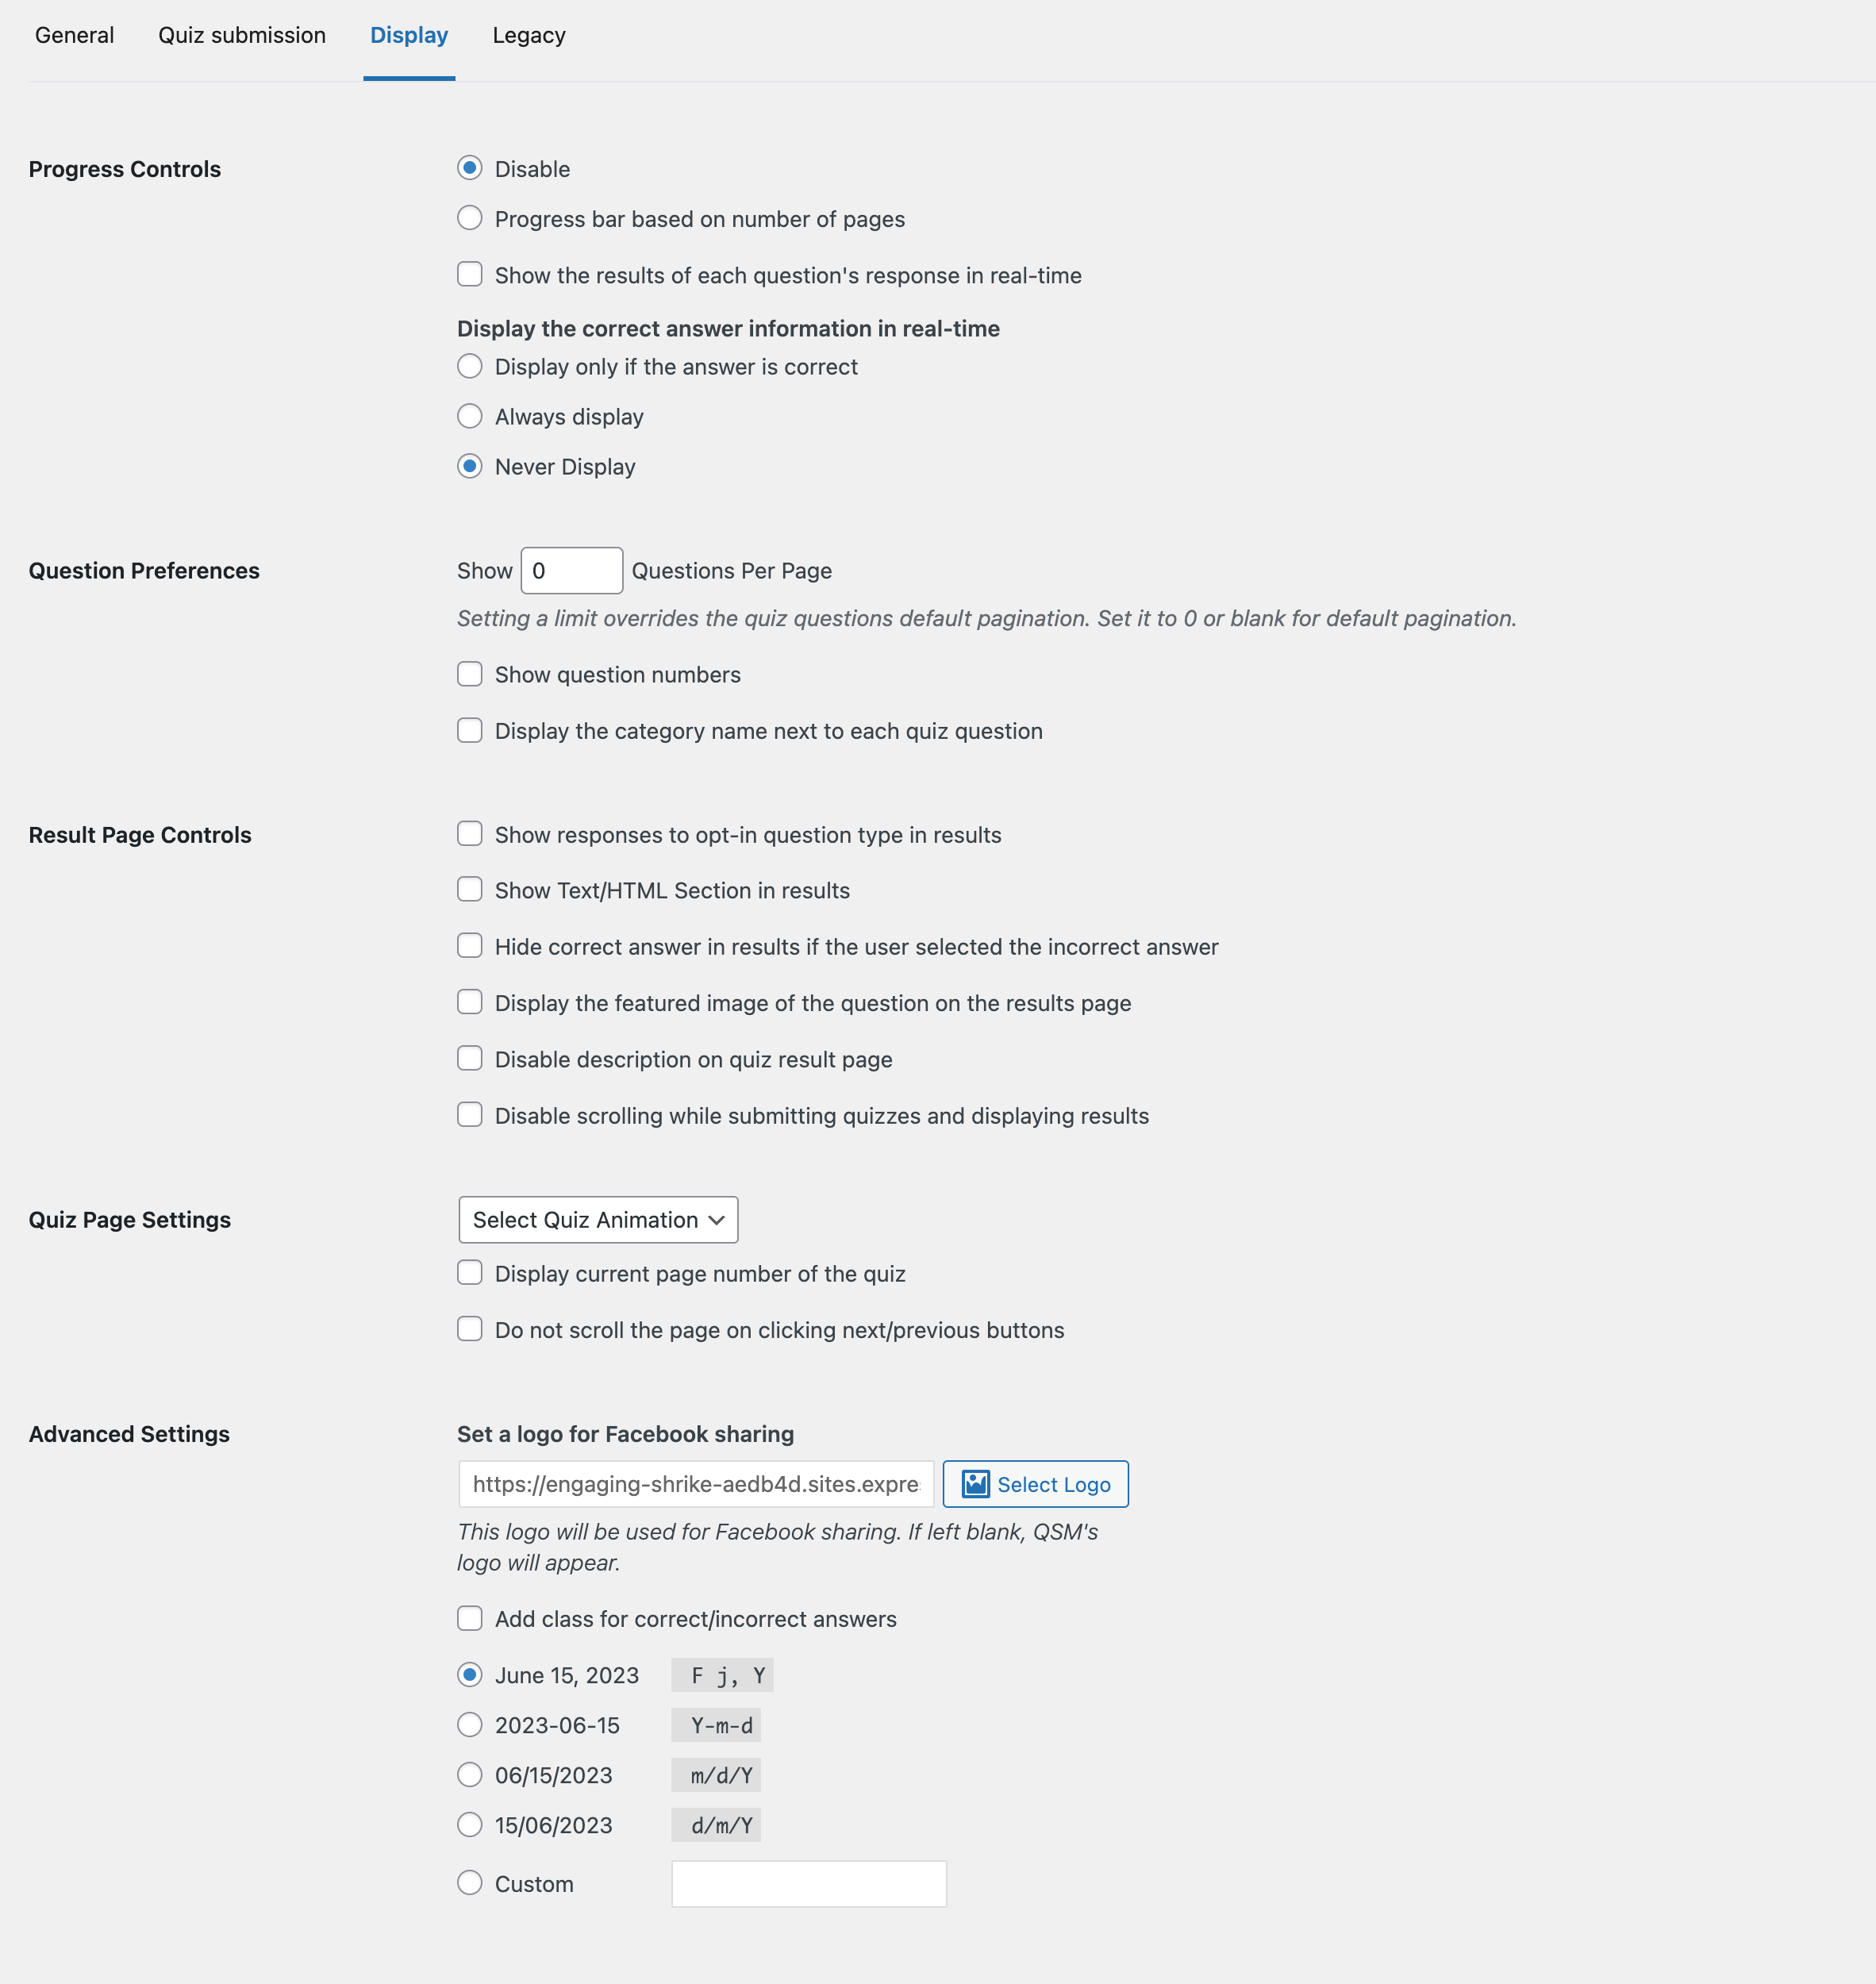
You can enable a progress bar, limit the number of questions per page, set a time limit for survey completion, limit the number of entries, set a Quiz Publish Date, and many more stuff.
Don’t forget to hit the Save Changes button at the end of the Page.
Step 7: Setup Emails with conditions
In the Emails Tab, you can set up the emails that will be sent to the users to their email ID and the Quiz Admin.
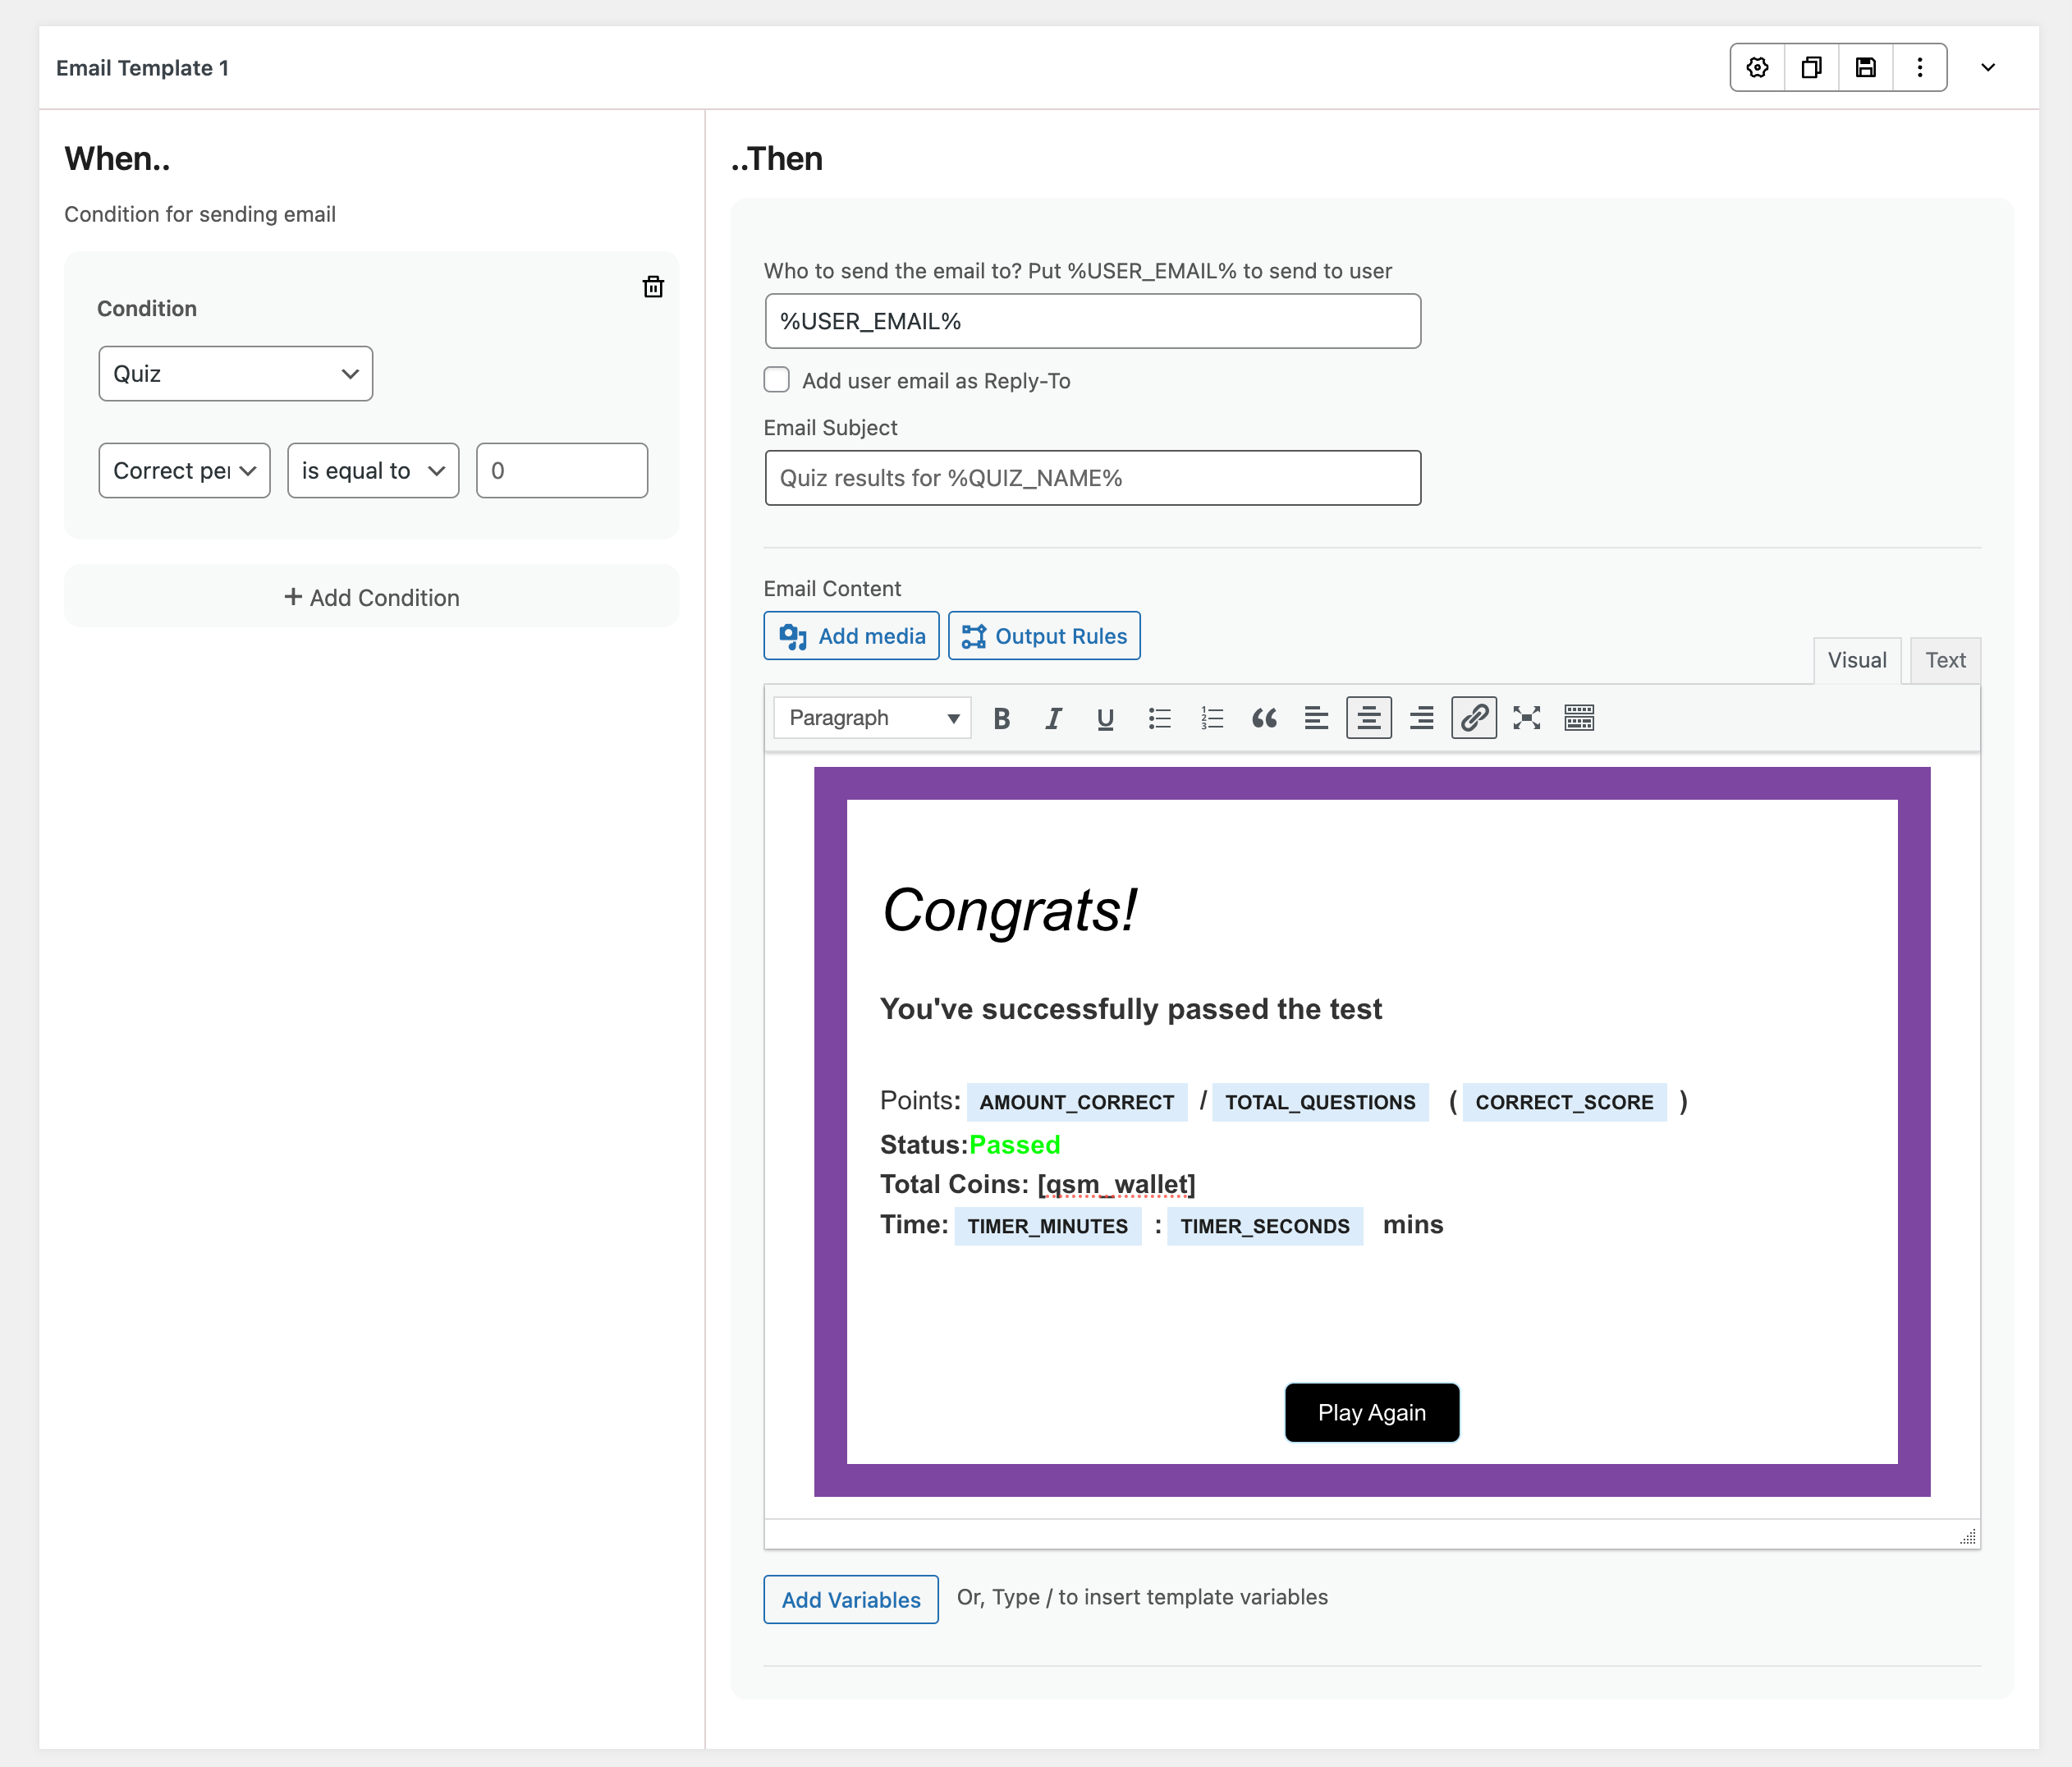
Make use of the Template Variables to automatically insert the user name, points earned, quiz name, etc. You also can add conditions for when the email should be triggered.
You can send the users an acknowledgment email thanking them for taking the Quiz. You can customize it by adding an image or other media to make it more appealing.
Hit the Save Emails button once done.
Step 8: Configure the Results Page
In the Results Pages Tab, you can configure what to display on the results page.
This page is displayed when the user completes the Quiz. You can customize the content by adding images and other media.
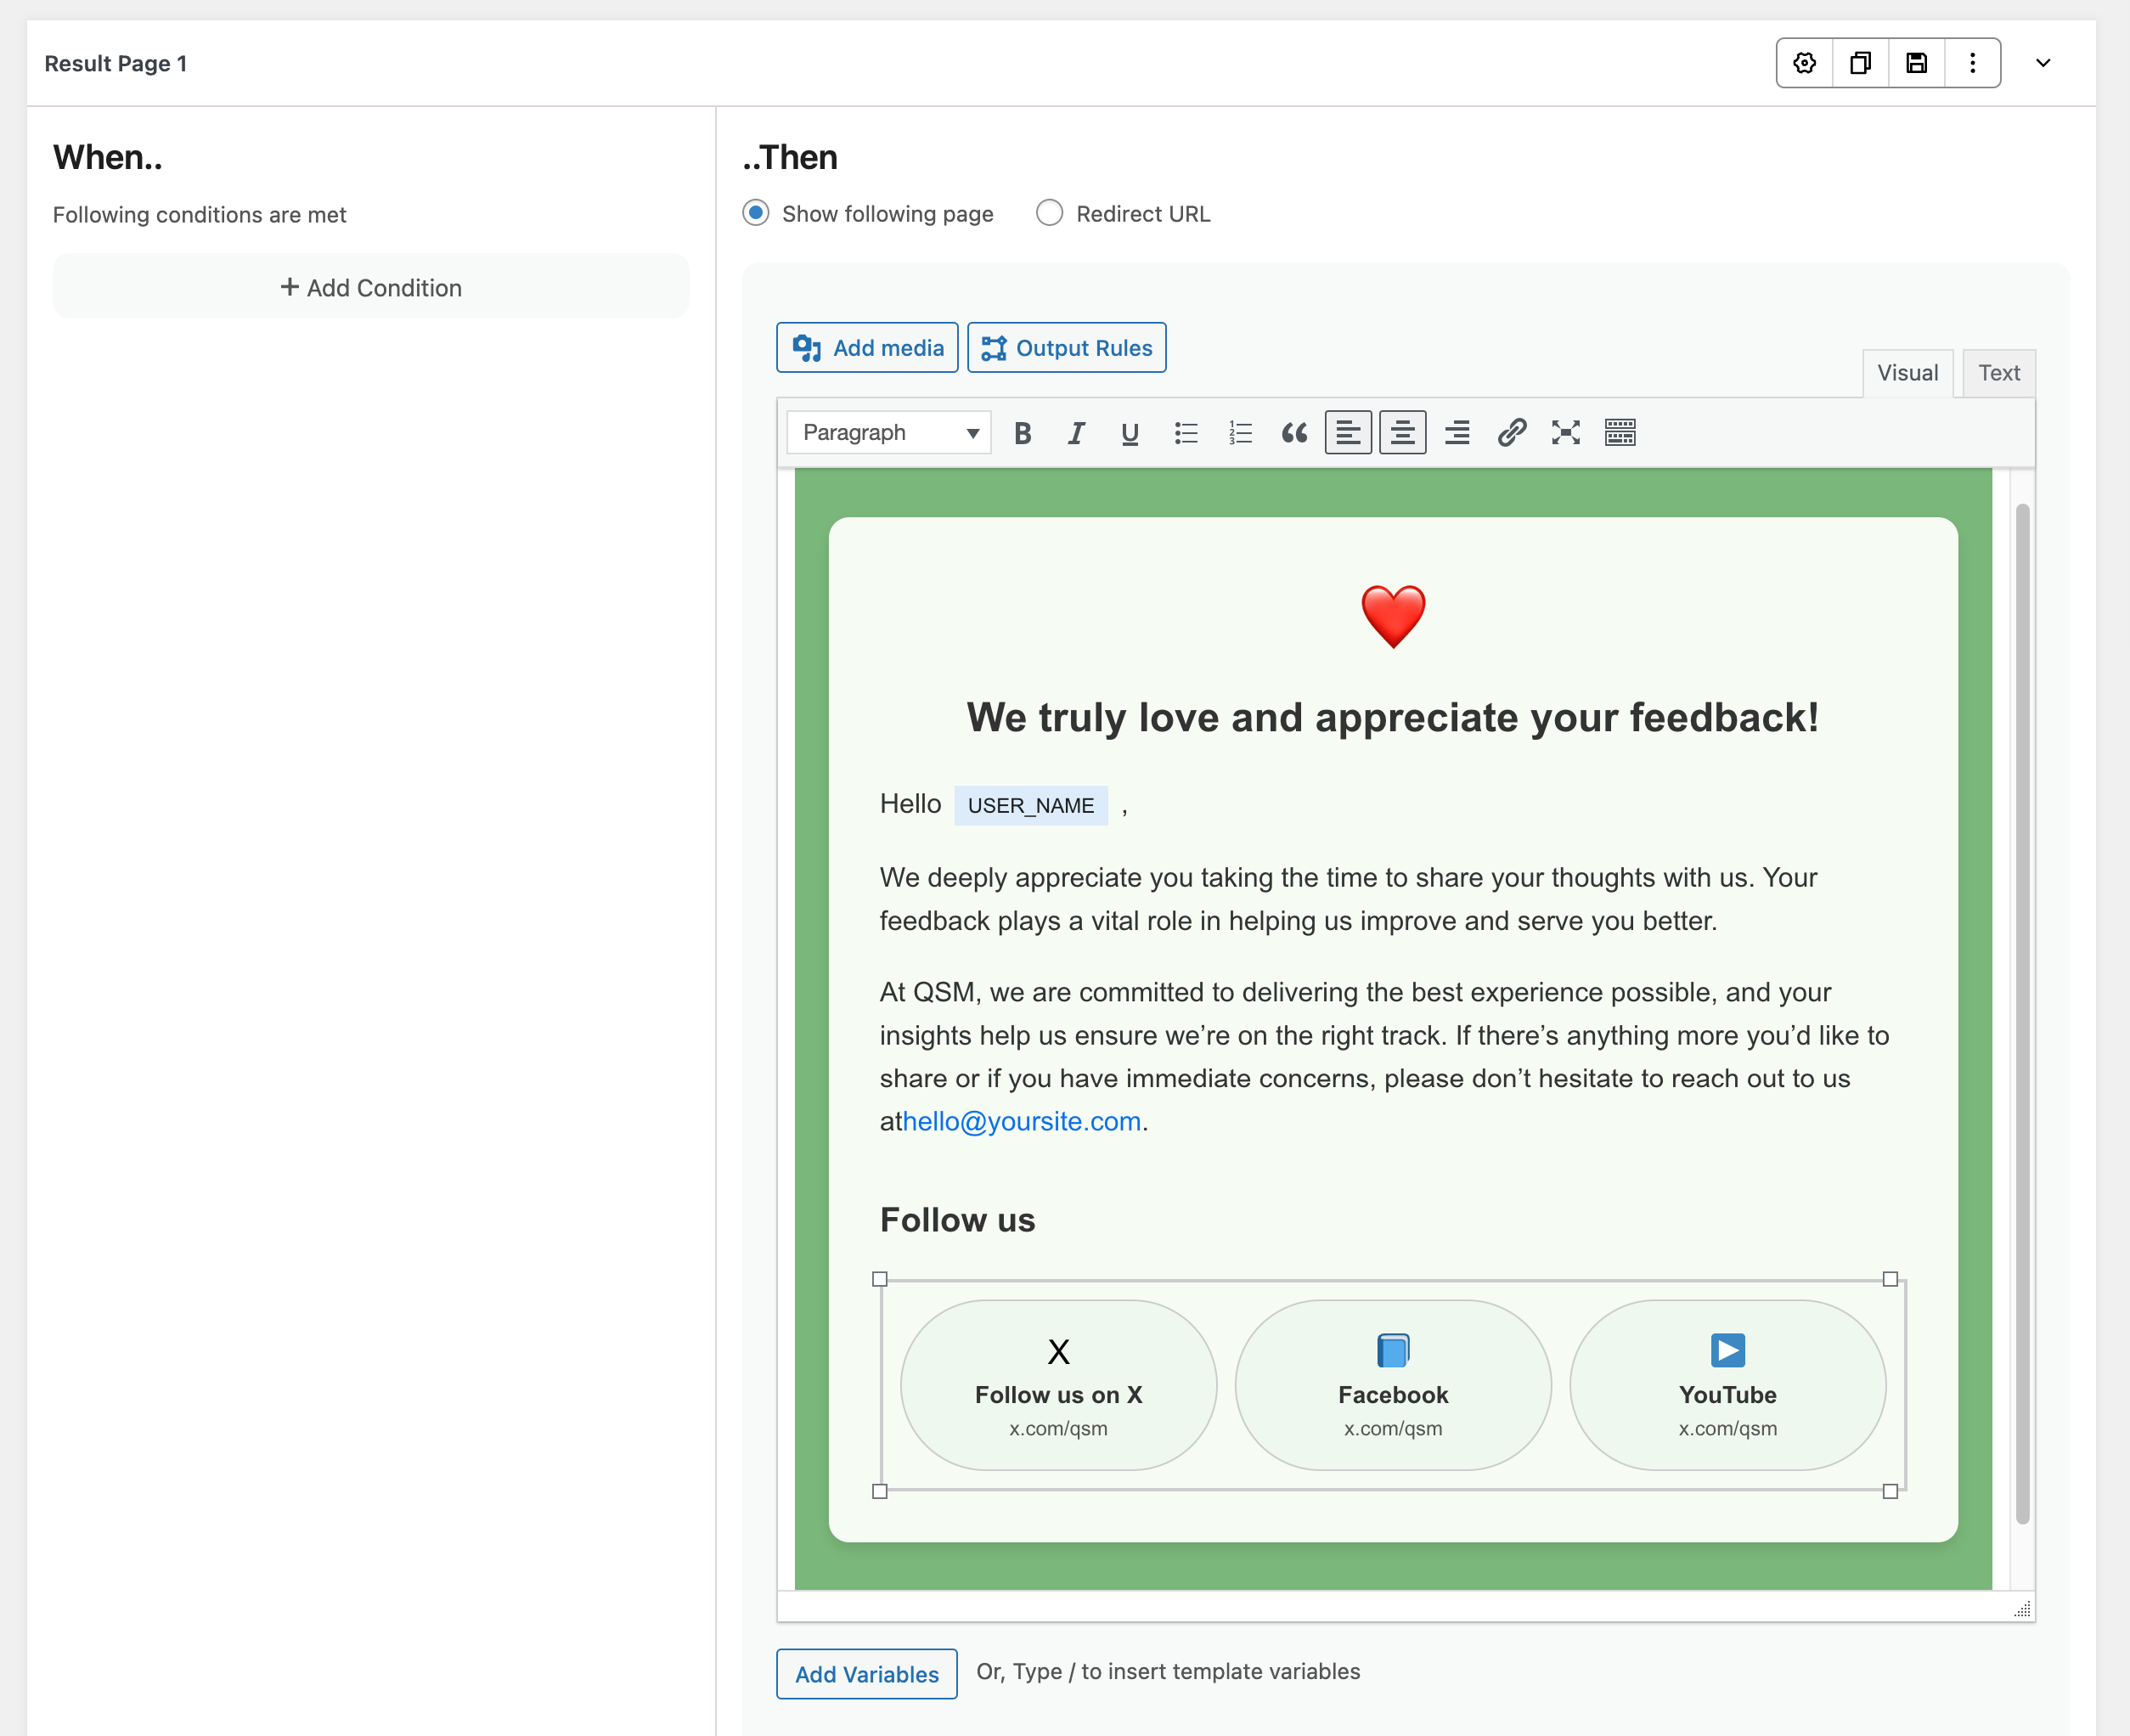
With the help of Template Variables, you can make it more informative. Like the Emails Tab, here too you can add conditions for when the Results should be displayed and to whom.
Add some stuff as in the image, and hit the Save Results Pages button once done.
Step 9: Styling the Survey
In the Last Style Tab, you can change the appearance by using various styles.
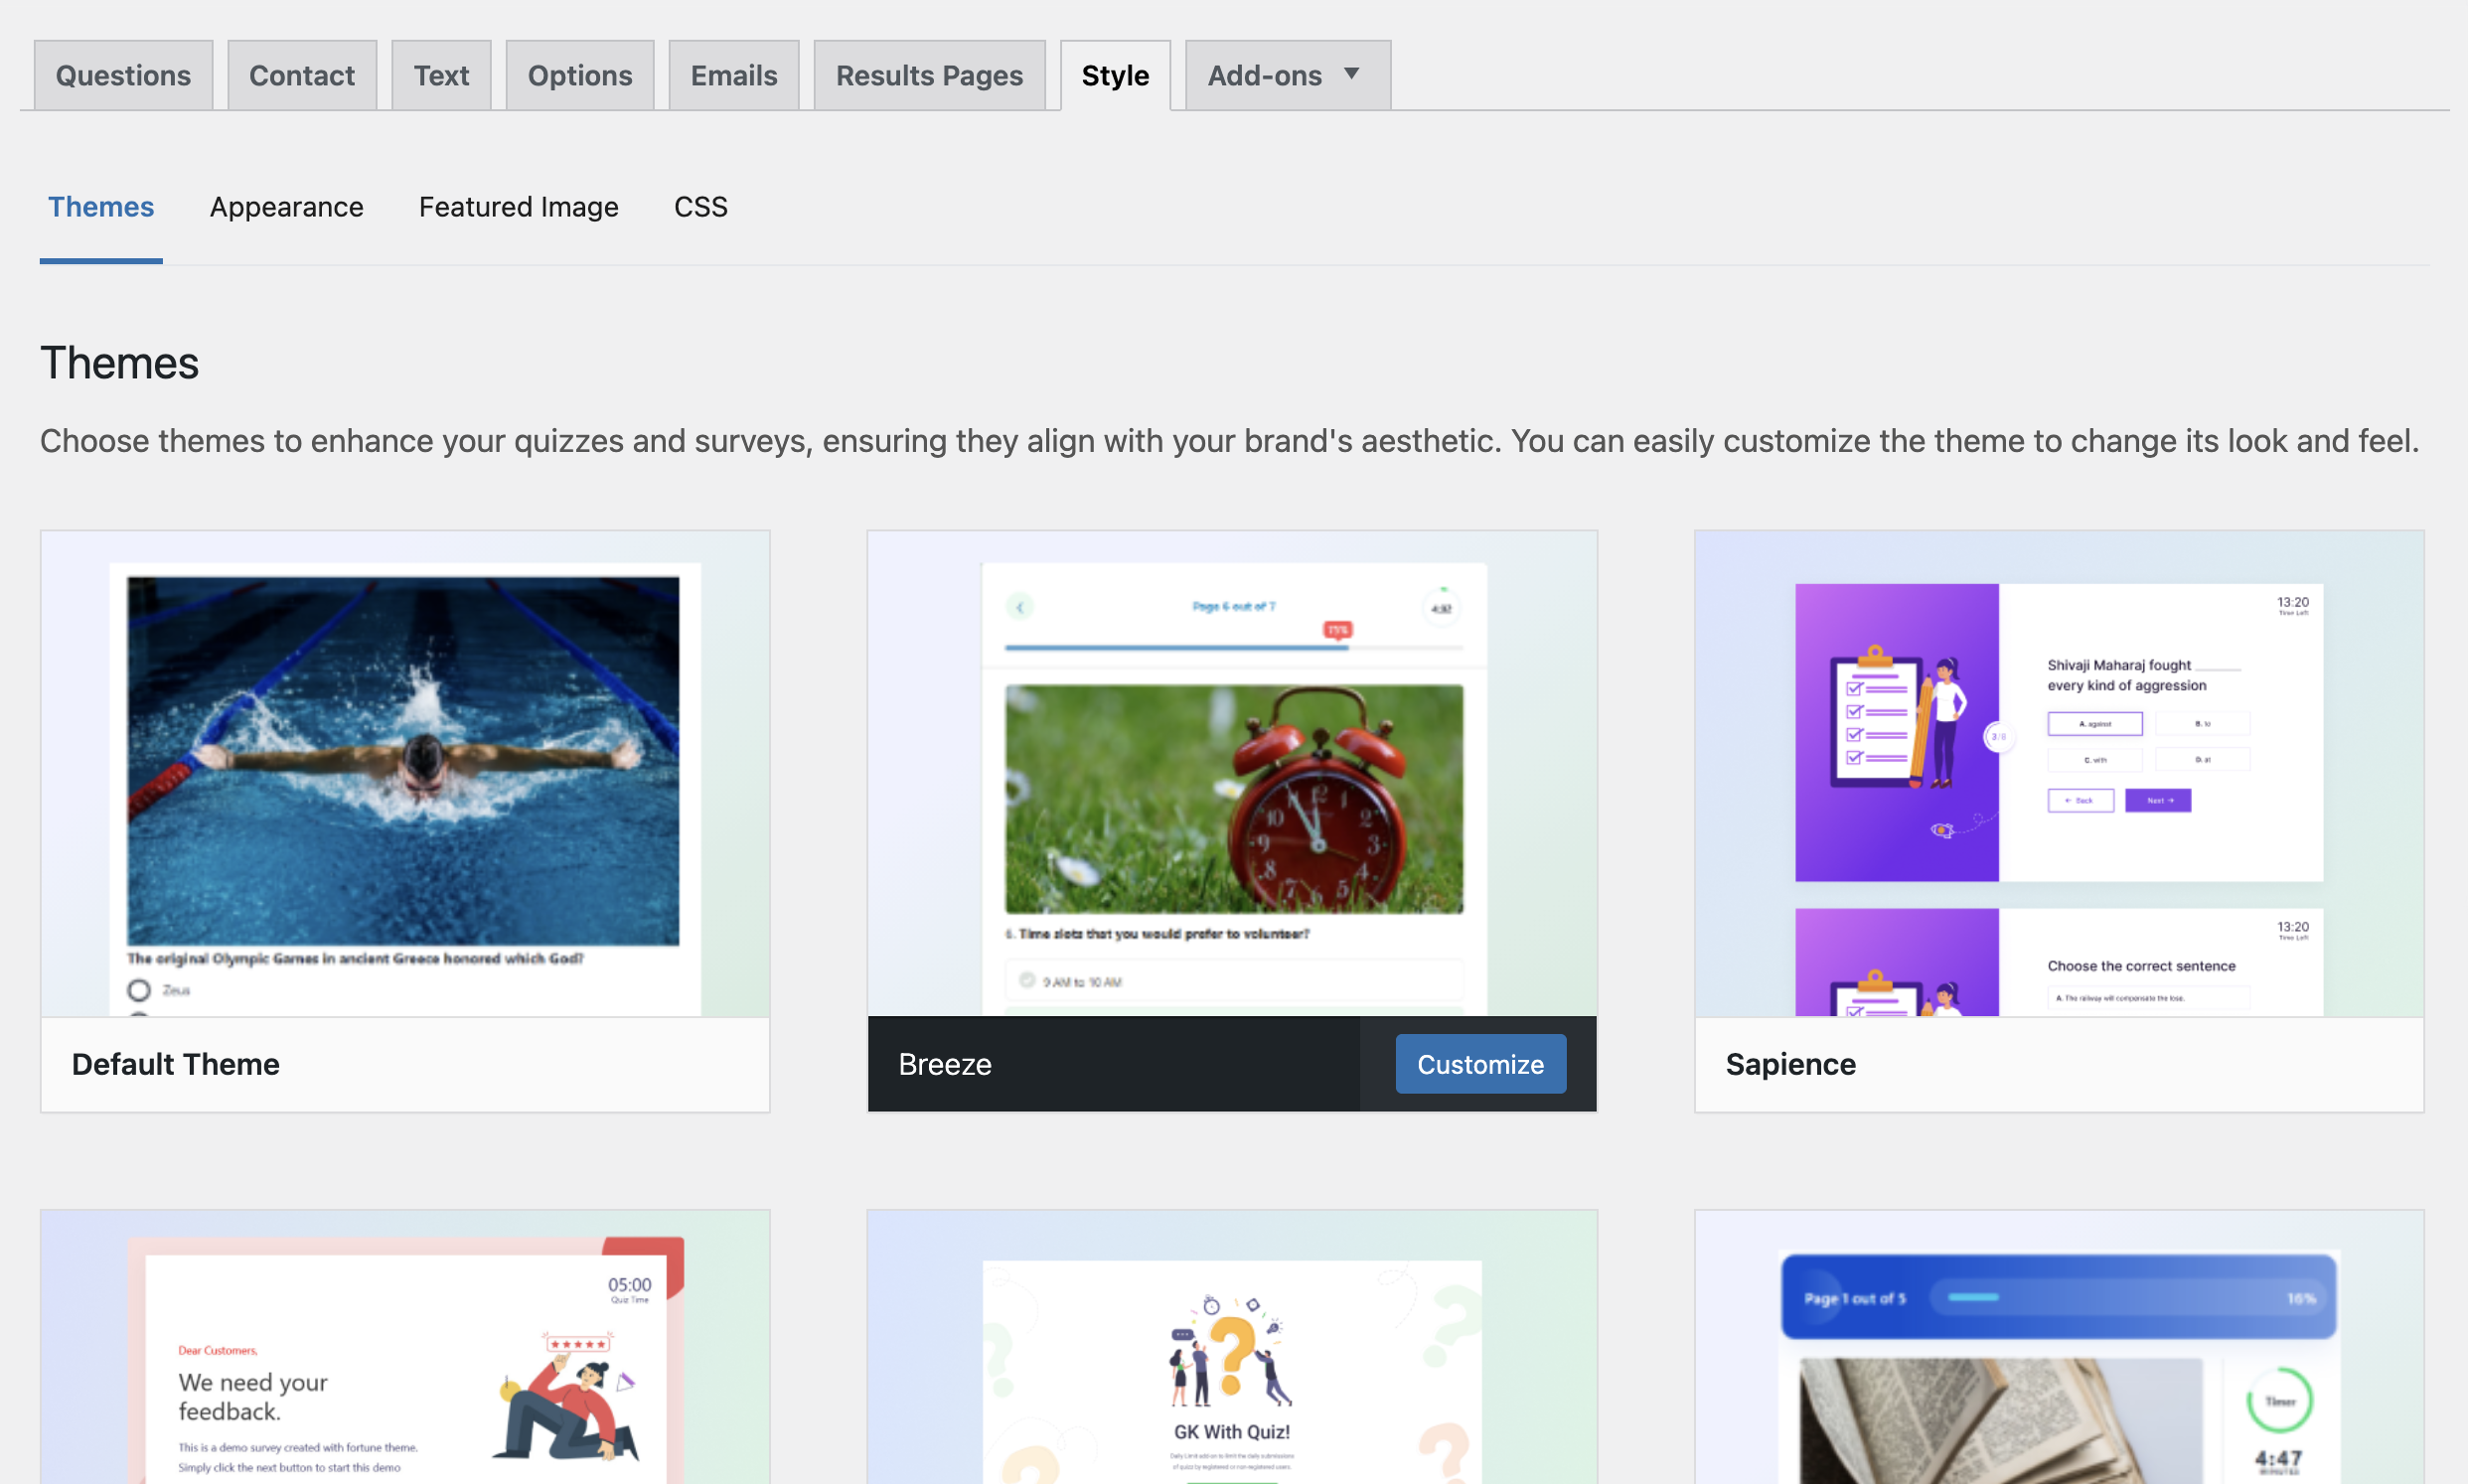
If you want, you also can add a custom CSS style in the blank field to match it with your website. Once done, hit the Save Quiz Style button.
Step 10: Ready to Roll
After completing all the steps, now is the time to display the Quiz.
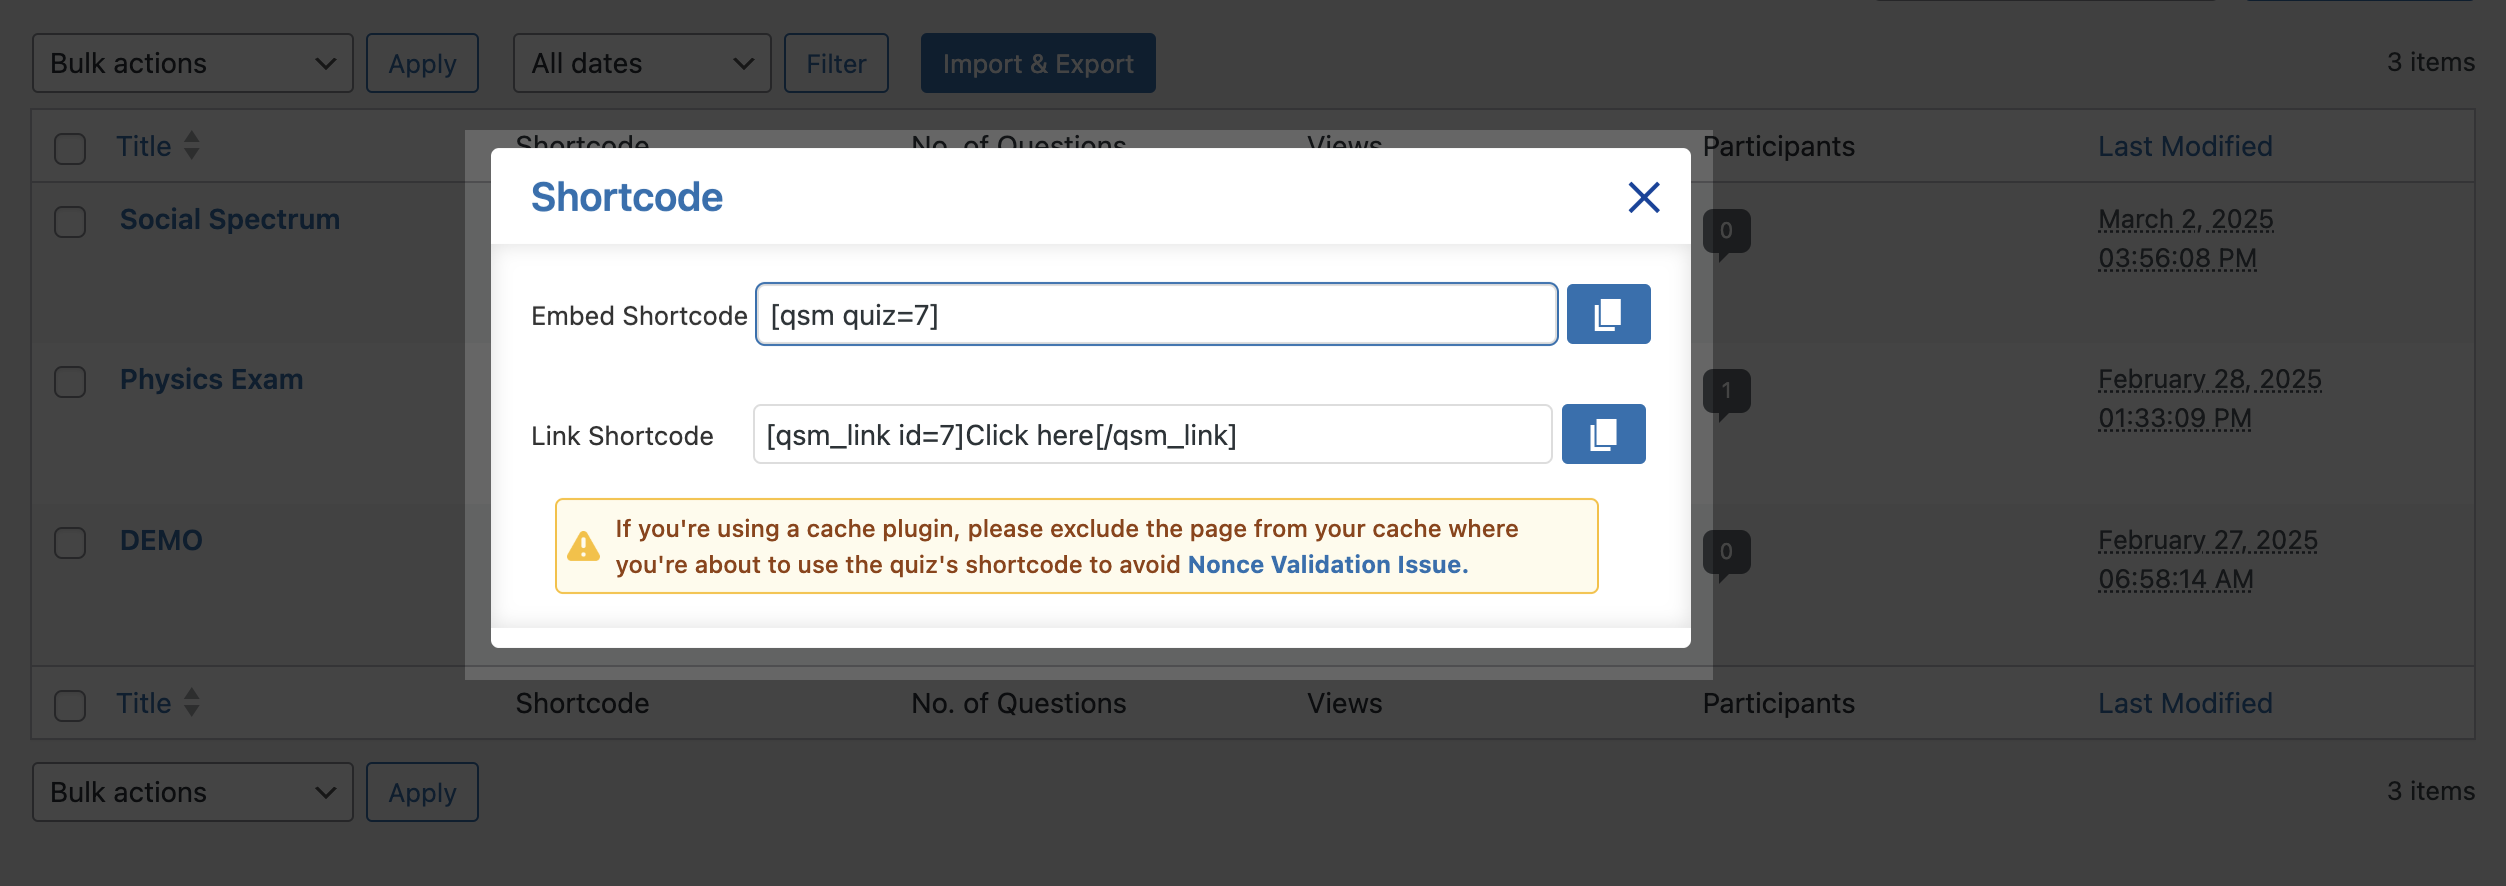
You can run the Quiz directly by pressing the Open Link Icon beside the Quiz Name above all the tabs.
Or, Open the Quizzes/Surveys Menu from the Quiz and Survey Master Plugin Menu on the Dashboard. Here you will get all the Quizzes/Surveys that you’ve made along with the Shortcode and link.
Copy the shortcode link and paste it into the website’s page and it’s done.
Conclusion
Here’s how to Create a Survey in WordPress. The Process remains the same for making Quizzes, Exams, and Polls with just minor adjustments.
Also, check out How to create an Online Exam or Quiz during Covid-19.
Hope you like it, tell us what you made out of this amazing plugin. Thanks!


