This guide provides a concise overview of the Quiz and Survey Master (QSM) plugin. It is intended for users who are already familiar with WordPress, plugins, and plugin administration.
In this guide, you will learn how to install the QSM plugin, create a quiz, add questions, set up result pages, and embed the quiz into a post or page.
INSTALLING THE PLUGIN

- In your WordPress admin panel, go to Plugins.
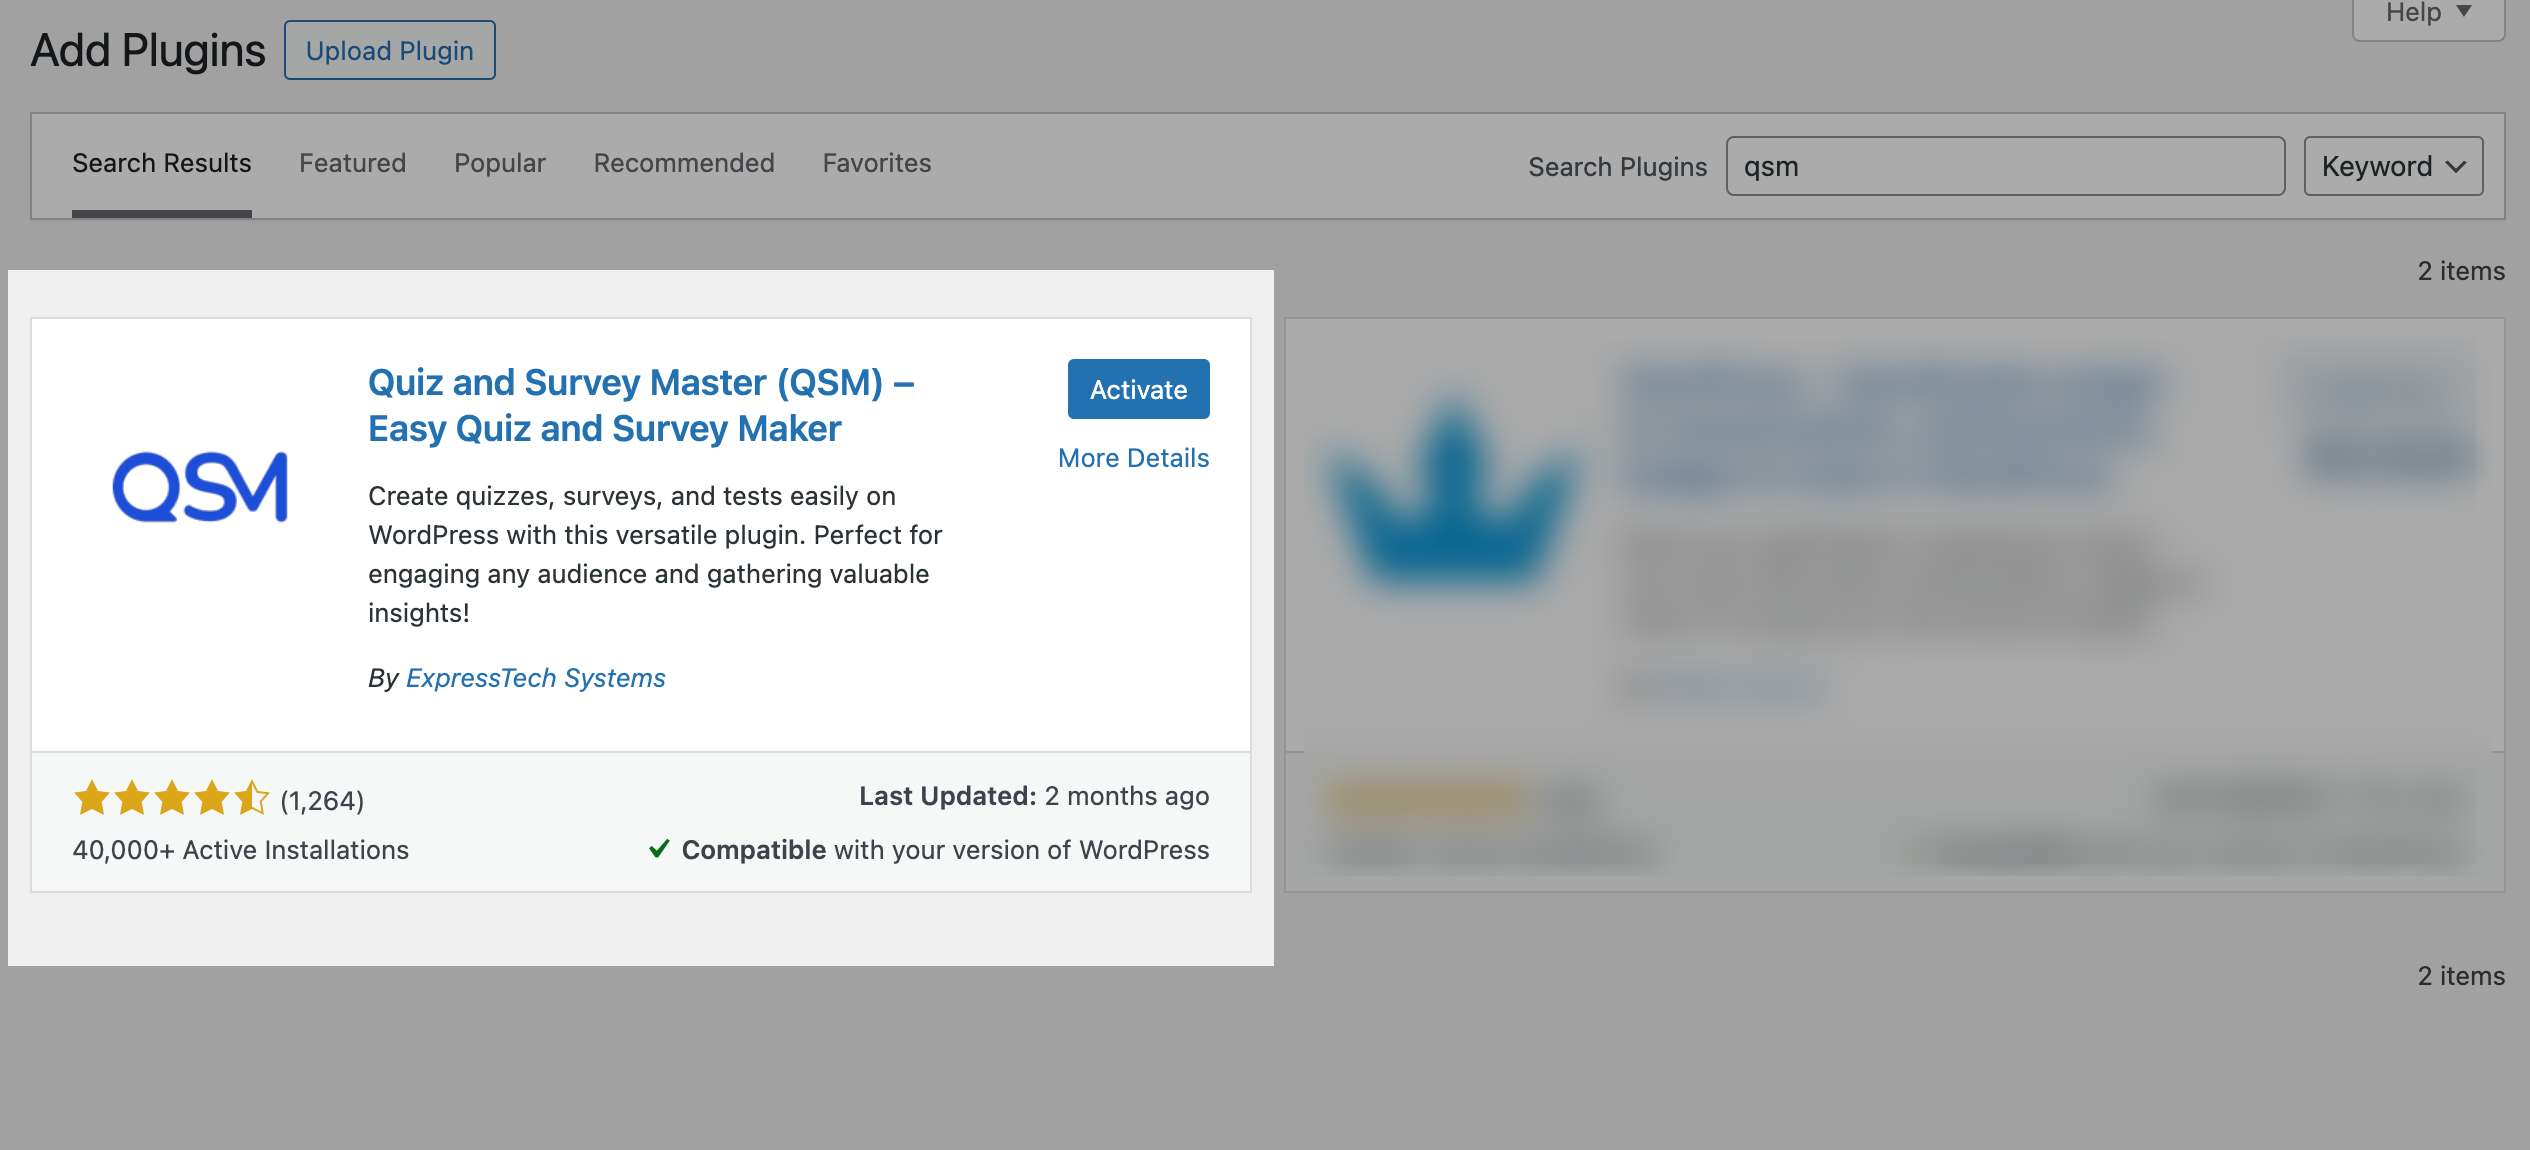
- Click Add New and search for Quiz and Survey Master (QSM).
- Click Install Now, then select Activate.
- Once the plugin is activated, the QSM menu will appear in the admin panel.
CREATING A QUIZ OR SURVEY
After installing the plugin, follow these steps to create your first quiz or survey:
- In the WordPress admin panel, click QSM to open the dashboard.
- Click Get Started to begin creating a quiz or survey.
- Select a form type: Quiz, Survey, Exam, Personality Assessment, or Poll Template, then click Proceed.
- Choose a theme from the recommended options or click on the “See More Themes (at the bottom) to expand the full QSM Themes selection. (Optional Step)
- Next, proceed to explore recommended add-ons or click on “See More Add-ons” to expand the list of all the QSM Add-ons. (Optional Step)
- Then, give your quiz a name and configure the additional form settings.
For further information, please consult our complete documentation on creating a quiz.
Adding and Editing Questions
Let’s start adding the questions;

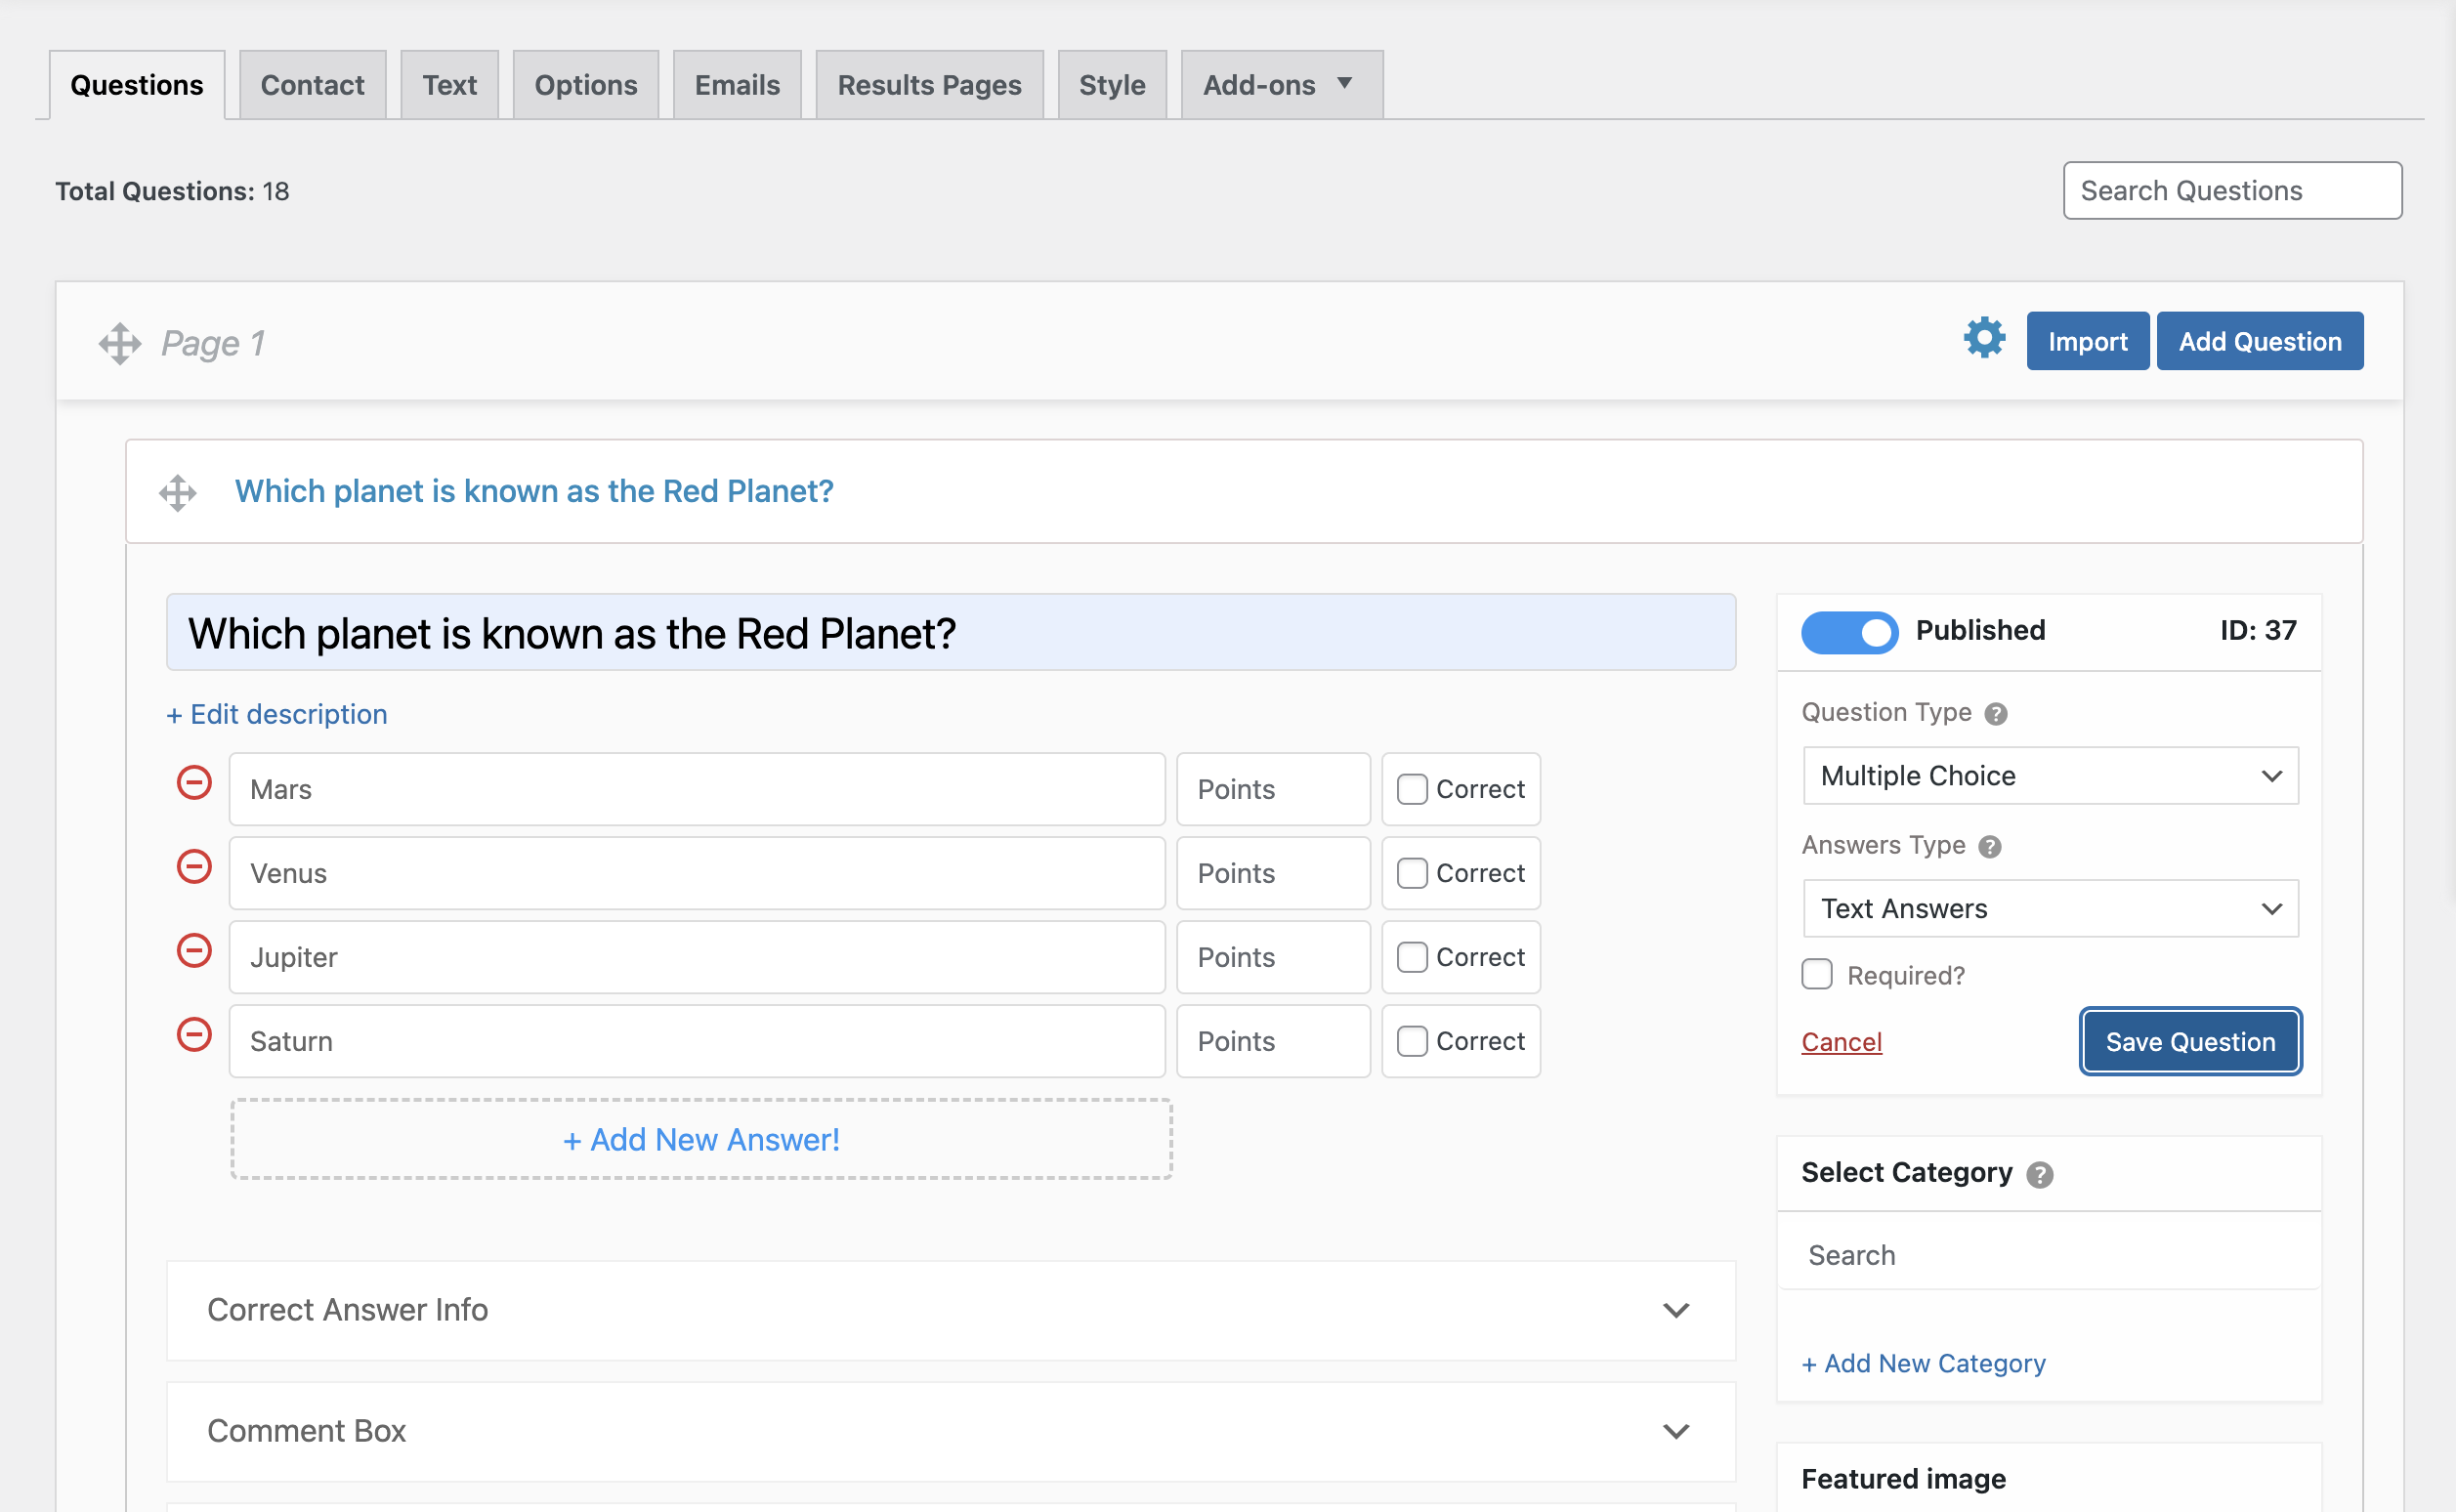
- In the blank field, enter your question. If needed, add a description.
- Select the Question Type from the 19 available options in QSM.
- Enter the answer(s). The input format will vary based on the selected question type. You can also choose the preferred answer input type from the Answers Type option.
- You can include Correct Answer Info, enable a Comment Box for user input, and provide a Hint Text to guide users.
- Assign a Question Category and upload a Feature Image if required.
- Repeat the process to add multiple questions. To organize them into different pages, click Create New Page.
For more details, refer to the Questions Tab section in our documentation.
Setting up the Results Pages

- Results Pages allow you to customize what quiz takers see after completing a quiz. Follow these steps to configure your Results Pages:
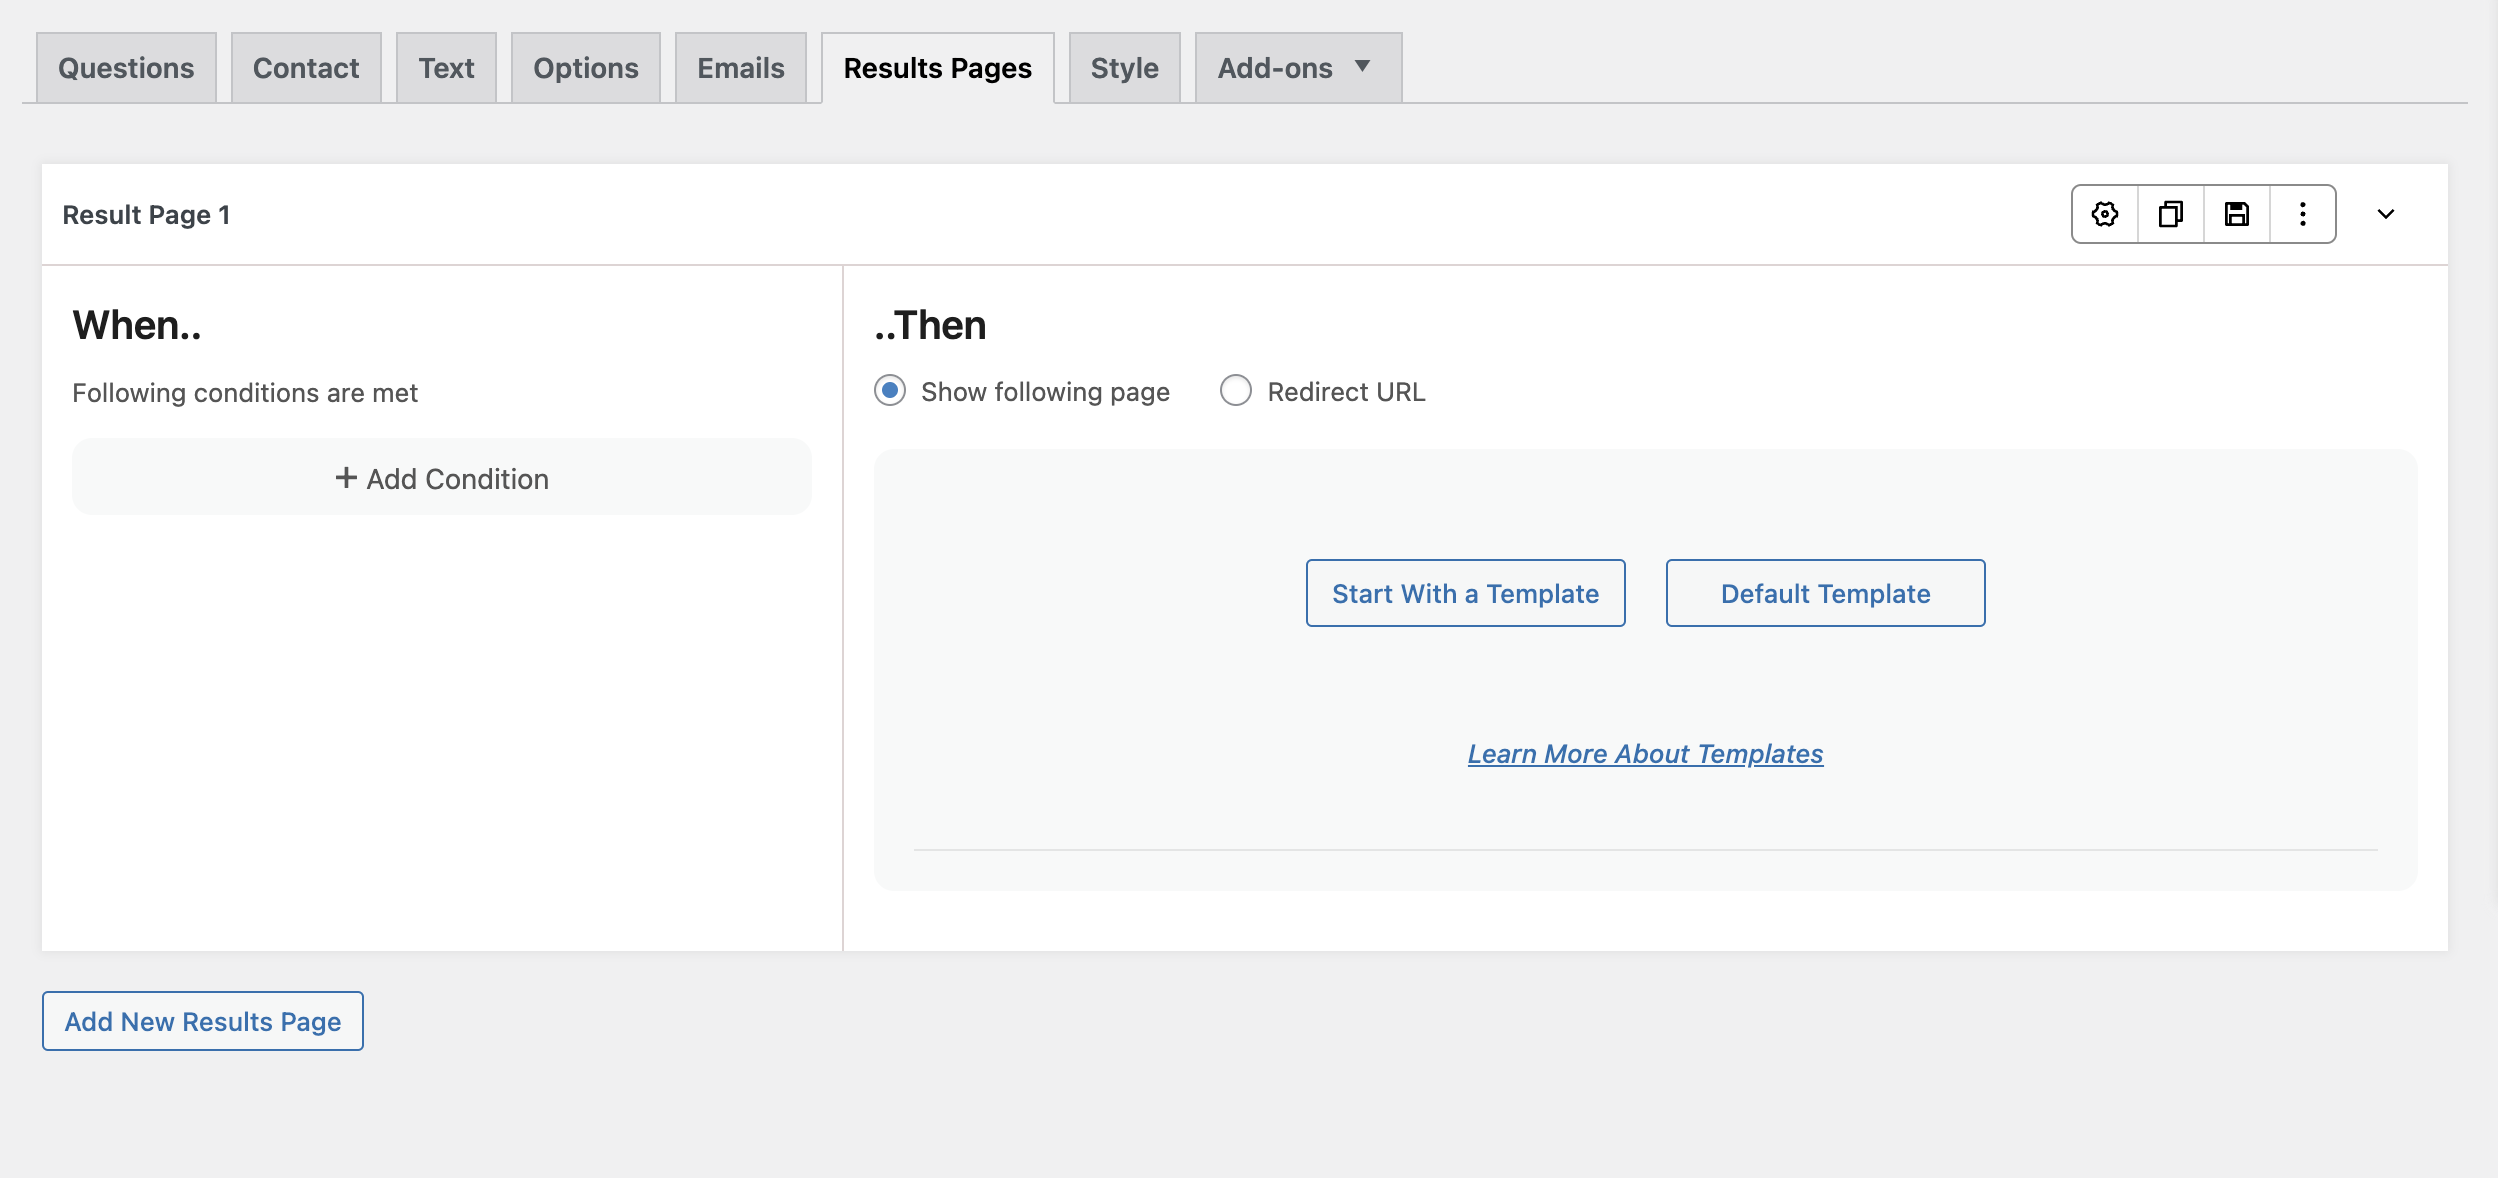
- Click on the Results Pages tab.
- You will see a default result page box that can be customized based on your requirements. Both sections of the result page can be adjusted to display tailored results.
- Start by setting up the Conditions (When) section. Select a suitable condition to determine when a specific result page should be shown. You can customize this based on total points or correct percentage.
- Next, configure the Then section. This defines the actual result page that will be displayed to participants when the set conditions are met.
- Choose how to display results:
- Create a custom result template.
- Select from pre-built templates.
- Redirect participants to a specific URL (e.g., a website or webpage).
📌 The results of a quiz or survey will not be displayed if the quiz is in draft mode. Ensure the quiz is published to view the results.
For more details, refer to our complete documentation on the Results Pages Tab.
Adding Your Quiz or Survey to Your Post or Page

- Once your quiz, survey, or form is published, you can embed it into a post or page by following these steps:
- Go to the Quizzes & Surveys menu from QSM.
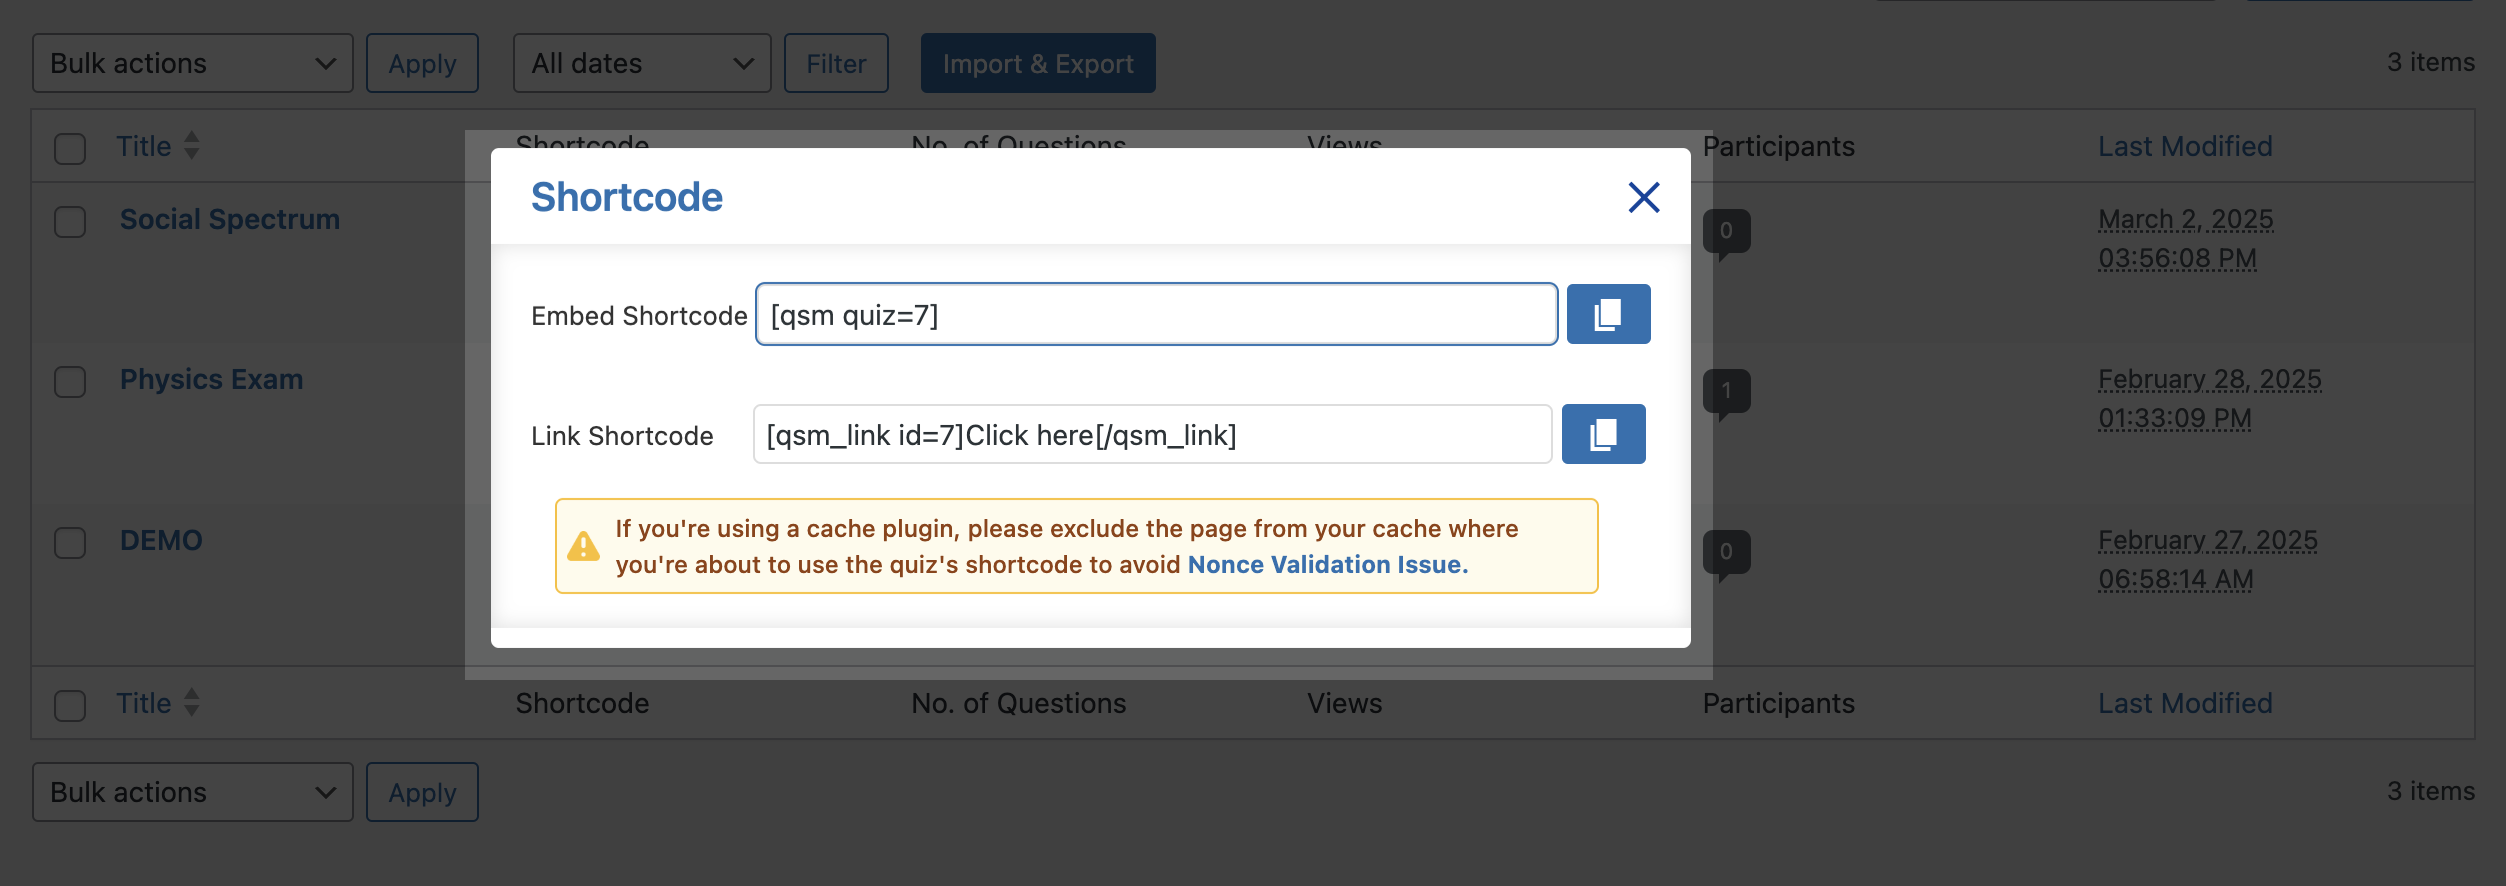
- Click the Shortcode icon beside your created quiz.
- Copy the Embed Shortcode from the pop-up window.
- Paste the shortcode into the post or page where you want the quiz or survey to appear.


