Have you found an addon that you would like to install on your site? Follow the steps in this guide to checkout, download the addon, and install the addon on your site!
Addon Installer (New)
QSM Addon installer is the easiest way to install and activate QSM addon bundles. It eliminates the need for manually uploading, installing, and activating the addons and does the work in a few clicks. Follow this quick guide to set up the addon installer plugin and manage your addons and licenses seamlessly.
Download and Install the QSM Addon Installer Plugin

Download and Install the “QSM Installer” plugin on your site that has the QSM plugin.
Navigate to Extensions
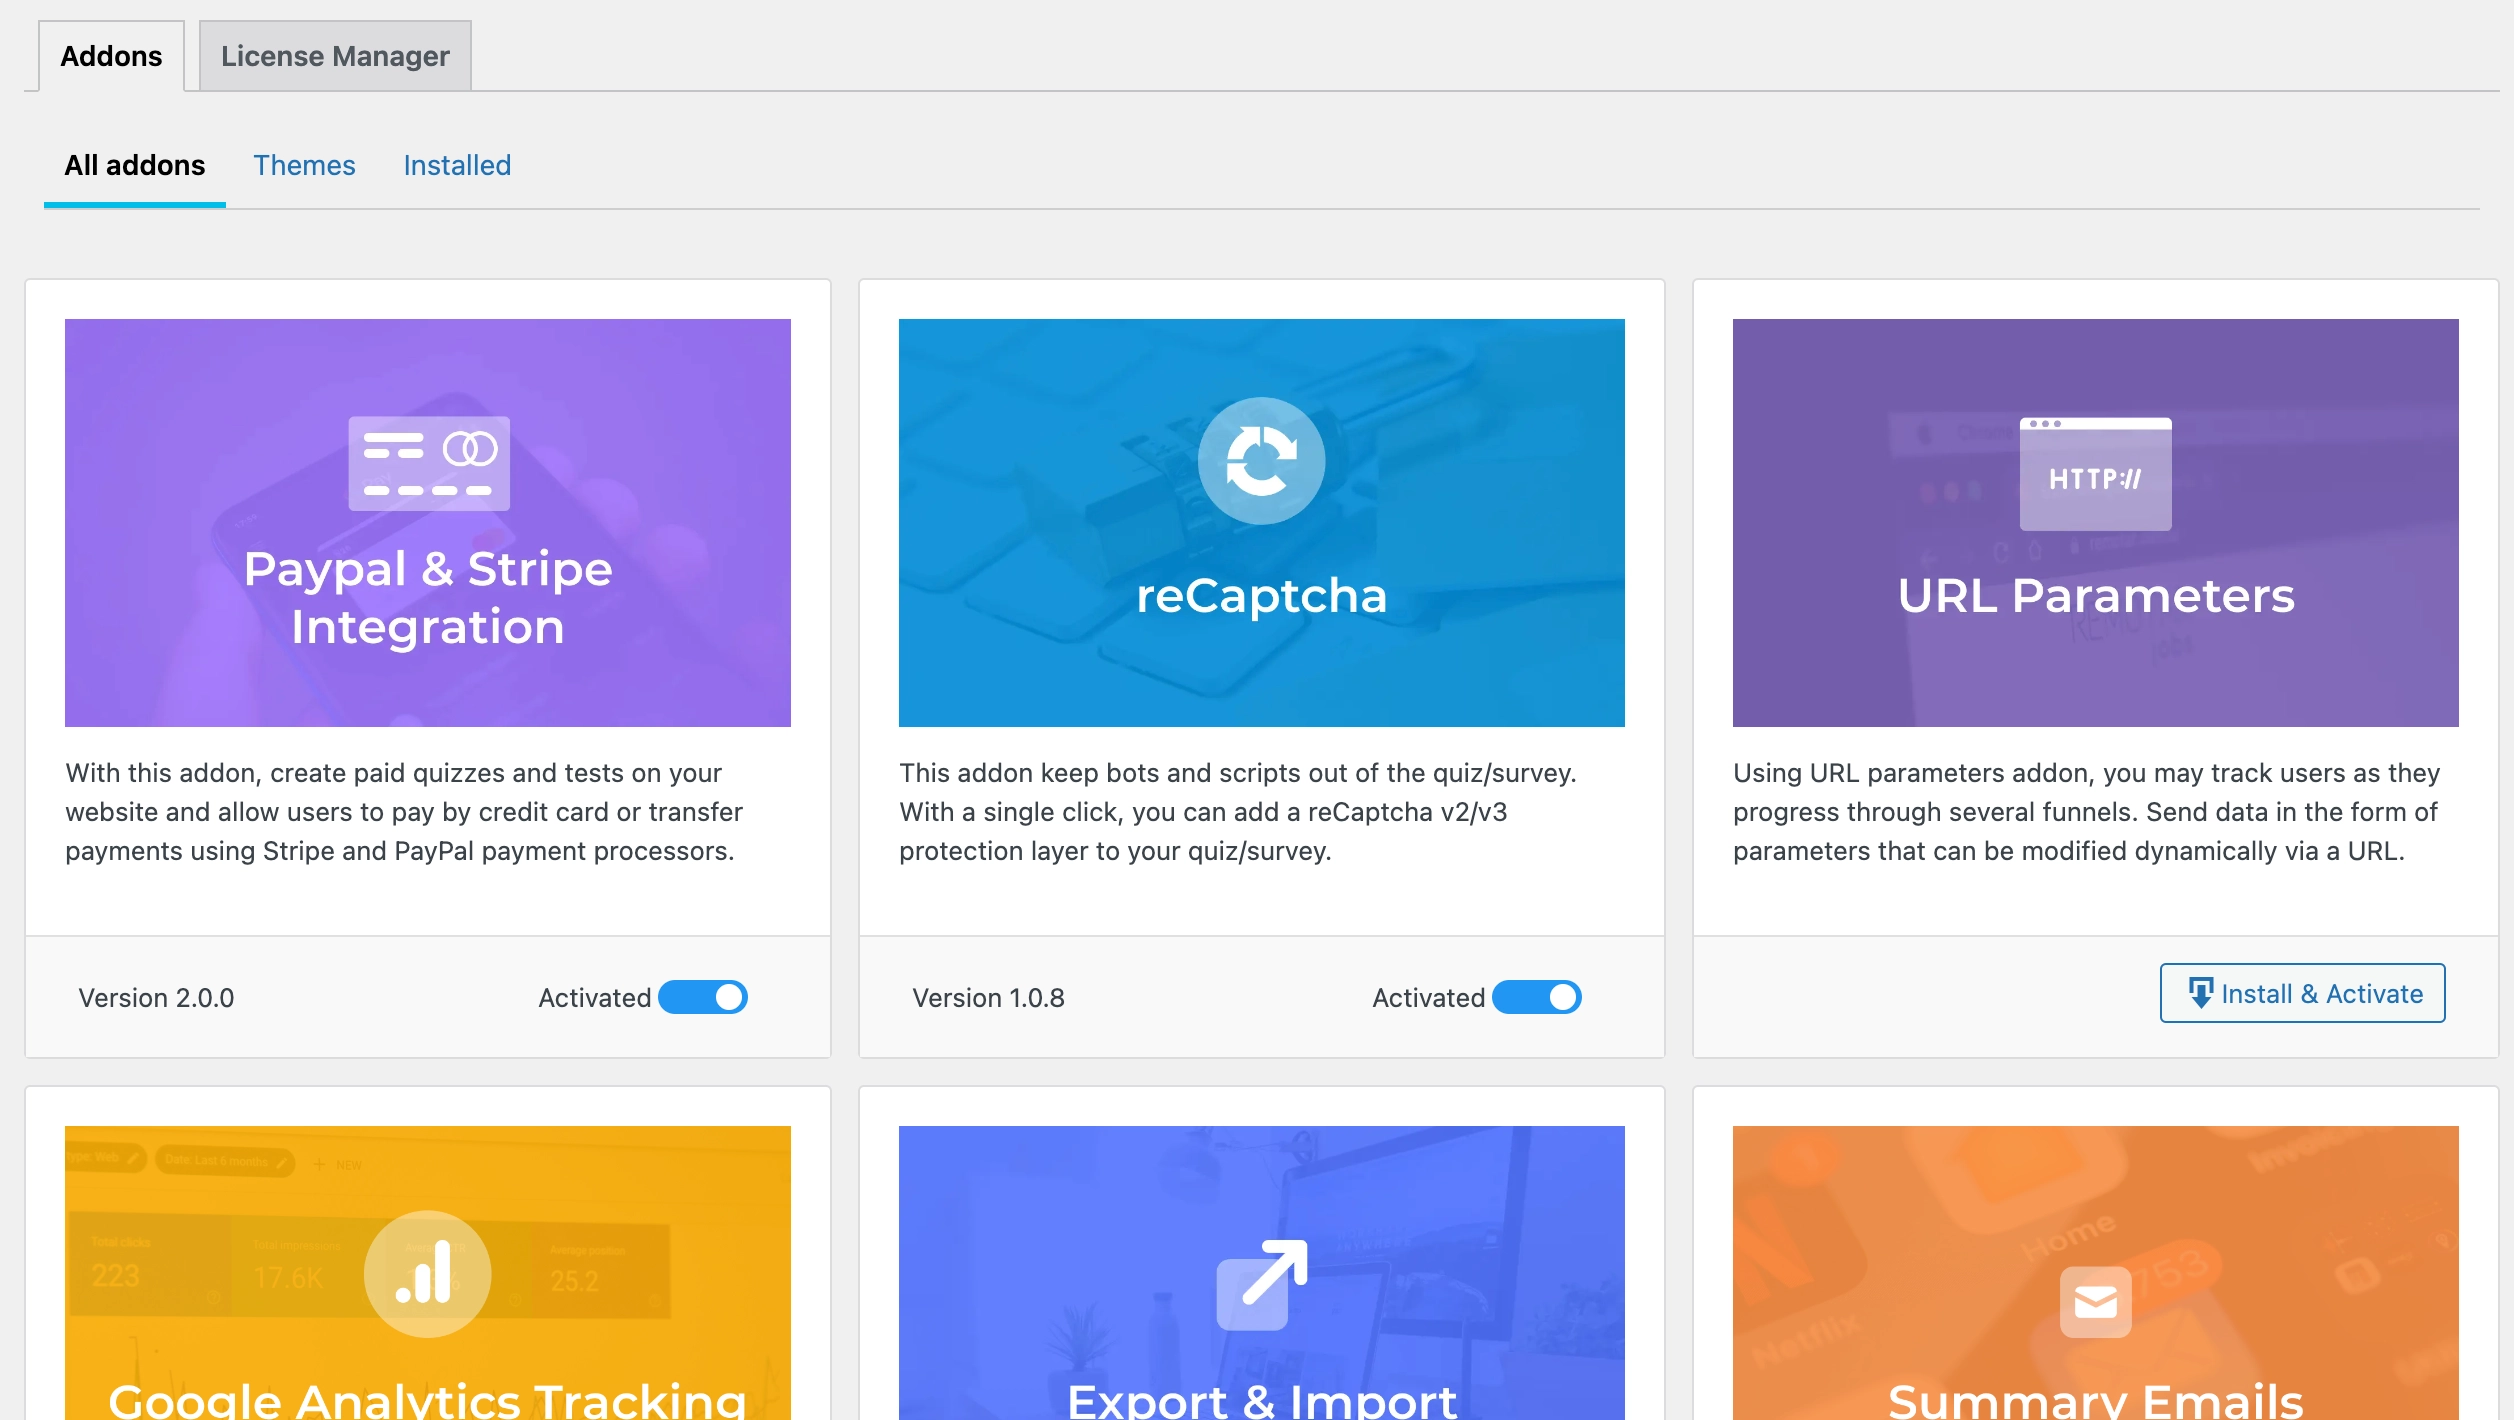
Navigate to QSM > Extensions > Addon Installer. Here, you can manage all of your addons and themes. The “All addons” tab houses all of the QSM’s addons. Simply activate/deactivate the purchased addons by hitting the toggle button, if you’re getting an “Upgrade Plan” button on specific addons then that means your current license doesn’t include the addon in that case you need to upgrade to a higher plan.
The current license can be changed from the “License Manager” tab.
Similarly, theme licenses can be managed from the “Themes” tab. Furthermore, you can configure and manage the installed addon settings from the “Installed” tab.
License Management
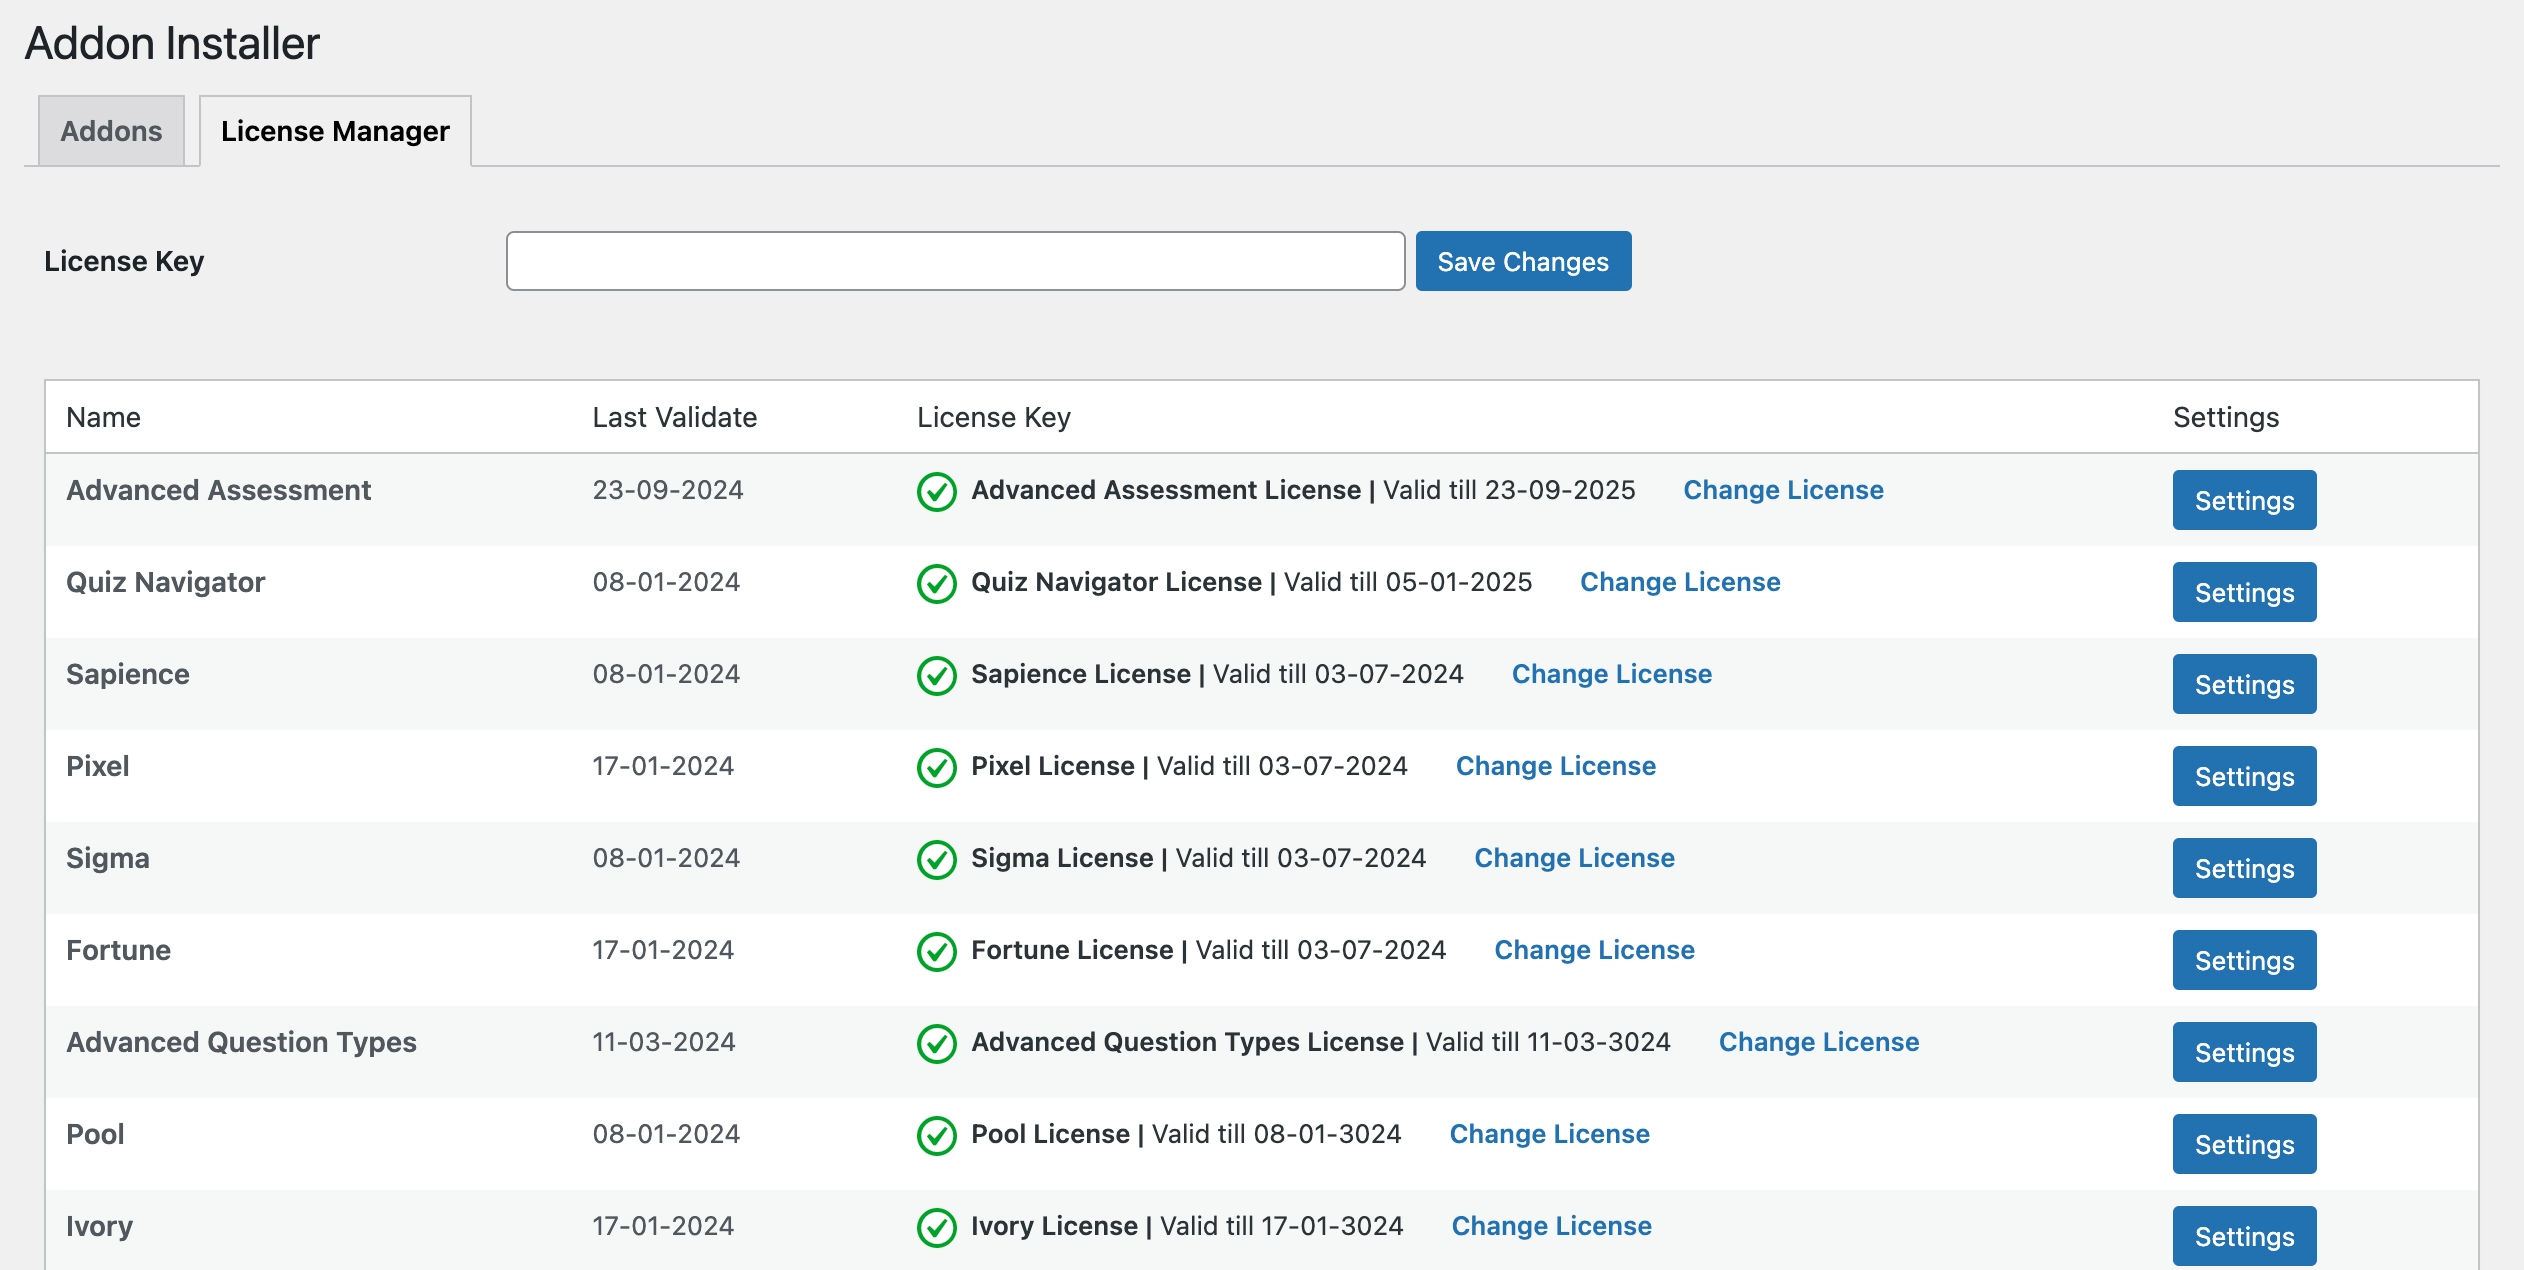
The License Manager tab lets you add and change your purchased licenses. It lets you add and change licenses of all the activated addons and lists out all the active licenses with the Addon Name, Last Validate date, License Key information, and License Settings.
Note: The License Key field only accepts bundle licenses i.e. Licenses of All Access, Pro, Plus, and Basic Bundles. If you’re trying to activate a ‘non-bundle’ individual addon key then you must follow the old manual addon installation and activation process.
The license table lets you validate the license key of individual active addons as well as lets you add/change the license key of an addon bundle allowing you to validate and make the addons available to activate.
Finding your licenses
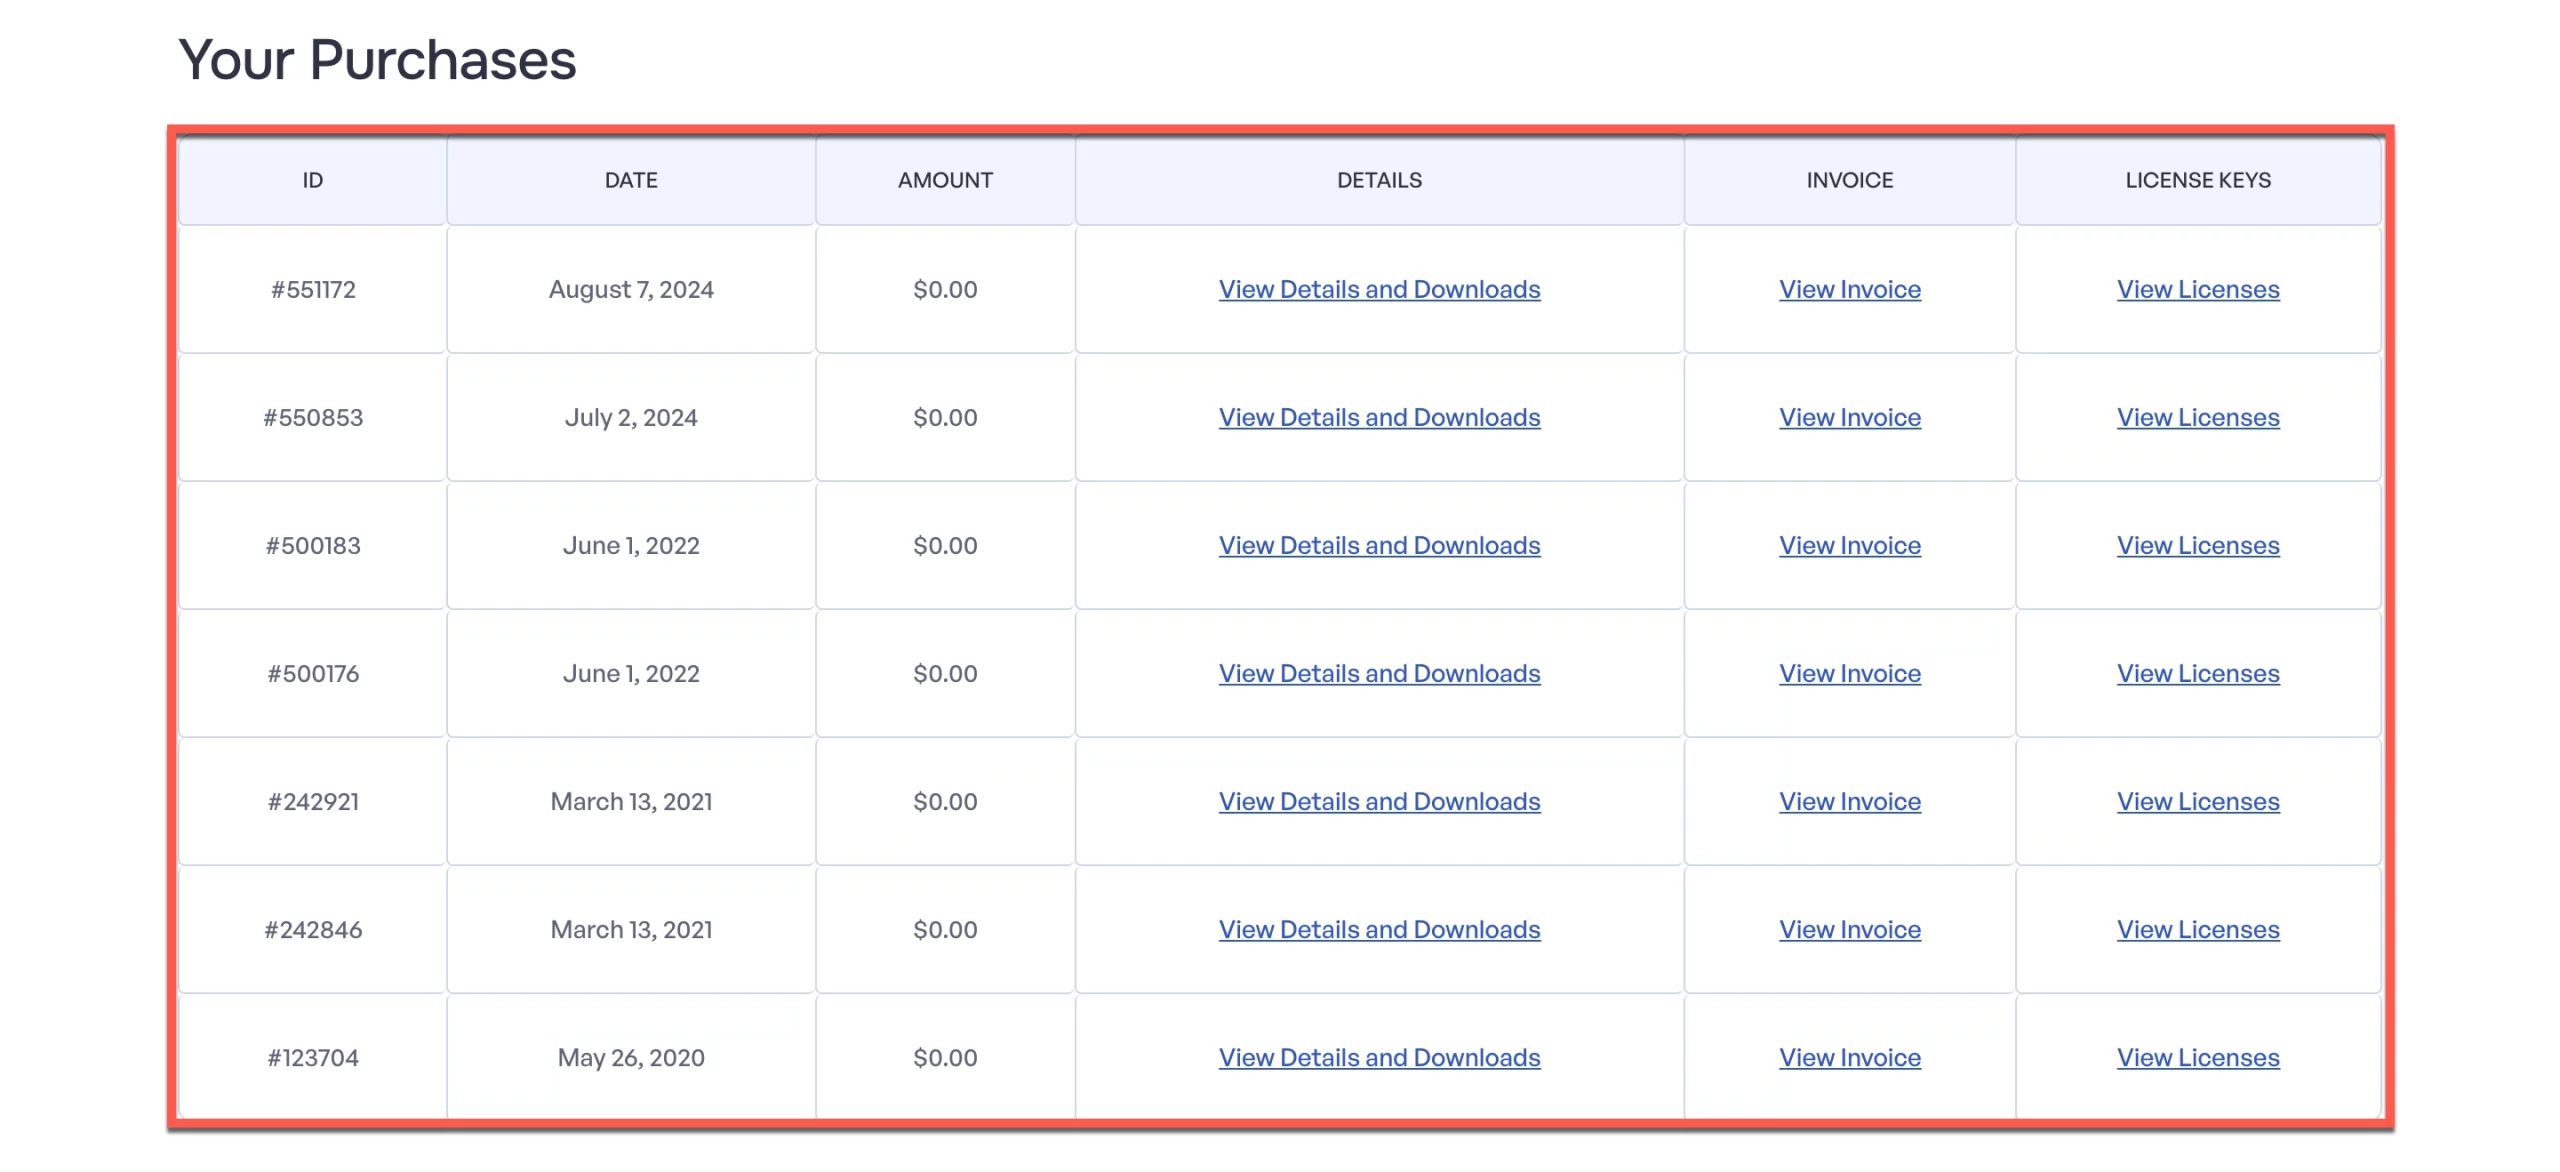
To find your purchased licenses goto QSM > Account > Your Purchases. Here you will find all your purchased addons/themes/bundle orders along with crucial information like the order id, date, amount, order details, invoice and license keys.

You can access your license keys by clicking on individual “Order Details” or by clicking directly on the “View Licenses”. When you click on “View Licenses” you can view all the individual licenses by clicking on the key icon as seen above.
Learn more about QSM Account Management.
Manual Addon Installation Process (Old)
Downloading the Plugin
After completing the purchase, you should see a page with your purchase confirmation, and also an emailed receipt will be sent to you within five minutes. Both the Purchase Confirmation page and the email sent to you with the subject ‘Purchase Receipt’ will contain a list of the purchased addons/bundles.
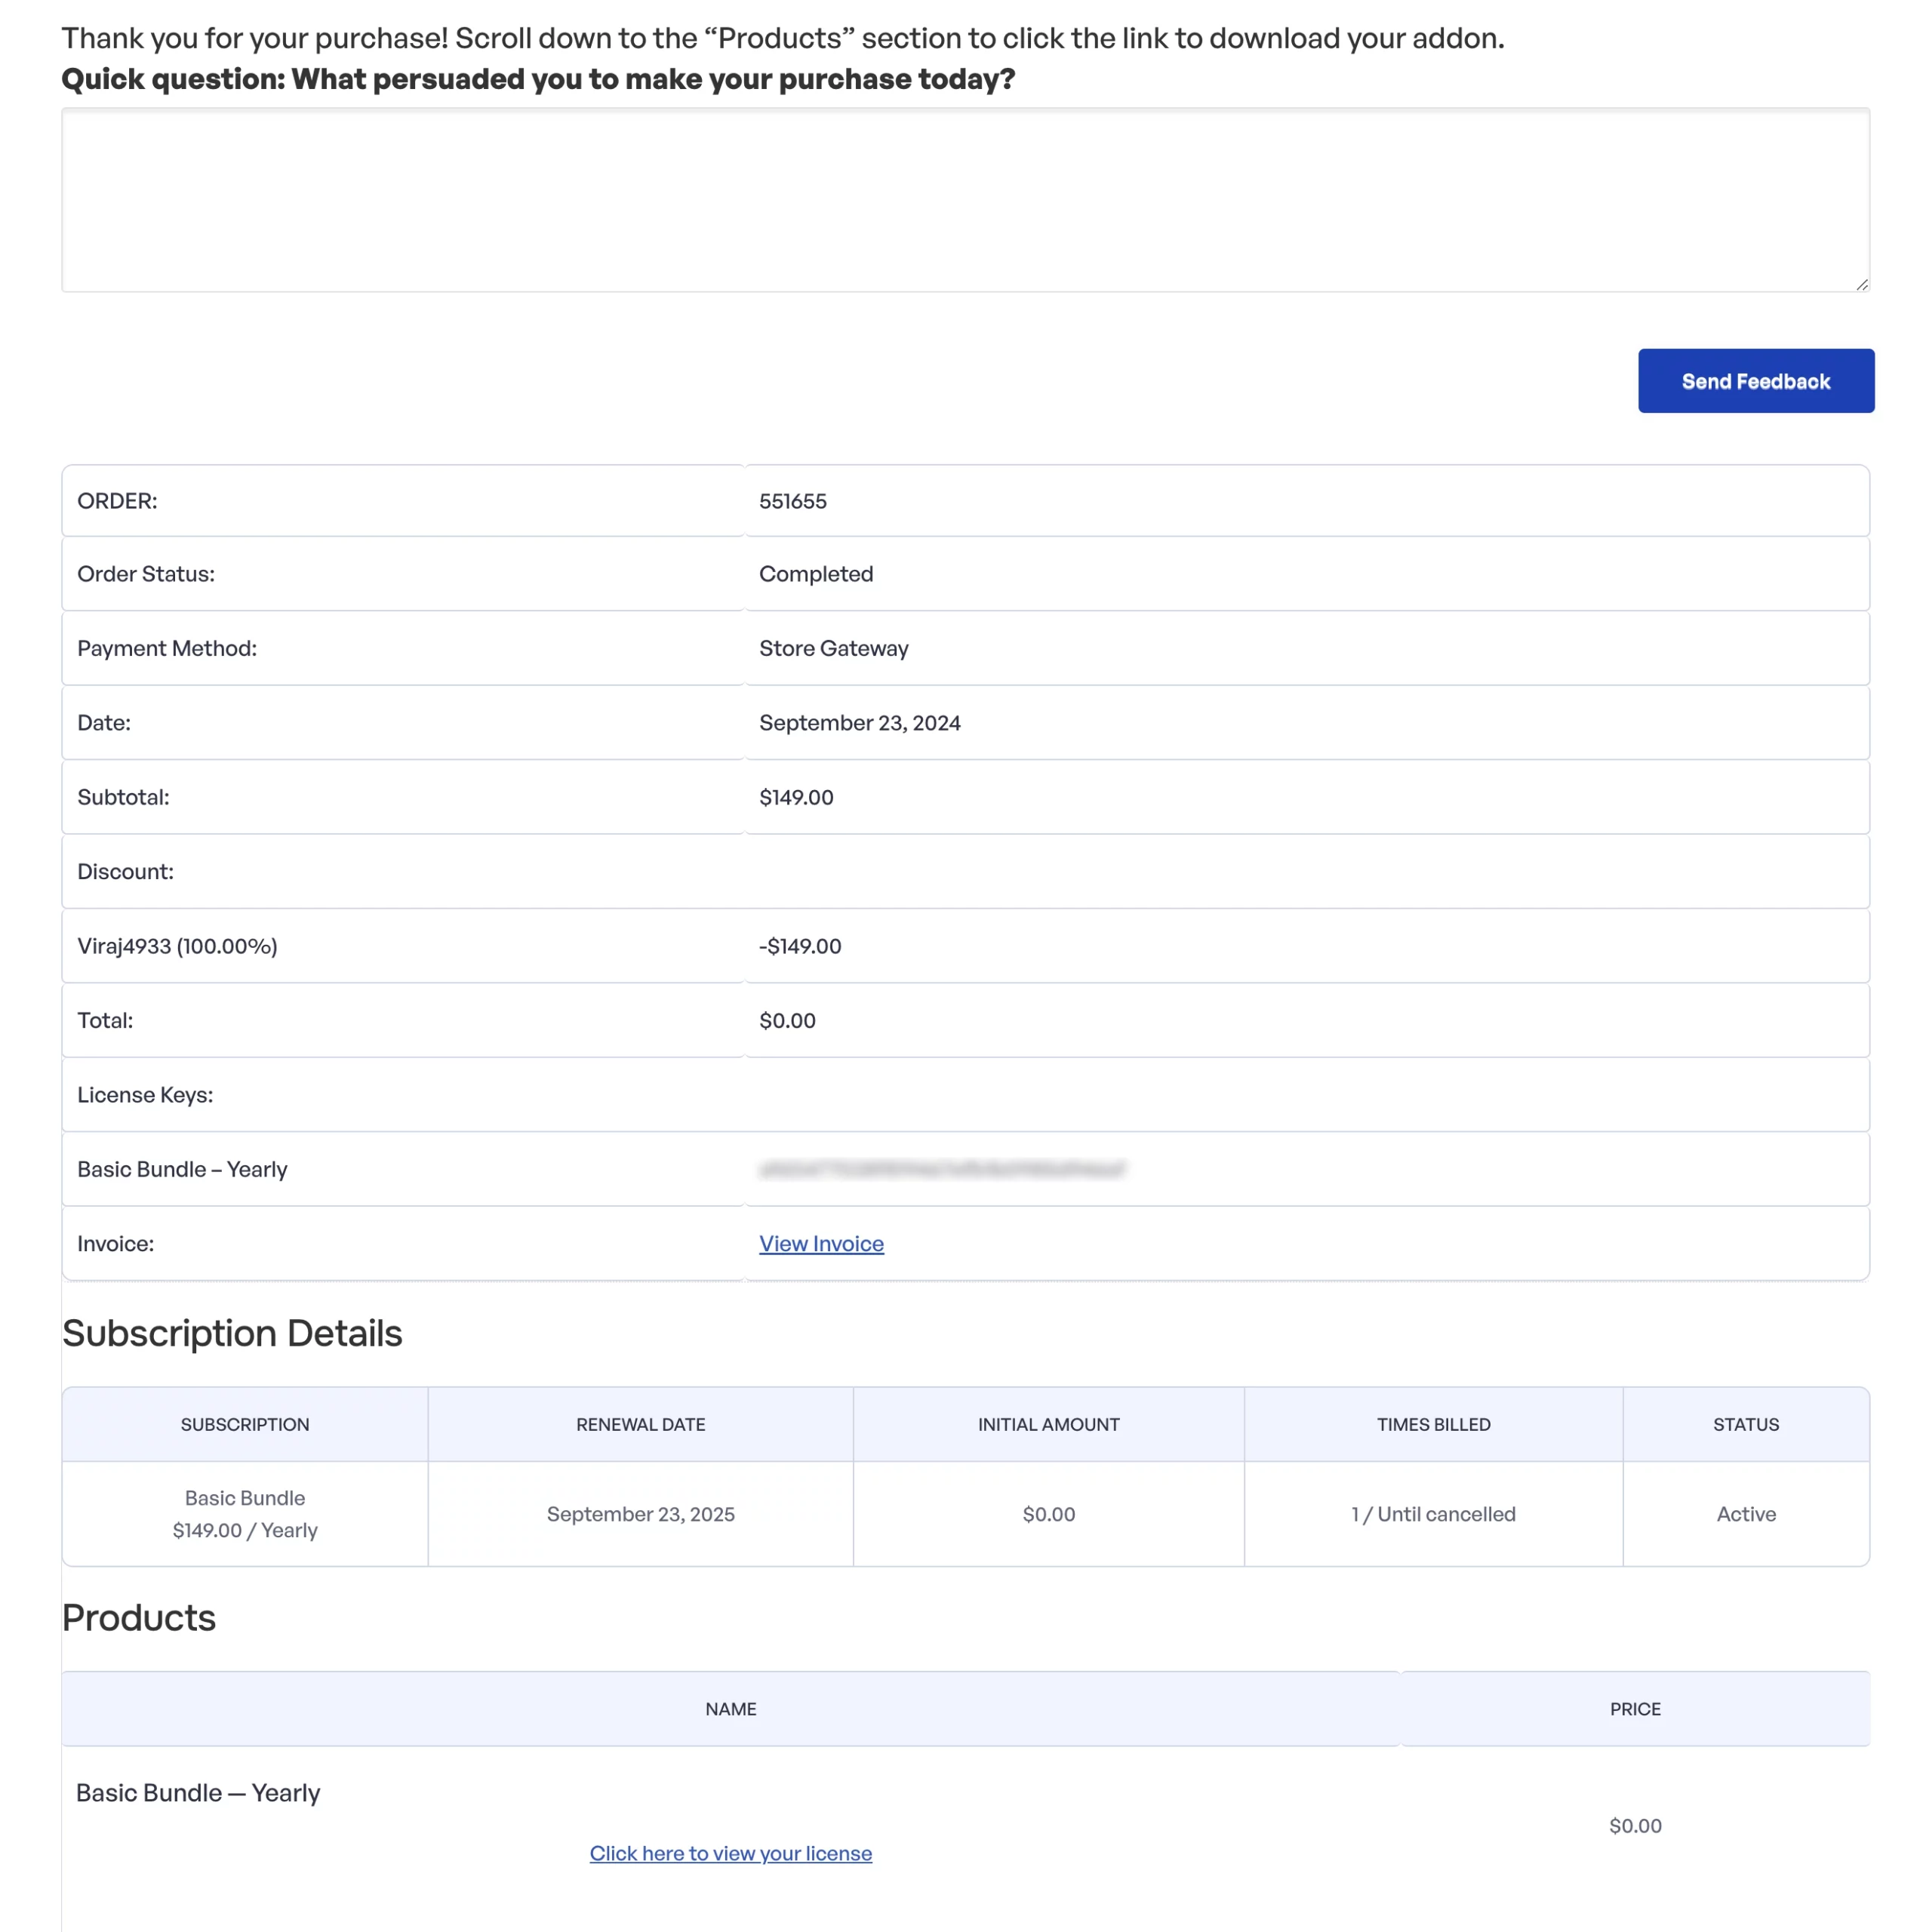
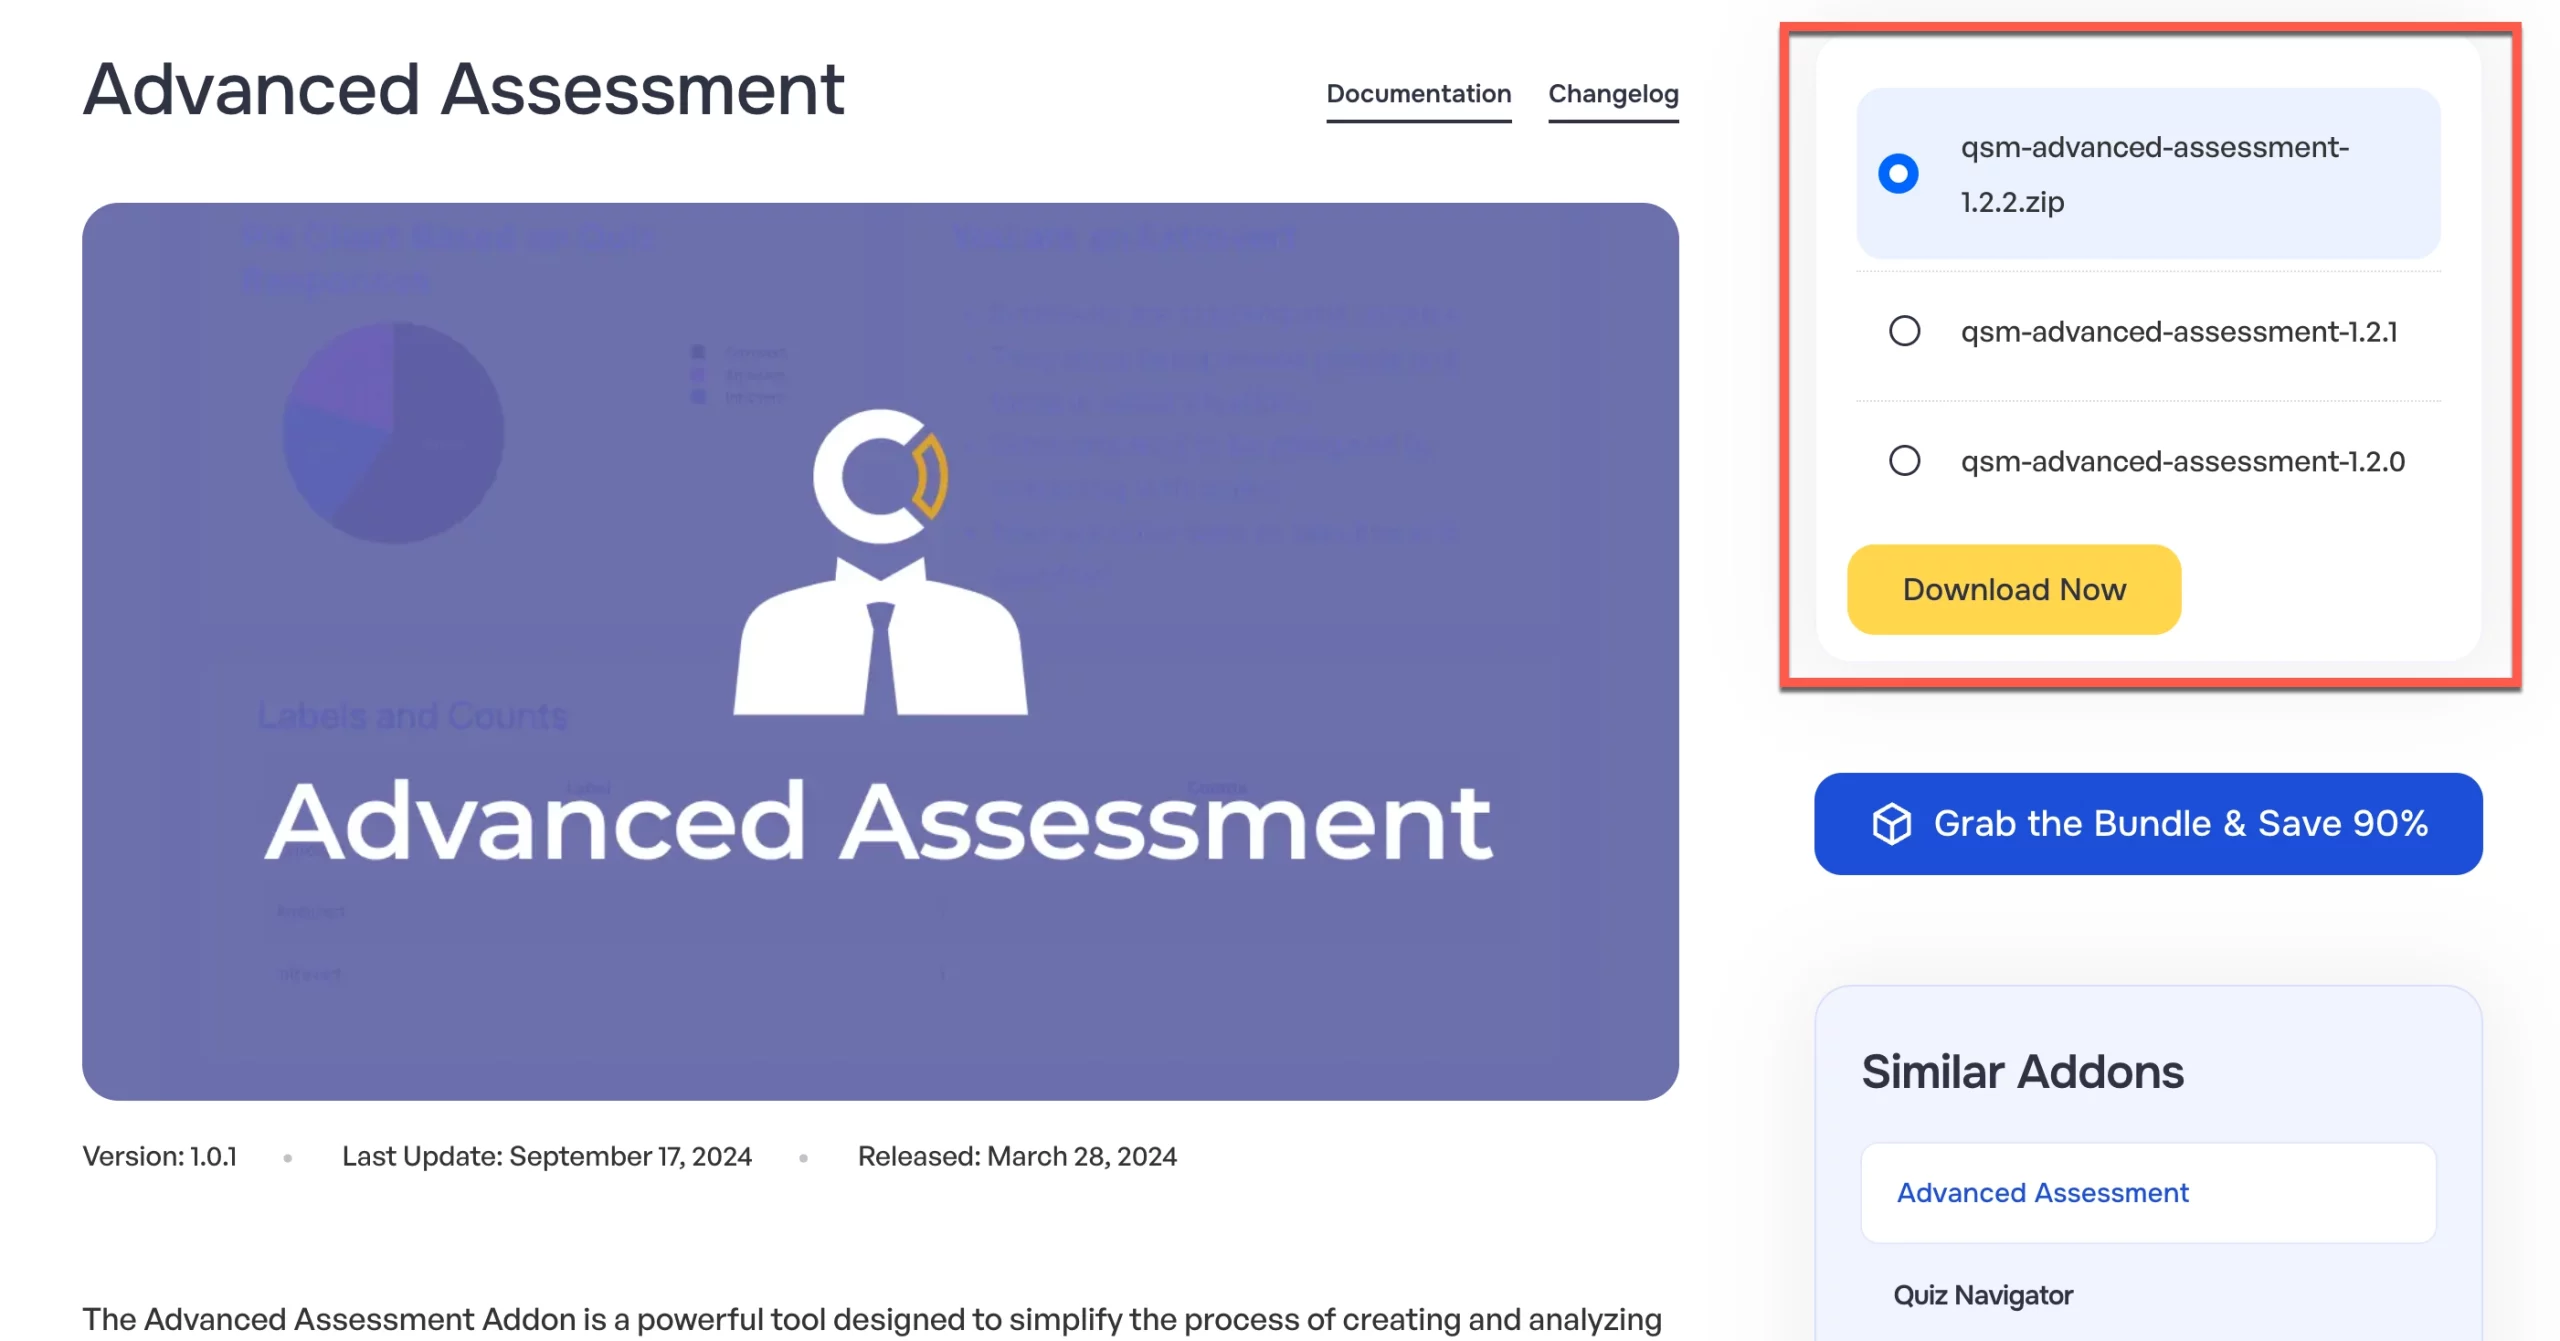
Next, you need to visit individual addon pages to download and install the addons manually on your system. If your purchased plan includes the addon then you will see a “Download Now” button instead of an “Add to Cart” button as seen below. Click the “Download Now” button to download the addon .zip onto your system.
Uploading the Plugin
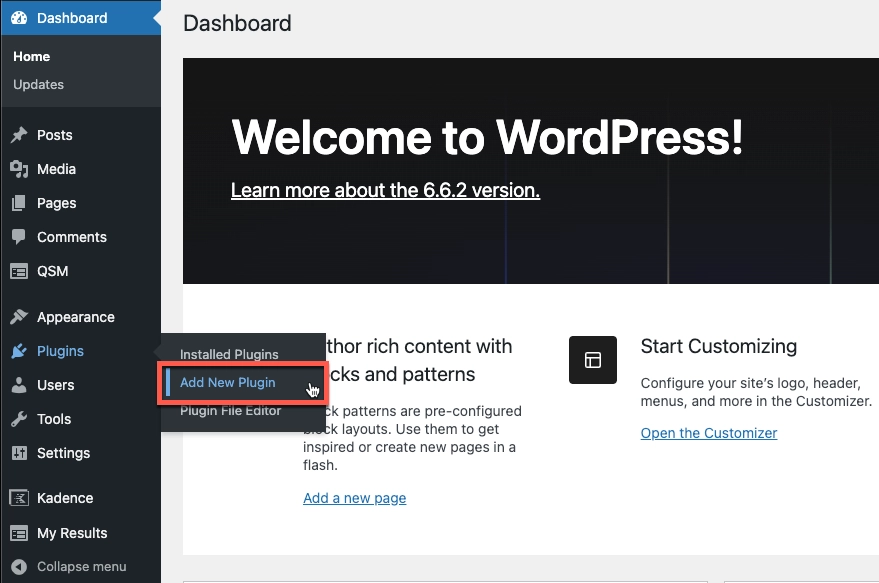
After downloading the .zip file, go to your WordPress dashboard and click on ‘Plugin’ and click ‘Add New’.
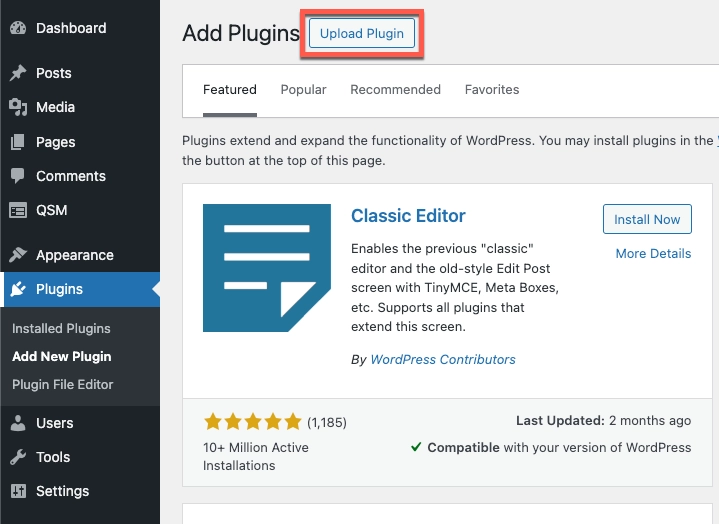
Right next to the title of the page ‘Add Plugins’, there is a button that says ‘Upload Plugin’. Click on this button and it will take you to a new page where you can upload the .zip file that you had downloaded earlier.
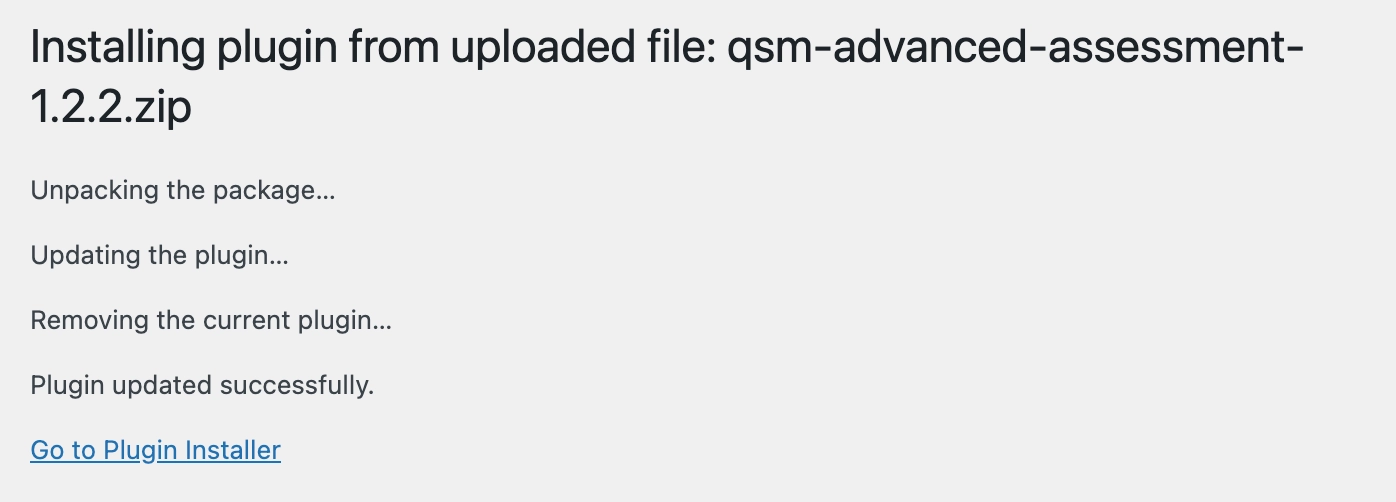
After uploading the file, click on ‘Install Now’. If the addon installs properly, that page will look like this;
Plugin Activation
After successful installation, you will need to activate the plugin. Click on the ‘Activate Plugin’ button below the final line ‘Plugin Installed Successfully’. If you have a lot of addons on your WordPress, then search for the addon you just installed to double-check that it is activated. It should look like this when you search for it in the search bar.

License Activation
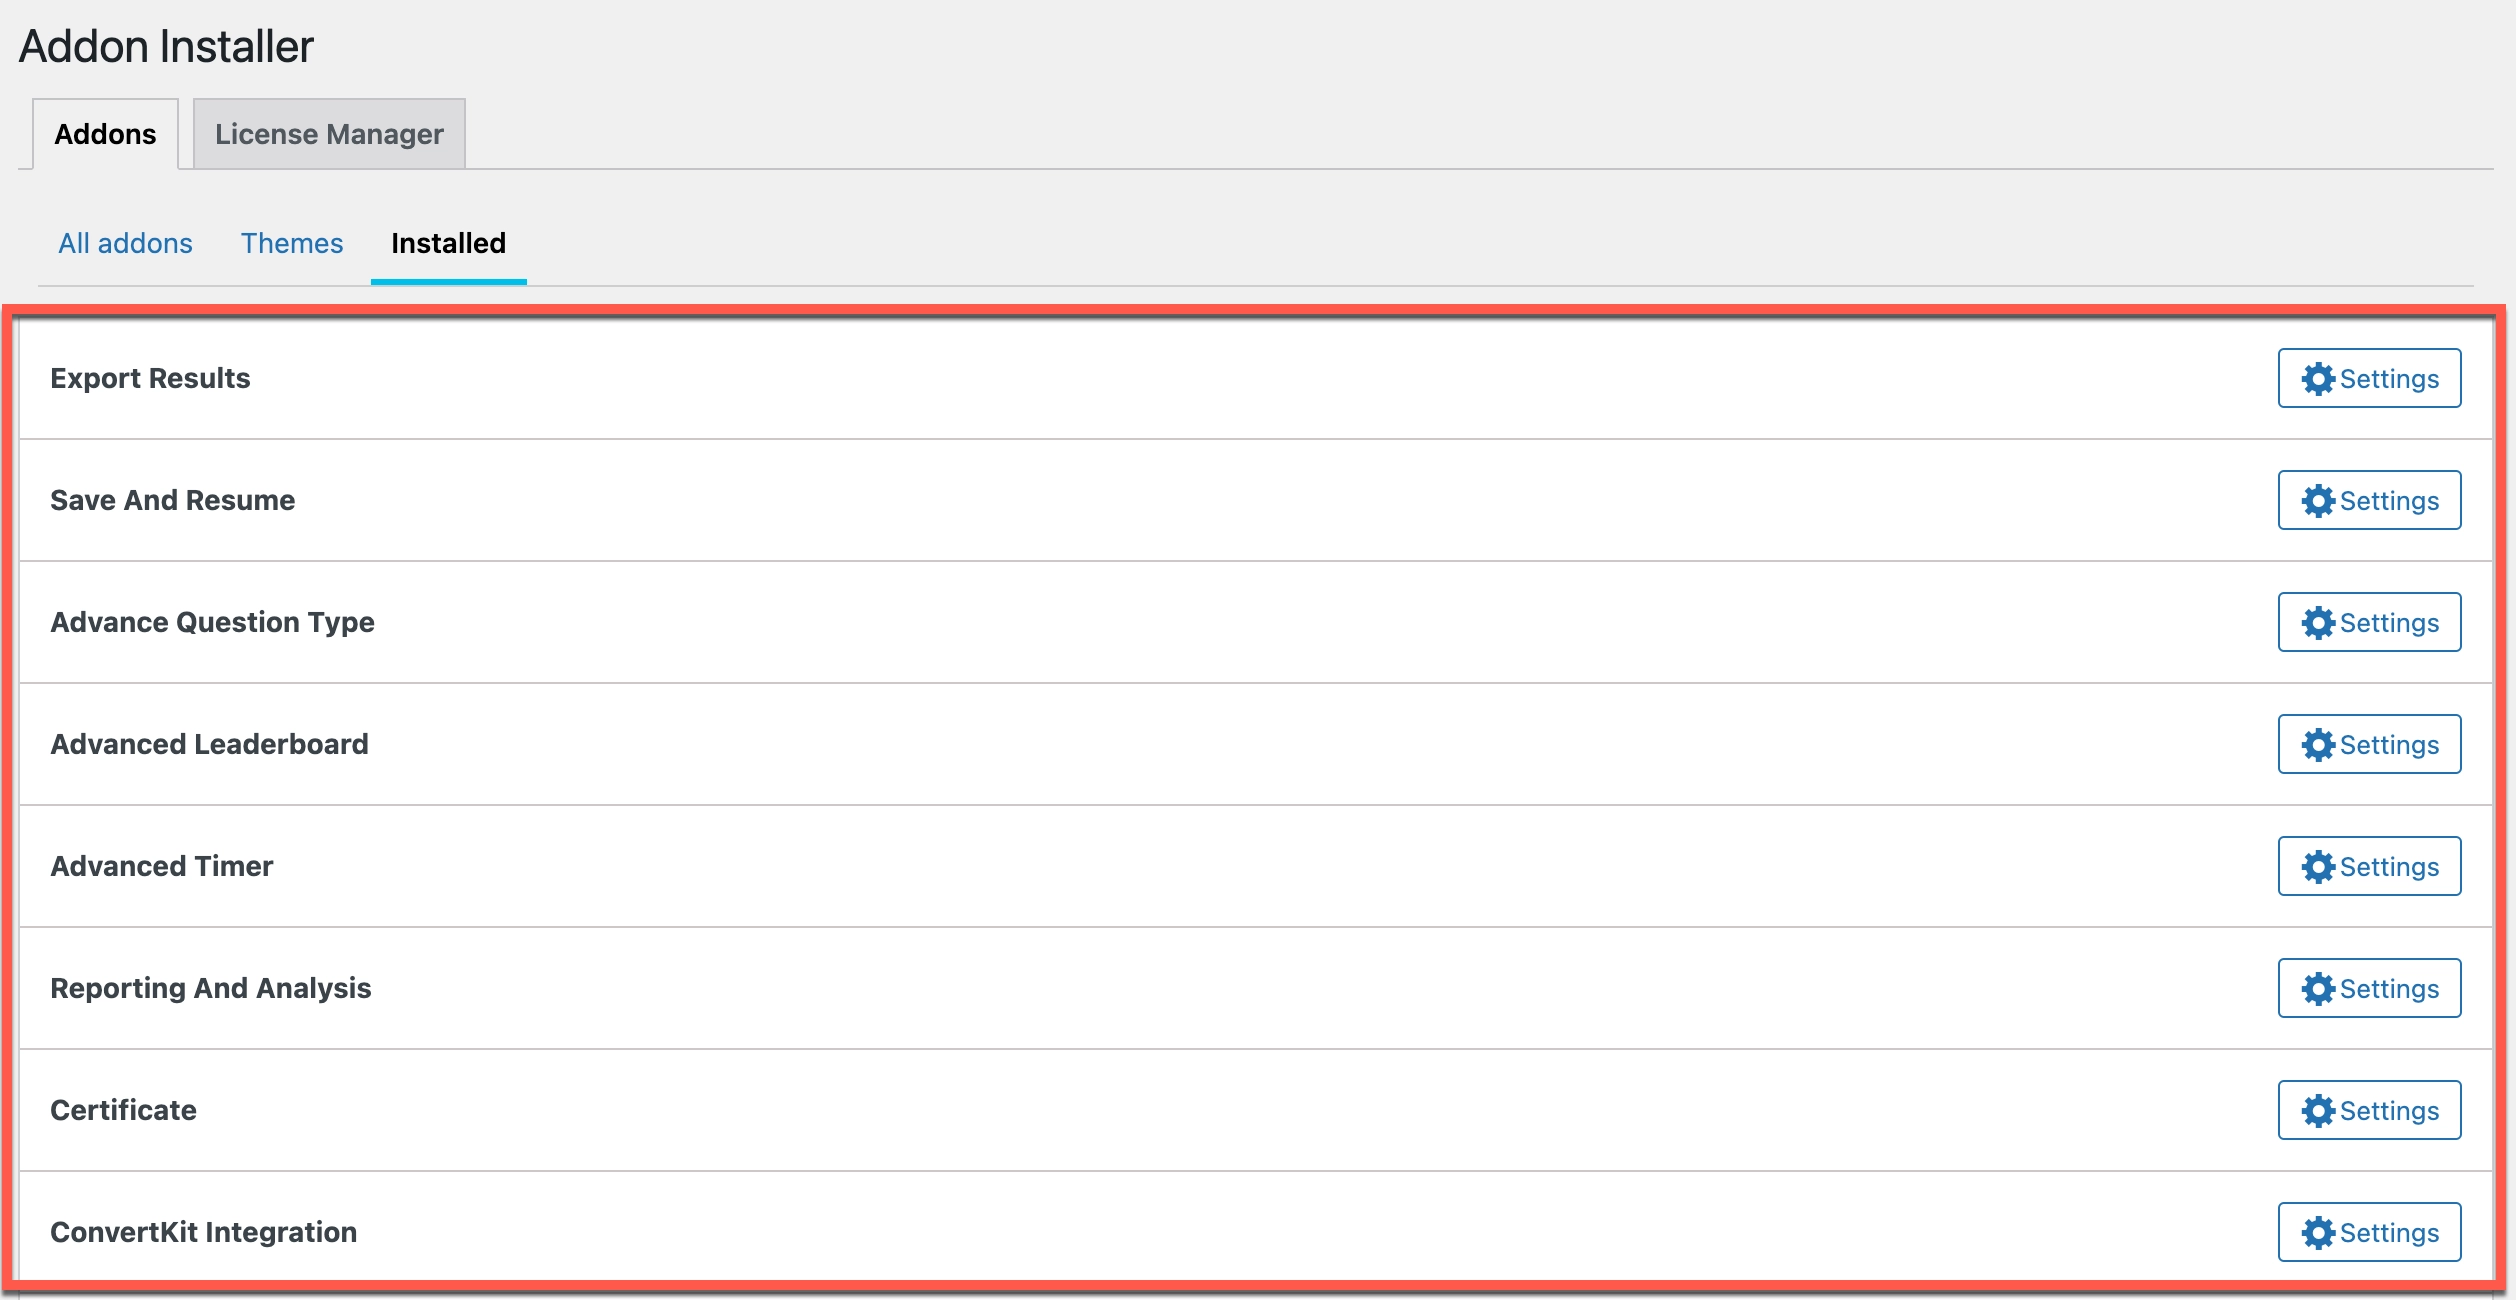
To activate an addon and make it work, you need to do this final step to activate it with the purchased license key. To activate the addon go to QSM > Extensions > Addons > Installed. Locate your addon and click on the “Settings” button.
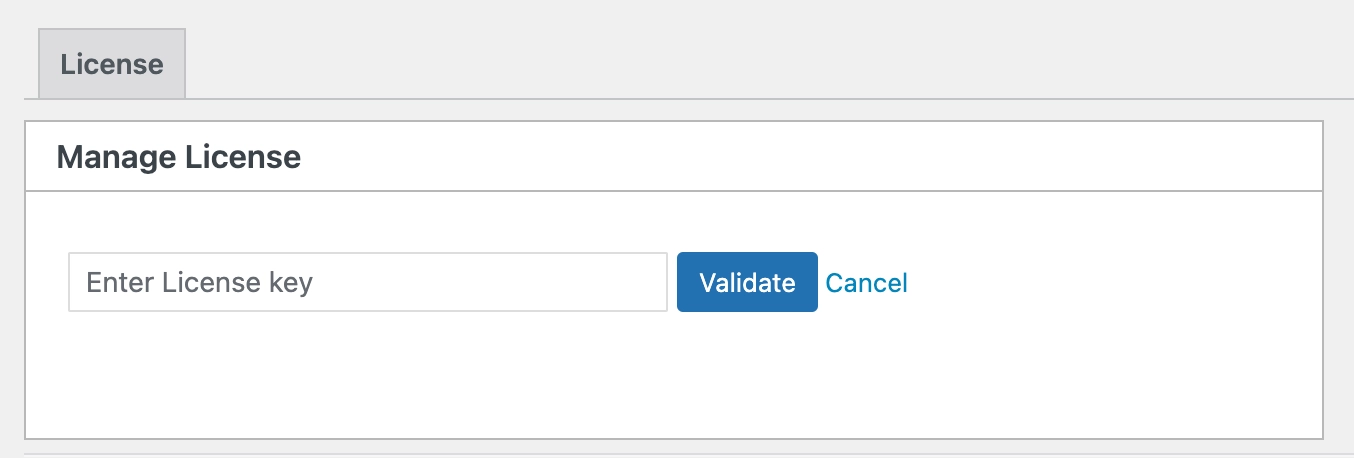
This opens up the addon activation window that lets you add the license key and activate the addon.
Once you have your addon installed, you can refer to that addon’s documentation for setting up. Check out our documentation page for finding the addon’s documentation.


